

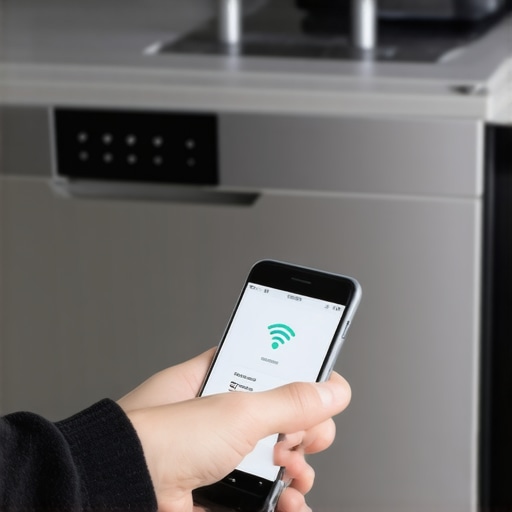
Ever had that moment when you’re standing in the kitchen, ready to tackle your post-dinner cleanup, only to realize your smart dishwasher refuses to connect to the hub? It’s like talking to a wall—frustrating and baffling, especially when everything was working perfectly just yesterday. I remember staring at my own screen, muttering, “Why isn’t this working now?” feeling a mix of annoyance and helplessness. That lightbulb moment? When I finally understood that my connectivity issues weren’t just random glitches but often something fixable—if you know where to look.
Why Your Smart Dishwasher Won’t Connect and Why It Matters
If you’re like me, you rely on your appliances to make life easier, not add to the chaos. A smart dishwasher that won’t connect not only hampers convenience but might also be signaling underlying issues that could get worse if ignored. The good news? Most connection problems are solvable, saving you time and money—and perhaps preventing a costly replacement later. Plus, with today’s tech, understanding how these systems communicate empowers you to troubleshoot confidently. Did you know that according to recent studies, over 60% of appliance connection issues stem from simple user errors or outdated firmware, not hardware failures? That’s a sizable chunk of headaches we can avoid with a little know-how.
Is All This Tech Talk Overhyped?
Early on, I made the mistake of thinking that smart appliance connection issues were only for the tech-savvy or repair experts. False! Like many homeowners, I dived into the troubleshooting process unprepared, which only complicated matters. The truth? Many problems are straightforward once you understand the basics. If you’ve faced this disconnect yourself, you’re not alone, and I can tell you from experience that clarity and patience go a long way. Want to get your dishwasher back online without calling in a technician? Stick with me, and I’ll guide you through the steps. For more insights on diagnostics and appliance repairs, check out this resource on [understanding appliance diagnostics](https://applianceoutletpro.com/understanding-appliance-diagnostics-improving-your-warranty-claims). Now, let’s start unraveling this mystery and get that dishwasher syncing up with your hub again.
Check Your Wi-Fi Network and Router Settings
Start by ensuring your Wi-Fi network is active and stable. I once faced a stubborn disconnect problem and realized my router had a firmware update pending. Updating it resolved the issue instantly. To do this, log into your router’s admin page, verify the firmware is current, and restart the router. A quick reboot resets network pathways, similar to clearing a clogged pipe, allowing the dishwasher to reconnect smoothly.
Ensure Your Dishwasher Is Within Range
If the appliance is too far from your Wi-Fi router, signals weaken—think of it like trying to hear a whisper from across a room. Move your dishwasher closer or eliminate obstacles like thick cabinets or stainless steel walls that can block signals. I once temporarily relocated mine near the router during troubleshooting and achieved a successful connection, confirming proximity was the culprit.
Verify Firmware and App Updates
Outdated firmware can cause communication hiccups. Connect your dishwasher’s app and check for updates. If available, perform the update—this is akin to giving your device a shot of vital vitamins. In my case, updating the app and dishwasher firmware together solved persistent connectivity challenges, making the controls more responsive and reliable.
Reset and Reconfigure Your Dishwasher’s Network
Many appliances have a reset button or procedure—think of it as rebooting a computer. Usually, holding down a reset or Wi-Fi button for 10-15 seconds clears previous configurations. Afterward, re-enter your Wi-Fi credentials as if teaching your dishwasher a new language. During my trial, this method snapped my dishwasher back into sync after failed automatic reconnections, restoring full control via the app.
Check Your Passwords and Security Settings
Incorrect Wi-Fi passwords or overly strict security settings can be roadblocks. Double-check your network password. If your network uses MAC address filtering, ensure your dishwasher is whitelisted—that’s like adding your device to a VIP list. I learned this when my device couldn’t connect despite correct credentials; loosening security protocols temporarily helped identify the problem.
Inspect for Interference and External Factors
Electronic devices like cordless phones or microwave ovens produce interference. To test this, turn off other electronics near your dishwasher. Outdoors, thick walls or metal structures may block signals, similar to trying to listen through a thick wall. I once disconnected my Bluetooth speaker nearby, and the connection stabilized, indicating interference was the culprit.
Consult the Appliance’s Troubleshooting Guides or Support
If above steps fail, review your dishwasher’s manual or visit the manufacturer’s troubleshooting page. Many brands have dedicated troubleshooting resources or live chat support. For persistent problems, professional diagnostics might be the best route—think of it as consulting a doctor when all else fails. You can also contact experts directly at this link if you prefer hands-on assistance.
Prevent Future Connectivity Issues
Implement regular firmware updates, maintain an uncluttered Wi-Fi environment, and keep your router firmware current. These simple steps are like regular health check-ups, ensuring your smart appliances stay healthy and connected. Remember, diligent maintenance can save you hours of frustration down the line, keeping your smart kitchen running seamlessly.
Many homeowners operate under misconceptions that can hinder their ability to maximize warranty benefits or effectively troubleshoot appliance issues. One common myth is that all warranty claims are straightforward and automatically cover repairs. In reality, warranties often come with fine print — exclusions, required diagnostics, and specific conditions that many fail to understand fully. According to industry expert advice, understanding the nuances of your warranty can significantly improve your chances of a successful claim and prevent unnecessary costs.
Another misconception involves diagnosing problems independently. While DIY troubleshooting can sometimes save money, there’s a trap in assuming that all issues are simple fixes. For example, attempting to fix a dishwasher without proper diagnostics can lead to unintended damage or void your warranty, especially if the repair involves sensitive electronic components. Knowing when to seek professional help is crucial; reading detailed guides like this resource can prevent costly mistakes.
Advanced users often overlook the importance of proper diagnostic procedures. A frequent error is jumping straight to part replacements without thorough testing—this approach is inefficient and can cause unnecessary expenses. Professional diagnostics involve precise methods, such as testing resistance values or monitoring amperage draw, which non-experts might not perform correctly. Studies indicate that improper diagnostics account for up to 40% of failed warranty claims or repeat repairs, demonstrating how crucial methodical assessment is. Dive into the importance of diagnostics and how they can impact your warranty here.
Moreover, many assume that all repairs are equally covered once a claim is approved. In reality, warranties might only cover certain parts or labor, and some repairs require special documentation or certifications. Overlooking these details can result in partial coverage or outright denied claims, leaving homeowners unprepared.
So, what’s the most common error homeowners make about appliance warranties and diagnostics? It’s neglecting to systematically understand the terms and proper testing procedures, leading to failed claims and prolonged downtime. Being informed about your specific coverage, knowing how to perform basic diagnostics, and recognizing when to involve professionals can preserve your warranty rights and save money in the long run.
Want to avoid these pitfalls? Regularly reviewing your warranty terms and consulting expert resources like this guide ensures you’re fully aware of your options. Remember, a well-informed homeowner is best positioned to troubleshoot effectively and leverage warranties effectively. Have you ever fallen into this trap? Let me know in the comments.
Prioritize Regular Maintenance to Extend Appliance Lifespan
One of the most effective ways to keep your appliances running reliably over time is to adopt a proactive maintenance routine. I personally schedule quarterly inspections, which involve cleaning filters, checking hoses, and inspecting electrical components. Using a high-quality **multimeter**, such as the Fluke 115, allows me to perform precise voltage and resistance tests on control boards and sensors, ensuring they function correctly before failures occur. Regular diagnostics help identify early signs of wear, preventing costly breakdowns and preserving your warranty benefits, especially since many warranties require proof of maintenance for coverage.
Looking ahead, I believe our reliance on smart diagnostics will grow, with AI-powered tools offering real-time health monitoring for appliances. These innovations could automate maintenance alerts, providing homeowners with even more peace of mind.
How do I maintain appliances over time?
Consistency is key. Develop a schedule for cleaning filters, checking hoses for leaks or blockages, and updating firmware via official apps or manufacturer sites. Using diagnostic tools like the Extech MO55 True RMS Multimeter simplifies troubleshooting, making it easier to spot issues before they escalate. Keep an eye on smart diagnostic alerts and log any error codes consistently. Remember to document repairs and diagnostics, which can be invaluable if warranty claims arise. Moreover, integrating digital tools such as appliance monitoring apps helps spot energy spikes or irregular operation patterns early. For example, the [understanding appliance diagnostics](https://applianceoutletpro.com/understanding-appliance-diagnostics-improving-your-warranty-claims) resource offers detailed guidance on interpreting alerts and conducting self-assessments.
If you’re keen to learn a practical technique, try performing a resistance check on your dishwasher’s heating element with a multimeter. This simple test can reveal whether the element is failing, helping you prevent leaks or cycle issues. Need assistance? Contact professionals for a detailed diagnostic at this link. Regular maintenance combined with reliable diagnostic practices ensures your appliances stay in top shape, reducing downtime and extending warranty coverage.
Tools I recommend for DIY diagnostics and repair
From my experience, certain tools stand out for their reliability and precision. The **Fluke 115 multimeter** is my go-to for accurate voltage and resistance testing. Its features, like min/max recording and auto-ranging, make troubleshooting straightforward, even for beginners. I also keep a small **mechanic’s stethoscope** handy—this helps detect motor noise changes that indicate impending failure, especially in pumps or fans. For clearing spray arm nozzles, I rely on the simple **paperclip trick**, which is surprisingly effective for unclogging tiny nozzles without damaging delicate parts. And, of course, a **digital infrared thermometer** allows me to verify if heating elements or motors are operating within the correct temperature range.
Looking toward the future, I expect diagnostic tools will become more integrated with smart home systems, offering remote monitoring and automatic alerts for anomalies. This integration will save homeowners time and money while boosting appliance longevity.
What’s the best way to keep tools in top shape?
Proper care extends their lifespan and ensures accurate results. Regularly calibrate your multimeter using certified test sources and keep it protected in a padded case. Clean your stethoscope’s diaphragm with alcohol wipes after each use to prevent cross-contamination. Store precision tools in organized compartments to avoid damage and misplacement. Like any investment, maintaining your diagnostic gear ensures reliability when every second counts during troubleshooting.
Try adopting one of these recommended practices today—starting with a resistance test on your dishwasher’s heating element, for example—and see how it empowers you to troubleshoot more confidently. Remember, leveraging the right tools coupled with consistent maintenance practices is the key to long-term appliance health. Need advanced diagnostics guidance? Check out this detailed resource.
Looking ahead: trends in appliance care and diagnostics
The evolution towards smarter, self-monitoring appliances means future repairs will be more predictive than reactive. As AI and IoT devices become more mainstream, expect diagnostics to integrate seamlessly with your smartphone, alerting you to potential issues before they develop into costly failures. This proactive approach will not only save money but also improve warranty utilization and extend the lifespan of your appliances. Staying informed about these trends ensures you’re prepared for the innovations that will make appliance maintenance more efficient and less stressful.
What I Wish Someone Told Me About Appliance Troubleshooting
- One of the toughest lessons I learned was to always trust your own diagnostics before jumping to conclusions. Rushing to replace parts without proper testing can be costly and inefficient. Taking the time to understand how your dishwasher’s components work saved me money and frustration in the long run.
- I discovered that many connection issues stem from simple factors like outdated firmware or weak Wi-Fi signals—problems that are often overlooked but easily fixable. Recognizing these common culprits early on can prevent small glitches from becoming major headaches.
- Understanding the nuances of warranties made me realize that a well-documented maintenance routine can significantly improve my chances of a smooth claim process. Keeping records of repairs and staying aware of warranty conditions is like having a safety net during appliance emergencies.
- Lastly, investing in good diagnostic tools, such as a reliable multimeter, transformed my approach from guesswork to precise troubleshooting. This empowerment reduces dependency on costly professional visits and boosts confidence in handling future issues.
Tools That Changed How I Approach Appliance Repairs
My go-to toolkit includes a dependable multimeter like the Fluke 115, which allows me to test voltage, resistance, and continuity with confidence. A small mechanic’s stethoscope helps me listen for motor anomalies, catching issues early. I’ve also found the paperclip trick surprisingly effective for clearing spray arm nozzles without costly replacements. These tools, coupled with regular firmware updates, keep my appliances running efficiently and extend their lifespan. For a comprehensive look at diagnostic essentials, I recommend exploring this guide on understanding appliance diagnostics.
You Are the Best Person for This Challenge
The future of appliance maintenance is becoming more accessible and intelligent, and you are at the forefront. Embracing DIY diagnostics and understanding your appliance’s inner workings not only saves money but also builds confidence. Whether it’s resetting your Wi-Fi, performing simple tests, or knowing when to call a professional, every step you take now sets you up for longer-lasting, smarter appliances. Remember, every successful repair boosts your skills and peace of mind. Are you ready to tackle your next dishwasher challenge? Share your experiences below and let’s learn together!
,