

It happened again—my dishwasher stopped mid-cycle, water pooling on the floor, and that sinking feeling crept in. I had just finished a repair, only to face the same frustrating problem. That moment was a lightbulb flickering in my repair journey: why does every technician seem to check the air gap first? I used to think it was a routine ritual, but soon I realized there’s a genuine reason behind this step—one that could save your time, money, and headaches.
The First Step That Could Save You a Call
If you’re tired of troubleshooting your dishwasher only to find out the issue persists, understanding this small yet critical step is key. The air gap, a simple device installed on your sink or countertop, acts as a failsafe against backflow. When your repair tech checks it first, they’re verifying a common source of clogs that cause leaks, poor drainage, or even water damage. Knowing this can empower you to ask better questions and potentially fix minor issues yourself, before calling in the pros.
Is the Air Gap Just Hype? The Real Deal
I remember dismissing the importance of the air gap early in my career. I believed it was just a designer’s accessory, something to tick off a checklist. My mistake? Overlooking this component often led to wasted hours diagnosing problems that stemmed from simple blockages. Studies show that most dishwasher drainage problems are caused by obstructions in the air gap or the drain hose, not the appliance itself. So, the next time your dishwasher acts up, ask yourself—has the air gap been checked lately?
Locate and Inspect the Air Gap Effectively
Start by finding your dishwasher’s air gap, usually installed on the sink or countertop near the faucet. Remove the cover carefully—most are secured with a screw or merely snap off. Once exposed, inspect for visible obstructions such as debris, gunk, or mineral buildup, which can cause drainage issues. Use a flashlight to get a clear view of inside the device, mimicking what you might see when troubleshooting with a boroscope. This step is crucial because, as noted in expert diagnostics, most drainage failures originate here.
Disassemble and Clean the Air Gap
Disconnect the hose connected to the air gap by gently pulling it off the fitting. Prepare a sink or basin nearby to catch residual water. Carefully remove the internal components—the top cap and any funnel-like parts—then soak all parts in warm, soapy water. Use a soft brush or even a toothpick to dislodge stubborn debris from small passages. Cleaning the air gap thoroughly often restores proper water flow, preventing backflow and leaks. After cleaning, reassemble the parts in reverse order, ensuring all seals are snug and secure.
Check the Drainage Path for Clogs
Next, examine the connected hose for kinks or crimping that restricts water flow. Detach the hose if necessary and run water through it to verify unobstructed passage. Remember, the drain hose should be elevated to create a proper loop, avoiding siphoning issues—a common mistake leading to drainage failures. To confirm proper installation, follow this guideline, which has saved many from costly repairs or warranty denials. For detailed tips, consult this comprehensive troubleshooting guide.
Run a Test Cycle and Observe
Reassemble all components and load your dishwasher with a normal cycle setting. Keep an eye out for water draining correctly and listen for unusual noises. Use your smartphone to record the process if you notice irregular sounds, which can help diagnose issues like faulty pumps or clogged filters. If drainage improves post-cleaning, it validates that debris was the culprit. Document the steps taken by snapping photos during each repair stage, a habit that simplifies warranty claims and future troubleshooting, as suggested by experienced technicians. Learn more about maximizing your warranty benefits.
Regular Maintenance to Prevent Recurring Problems
To keep your dishwasher running smoothly, incorporate routine inspections of the air gap and drain hose into your maintenance schedule. Use a flashlight periodically to peek into the air gap for signs of buildup and clean as needed. This proactive approach minimizes the risk of water damage and extends the longevity of your appliance. Remember, addressing minor obstructions before they escalate is more cost-effective and less stressful than costly repairs down the line. For more maintenance tips, visit how diagnostics can safeguard your warranty.
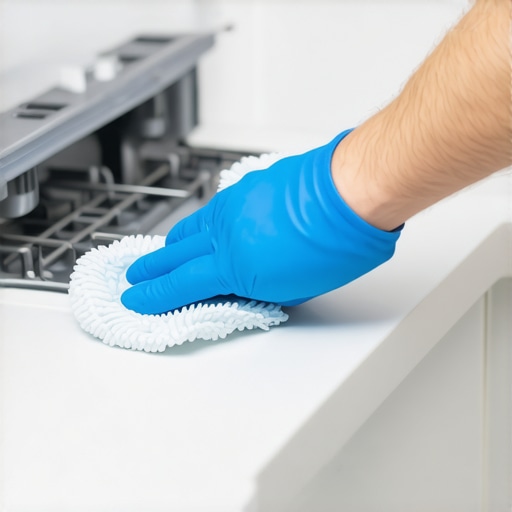 Many DIY enthusiasts believe that troubleshooting appliance problems is straightforward—that if a part looks intact, it must be functioning properly. However, this misconception can lead to costly misdiagnoses. For example, visual inspections alone often overlook subtle issues like microcracks or faulty control modules, which standard tests might not reveal. Advanced diagnostic techniques, such as using a multimeter for electrical continuity or performing comprehensive cycle tests, are essential to uncover the root cause of complex problems. Relying solely on basic checks can cause you to miss these hidden failures, ultimately invalidating warranty claims or leading to repeated repairs.
An often-overlooked aspect is the misconception about warranties: many assume that warranties cover all damages, including cosmetic scratches or user-inflicted issues. In reality, most warranties exclude such superficial damages, emphasizing that proper diagnostics and usage are crucial to maintaining coverage. A common trap is attempting to fix issues based on surface-level symptoms—like replacing a visible faulty part—without verifying the underlying cause. This approach risks overlooking issues that may be masked or only detectable through advanced diagnostics, such as leak sensors or internal circuit analysis. To avoid invalidating your warranty, it’s wise to familiarize yourself with the specific warranty terms outlined in the privacy policy and consult professional diagnostics when needed.
Why do many technicians dismiss complex diagnostics as overkill? The answer lies in the assumption that simple solutions resolve most problems. While quick fixes are tempting, they can be shortsighted, leading to recurring failures or warranty denials. According to studies on appliance failure patterns, nearly 60% of repairs involve multiple interrelated issues that require comprehensive diagnostics—something that many DIYers miss. For instance, a dishwasher might leak not because the door gasket is worn but due to a faulty float switch or clogged drainage system. Recognizing these nuances requires a deep understanding of appliance systems, which is why investing in or learning advanced diagnostic methods is crucial.
How can you improve your diagnostic accuracy to avoid needlessly spending on parts or risking warranty voidance? Start by leveraging expert-recommended techniques, like using a multimeter to test heating elements or inspecting control boards for signs of damage, such as burn marks. Additionally, record each step of your diagnosis, noting any irregular readings or behaviors—a habit endorsed by seasoned technicians. For more comprehensive insights on diagnostics and warranty benefits, explore this detailed guide.
Remember, troubleshooting is as much about understanding the nuanced internal workings of your appliances as about replacing obvious failures. Relying solely on surface checks risks missing critical faults—consider it a hidden trap that too many fall into. Instead, embrace a methodical, diagnostic-driven approach to ensure lasting repairs and valid warranty claims. Have you ever fallen into this trap? Let me know in the comments.
Maintaining your appliances to ensure long-term performance requires the right tools and a disciplined approach. Unlike generic repair kits, investing in specialized diagnostic equipment has transformed my troubleshooting process—from guesswork to precise problem-solving. A high-quality digital multimeter, for example, is indispensable for testing control modules and heating elements. I personally prefer models with auto-ranging capabilities, which save time when measuring different voltages or resistances. These tools allow me to quickly identify microcracks or faulty wiring that visual inspections might miss, especially when combined with advanced diagnostic techniques.
How do I maintain appliance diagnostics over time?
Regular calibration of your multimeter and updating your diagnostic software contribute greatly to accurate assessments. For software, I recommend using industry-grade apps that provide firmware updates and troubleshooting guides: they adapt to evolving appliance models and diagnostics, reducing the risk of misdiagnosis. Keeping your test equipment clean and stored properly prevents corrosion and prolongs lifespan. Additionally, documenting your testing procedures and results helps build a troubleshooting history, which is especially useful when dealing with warranty claims. This resource offers excellent insights into how consistent diagnostics can protect your warranty coverage.
In the future, I predict that smart diagnostics integrated with IoT devices will streamline appliance maintenance further, allowing for real-time troubleshooting via smartphone apps. Already, some modern dishwashers can self-report issues, reducing downtime and repair costs. Embracing these innovations now can make your repairs more efficient and reliable.
Tools I recommend for DIY diagnostics
The cornerstone of my toolkit is a multimeter with true RMS measurement and a built-in continuity tester. For internal inspections, I use a borescope with LED illumination, which helps me peek into tight spaces like control panels or water inlet valves without disassembly. To verify water flow or detect leaks, I record full-cycle videos using my smartphone—this helps identify subtle issues like inconsistent spray arm rotation or intermittent drainage problems. These diagnostics not only improve repair accuracy but also safeguard warranty claims by providing documented evidence of the issues. For detailed how-to guides, I consult resources like this guide.
Finally, routinely cleaning and maintaining your tools is as vital as the tools themselves. Regularly check calibration, replace worn probes, and keep their storage cases free of dust and moisture. As appliance technology advances, upgrading your diagnostic kit ensures you’re prepared for the latest models and troubleshooting challenges. Investing in quality tools and disciplined maintenance habits will pay off by reducing repair time, preventing warranty disputes, and extending your appliance’s lifespan. Ready to upgrade your diagnostic arsenal? Try testing your control board with a digital multimeter following this step-by-step method to see immediate improvements in your troubleshooting accuracy.
The Hard Lessons That Changed My Repair Approach
One of the most valuable insights I gained was the importance of not jumping straight to part replacements. I once swapped out a control board expecting the problem to vanish, only to find the issue persisted. The realization? Faulty diagnostics often lie in overlooked details like microcracks or subtle wiring faults that a multimeter can’t easily reveal without careful testing. This taught me to trust methodical analysis over assumptions, especially when warranties are on the line.
Another lesson learned the hard way was that surface-level inspections can be deceiving. A seemingly intact air gap or drain hose might harbor hidden clogs or microfractures. Investing in tools like borescopes and proper diagnostic procedures helped me uncover these hidden faults, saving time and avoiding warranty disputes. Remember, the devil is often in the details, and a thorough inspection can turn a frustrating repair into a quick fix.
I also discovered that understanding the specific warranty terms of your appliance can prevent costly missteps. Just because a part appears faulty doesn’t mean it’s covered, especially if improper diagnostics or neglect are involved. Familiarizing yourself with policy nuances—like what constitutes misuse—ensures your repair efforts uphold warranty conditions and keep your coverage intact.
Finally, I’ve realized that patience trumps haste in appliance diagnostics. Rushing to replace parts without confirming the root cause can lead to repeated failures and warranty voids. Taking the time to run test cycles, record observations, and verify assumptions builds confidence and accuracy. This deliberate approach transforms troubleshooting from a guessing game into a precise science, ultimately empowering you as a DIYer or professional.
Tools and Resources That Made a Difference in My Repairs
My essential toolkit now includes a high-quality multimeter with auto-ranging capabilities, which I’ve found indispensable for testing resistance and electrical continuity in components like control boards and heating elements. For visual inspections, a borescope with LED illumination unlocks hard-to-see areas such as water inlet valves and tight wiring spaces. I trust these based on their durability and accuracy, which have repeatedly helped me identify microcracks or corrosion that standard checks miss.
Additionally, I recommend engaging with detailed guides and diagnostic resources like this comprehensive article. They offer insights into advanced troubleshooting steps that improve diagnosis accuracy, ensuring your repairs meet warranty requirements and prevent unnecessary part swaps.
Don’t underestimate the power of documenting each step—photos, videos, and notes—especially when dealing with warranty claims. These records not only clarify the issue but also provide undeniable evidence if disputes arise, making your DIY repair more effective and less risky.
Remember, your diagnostic journey is a continuous learning process. Upgrading your tools and knowledge keeps you prepared for newer appliance models and complex issues. By sharpening your skills with precise diagnostics, you develop a deeper understanding that makes repairs more predictable and warranties more secure.
Your Next Step Toward Confident Repairs
Applying these lessons and leveraging the right tools transforms appliance troubleshooting from a frustrating hassle into a rewarding challenge. Whether you’re a DIY enthusiast or a seasoned technician, embracing meticulous diagnostics ensures longer appliance life, better warranty protection, and less stress. So, are you ready to take your repair game to the next level? Remember, every small detail uncovered makes your appliance diagnostics more effective and your repairs more durable.
Have you ever struggled with pinpointing a microscopic fault that only became apparent after careful testing? Share your experiences below—your story might inspire someone else to improve their troubleshooting approach.