

I’ll never forget the day my high-efficiency dishwasher stopped midway through a cycle. Water was pooling at the bottom, and I was frantically trying to troubleshoot, thinking it was a plumbing issue or a broken part. That lightbulb moment hit me hard—what if the secret to smooth operation wasn’t just fixing parts but understanding what this machine actually needs to function properly? Turns out, the type of salt I was using was a major culprit, and I had been ignoring it for too long.
Getting to Know Your High-Efficiency Unit’s Salt Needs
Modern appliances, especially high-efficiency (HE) dishwashers and water softeners, rely on special salt to keep them working efficiently. Unlike regular table salt, these units require specific water softening salt to prevent mineral buildup and protect internal components. Using the wrong type of salt can lead to reduced cleaning performance, quick wear and tear, and even costly repairs. I learned this lesson the hard way early on, making the mistake of using regular salt from my kitchen pantry rather than the recommended water softening salt.
This oversight initially didn’t seem serious. But over time, I started noticing stubborn spots on my dishes, the cycle taking longer, and occasional error codes popping up. It was frustrating—something I initially dismissed as a temporary glitch. Then I discovered that not all salts are created equal; in fact, using the wrong kind can impact the health of your appliance and your wallet.
To avoid the pitfalls I experienced, it’s crucial to understand why your high-efficiency unit needs this specialized salt and how it can significantly extend the lifespan of your appliance. Regularly checking and refilling the right salt not only maintains optimal performance but also ensures your warranty remains valid, saving you money in the long run. For even more insights on keeping your appliance in top shape, you might want to explore diagnostics techniques that can pinpoint issues early—something I learned to do early on from [this resource](https://applianceoutletpro.com/understanding-appliance-diagnostics-improving-your-warranty-claims).
Does this sound like your experience too? Have you overlooked the importance of proper salt in your water softening system? If so, stay tuned—I’ll walk you through how to recognize the signs that your unit needs attention and how to fix it before it turns into a costly repair.
Inspect the Salt Level Regularly
Start by opening your dishwasher’s salt compartment, usually located at the bottom. Use a clean cloth to check the salt level; it should be near or above the indicator line. If it’s low, refill with the recommended water softening salt. I remember once, during a busy week, I neglected this step and noticed my dishes had spots. Refilling the salt immediately restored cleaning performance.
Use the Correct Salt Type for Your Unit
Not all salts are equal. Your high-efficiency dishwasher requires specific water softening salt, which differs from regular table salt. Using regular salt can cause the salt dispenser to clog or malfunction, leading to poor softening and damage. Think of it like using the wrong oil in your car—eventually, it causes wear and tear. Always check your dishwasher’s manual and use recommended salt types to avoid unnecessary repairs.
Check and Clean the Salt Dispenser
Over time, salt residue can build up and clog the dispenser. Remove the salt compartment cover and inspect for hardened salt or debris. Use a small brush or a damp cloth to clear any blockages. During one repair, I found a thick layer of salt crust blocking the outlet, which prevented salt from dissolving properly. Cleaning this saved me from replacing the entire dispenser assembly.
Test Water Hardness and Adjust Settings
High water hardness reduces the effectiveness of salt and may require adjusting your dishwasher’s water softening settings. Use a water test kit to measure mineral levels; if your water is very hard, consider increasing the softening level in your unit’s settings. This step ensures the salt works optimally and prevents mineral buildup. Remember, neglecting this can wear out parts faster, leading to costly repairs down the line. For comprehensive diagnostics, consider professional assessments, as detailed here.
Monitor Performance and Signs of Salt Deficiency
Observe your dishwashing results: persistent spots, film, or longer cycle times indicate insufficient salt action. These symptoms are similar to a car engine idling rough—something’s amiss. Regularly evaluating cycle performance helps catch issues early before they escalate. If problems persist despite refilling the salt, it may be time to conduct deeper diagnostics, potentially involving
professional diagnostics to identify underlying faults.
Document and Seek Expert Help When Needed
If all steps fail, take detailed photos of your salt compartment and operational errors. This documentation can be invaluable when consulting a technician or attempting warranty claims. I once faced a stubborn issue and, by sharing clear images and logs, I realized a clogged water inlet valve was causing ineffective salt distribution. Never hesitate to reach out through contact-us for specialized assistance. Proper diagnosis not only saves money but also extends your appliance’s lifespan and preserves warranty benefits, as explained here.Many homeowners operate under misconceptions about appliance repair, especially regarding warranties and diagnostics, which can lead to costly mistakes. Contrary to popular belief, not all repairs are equal, and trusting generic advice without understanding the specifics can jeopardize your warranty coverage. For example, some assume that all diagnostic tests are foolproof, but in reality, advanced diagnostics require proper interpretation; skipping this step might mean overlooking underlying issues. Moreover, many think that DIY repairs always save money, yet without proper tools or knowledge, you risk causing more damage—sometimes voiding your warranty entirely. An often-overlooked nuance is that warranties frequently exclude damage due to incorrect usage or neglect, so understanding the fine print is essential. Additionally, relying solely on basic troubleshooting can be misleading; professional diagnostics utilize specialized equipment, like borescopes or multimeters, to identify hidden faults. A common myth is that if an appliance isn’t leaking, it isn’t malfunctioning, but internal component failures may not show visible signs. Experts recommend a proactive approach—regular inspections and advanced diagnostics—to catch problems early. For deeper insights on protecting your warranty, check out how diagnostics can boost your warranty claims. Remember, understanding these nuances helps avoid unnecessary expenses and extends your appliance’s lifespan. Have you ever fallen into this trap? Let me know in the comments.
Keeping It Working: Tools for Reliable Appliance Maintenance
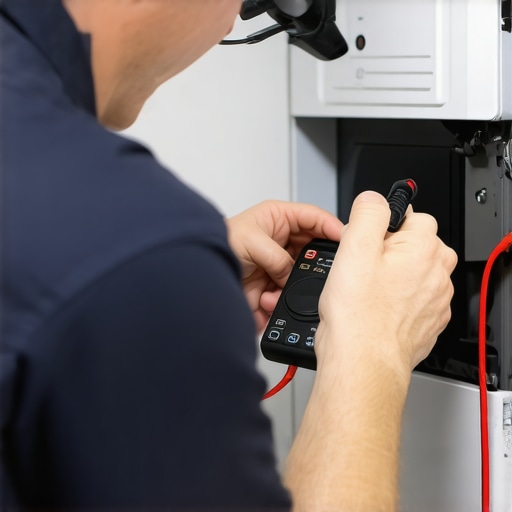
To ensure your dishwasher and other appliances stay in top shape over the years, investing in the right tools is crucial. I personally rely on a high-quality multimeter, a borescope, and a specialized water hardness test kit. These tools have become indispensable in diagnosing issues early and performing minor repairs myself. For instance, a reliable multimeter allows me to quickly test electrical components like heaters, pumps, and control boards without guesswork. Testing your heating element with a multimeter has saved me from unnecessary replacements and helped me determine whether a part needs professional attention.
The borescope, in particular, is what I consider a game-changer. Its slender design lets me peer into tight spaces, drain hoses, or behind the internal panels—things that once required dismantling large sections of the appliance. I use it to check for clogs, corrosion, or damage that may be invisible to the naked eye. Here’s how I use a borescope for drain checks during routine maintenance. This proactive approach helps prevent major failures and preserves my warranty coverage, especially when combined with ongoing diagnostics.
How do I keep my appliances in peak condition over time?
Regular cleaning and timely inspections are your best bets. Make it a habit to check and refill water softening salt, clean filters, and inspect hoses for leaks or signs of wear. Setting a monthly reminder on your smartphone helps maintain consistency. Integrating diagnostics tools like water hardness testers or the aforementioned borescope into your maintenance routine can extend your appliance’s lifespan significantly. As technology advances, I predict that future appliance diagnostics will become even more integrated and user-friendly, with smart devices providing real-time health reports—making DIY maintenance easier than ever.
If you haven’t already, I recommend trying the tip of testing your heating element with a multimeter. It’s a simple step that can reveal underlying issues before they escalate. For expert guidance on diagnostics, visit this resource. Taking proactive steps now ensures your appliances serve you well for years to come, saving money and preserving warranty benefits.
Are you ready to improve your maintenance game? Start by using a multimeter to test your appliance’s heating element today, and see how small checks can lead to big savings!
Unforgettable Lessons That Changed My Approach
- Realize that user manuals are gold mines—emphasizing proper salt type and level can prevent costly breakdowns, a fact I learned after a frustrating repair.
- Understanding the science behind water softening shifted my mindset: it’s not just about refilling salt but about maintaining a balanced water profile for longevity.
- DIY diagnostics with simple tools like a multimeter and borescope empower you to catch issues early, often saving expensive service calls and protecting your warranty.
- Ignoring the importance of routine checks—like inspecting salt dispensers and testing water hardness—can lead to performance issues that seem minor but cause major damage over time.
- Sharing my experiences and learning from pros in online communities has been invaluable—trusting expert guidance can be a game-changer for appliance health.
Tools and Resources That Make a Difference
- Multimeter: Crucial for testing electrical components—I’ve used mine to verify heating elements and control boards efficiently. Find a reliable one here.
- Borescope: A slender camera that helps inspect hidden areas like internal hoses and drains—maximizes diagnostics without disassembly. Learn how I use mine.
- Water hardness test kit: Ensures your softened water is within optimal ranges, preventing mineral buildup. Trust this method for proactive maintenance.
- Expert articles and diagnostics guides: Resources like this comprehensive guide have deepened my understanding and improved my troubleshooting skills.
Your Next Move Starts Now
Taking control of your dishwasher’s maintenance—especially understanding the role of proper salt—can dramatically extend its lifespan and preserve your warranty. Equip yourself with simple diagnostic tools, stay vigilant with routine checks, and seek expert advice when needed. Remember, proactive care isn’t just about fixing problems; it’s about preventing them and gaining peace of mind. So, why not test your heater or inspect your salt dispenser today? Small steps lead to big savings, and your appliance will thank you for it.
Are you ready to elevate your dishwasher maintenance game and unlock the full potential of your appliance? Let me know what step you’re excited to try first in the comments below!
}**}}#END#}}#END#}]]}}#END#}rmal’}