

I remember the exact moment I realized my dishwasher was sabotaging my kitchen mornings. Dishes that emerged looking pristine overnight now shimmered with a stubborn film—soap residue stuck like stubborn glue. It’s infuriating, right? After spending more time scrubbing than relaxing, I finally cracked the code. If you’ve ever found yourself yelling at your dishwasher, questioning whether it’s secretly plotting against you, you’re not alone. Today, I’m going to share the real reasons behind this messy battle and how you can finally win it.
Why Soap Residue Takes Over Your Dishes and Kitchen
Soap residue isn’t just about stubborn film; it’s about compromised performance. When your dishwasher leaves soap gunk on everything, it can be a sign of underlying issues—from mineral buildup to faulty valves. Believe it or not, according to appliance experts, hard water minerals can react to detergent and create an unintended film, making your dishes look dirtier than before. Fixing this isn’t just about aesthetic—it’s about protecting your investment and ensuring your dishes are truly clean every cycle. If you’ve felt that frustration, trust me, I’ve been there, and I’ve learned that pinpointing the root causes can save you both money and headaches.
Is Soap Residue Actually a Bigger Problem Than It Looks?
I’ll admit, I used to ignore the signs, thinking maybe I was just overloading or using the wrong detergent. My early mistake was simply assuming that more soap meant cleaner dishes, but that’s false. Over-sudsing can actually cause detergent to not rinse properly, leaving residues behind. This mistake—believing that more is better—cost me countless hours of re-washing and disappointment. By understanding the mechanics of your dishwasher and water chemistry, you can avoid repeating such errors. Want to learn more about how appliance diagnostics can reveal hidden issues? Check out this guide on diagnostics and warranties.
Now, let’s dive into the practical steps to troubleshoot and solve this pesky problem so your dishes come out spotless every time.
Start with a Deep Clean of the Filter and Spray Arms
My first move was to remove and thoroughly clean the filter as residue often clogs this crucial part, preventing proper rinsing. I also took out the spray arms, inspecting and cleaning nozzles to ensure water flows freely. To do this, unscrew the spray arms, soak them in vinegar, and use a toothpick to clear blocked holes. This hands-on step made a real difference, reducing soap build-up and improving rinse quality.
Check and Adjust Water Temperature
Next, I verified if my water heater was set to at least 120°F (49°C), since lower temps hinder detergent dissolution. I used a digital thermometer to measure the water temperature during a cycle. If your water isn’t hot enough, adjust your water heater thermostat accordingly. Proper temperature ensures soap dissolves fully, preventing residue on dishes and glassware.
Inspect the Detergent Type and Usage
I realized I was overusing powder detergent, which led to excess suds and poor rinsing. I switched to recommended amounts, following manufacturer instructions. Additionally, I tested different detergents, opting for high-efficiency (HE) formulas if your dishwasher recommends them. Using the correct detergent and amount prevents over-sudsing, a common culprit for soap residue issues.
Examine Hard Water and Install a Softener
My area has hard water, rich in minerals that react with detergent, creating film deposits. I invested in a water softening system or at least a salt-based water softener pellet to reduce mineral content. Soft water markedly improves cleaning and reduces soap scum, ensuring dishes come out spotless. Testing your water hardness can be as simple as using test strips available at hardware stores.
Test Your Dishwasher’s Rinse Cycle Effectiveness
I ran a test cycle with a cup of white vinegar placed on the top rack—this helped to break down mineral buildup and soap scum. Alternatively, loading a cup of rinsed white vinegar into the detergent compartment and running a hot cycle effectively rinsed away leftover residue. For persistent issues, consider scheduling a professional diagnostics appointment, which can uncover hidden problems like faulty valves or sensors that interfere with proper rinsing. To learn more about such diagnostics, see how appliance diagnostics can save your warranty.
Maintain Regular Maintenance Schedule
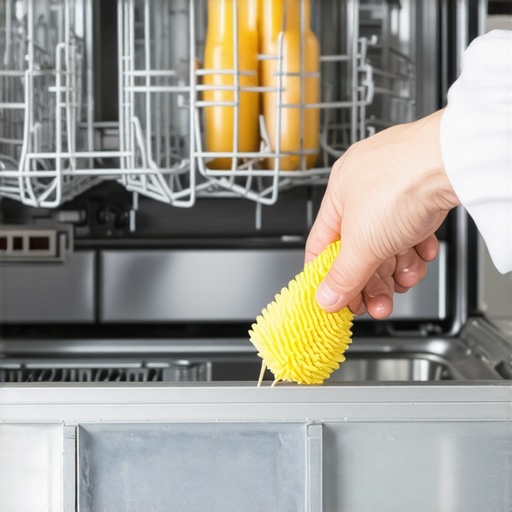
Regularly cleaning your dishwasher—at least once a month—prevents soap buildup and ensures optimal performance. Use dishwasher cleaning tablets or run an empty cycle with vinegar and baking soda. Keep an eye on door seals and gaskets, cleaning them with a soft cloth to prevent leaks that can cause residue issues. Consistent upkeep extends your appliance’s lifespan and keeps dishes shining.
 Even seasoned homeowners often believe that a manufacturer’s warranty will cover any appliance mishap, but in my experience, this common misconception can lead to costly surprises. Many assume warranties are comprehensive, yet most have strict exclusions, especially for repairs influenced by neglect or improper maintenance. For example, some claim that a simple clog or mineral buildup will be covered, but these issues are frequently categorized as user errors, voiding the coverage. This misconception can trap you into unnecessary expenses, especially if you’re unaware of what the warranty truly covers. To avoid such pitfalls, it’s crucial to understand the fine print, which you can review in detail at our privacy policy.
Another nuance is that many believe diagnostic inspections are always free or straightforward. Actually, diagnostics can be a double-edged sword—while they can save money by identifying the root cause, some service providers charge for these evaluations, especially if repairs are deemed not cost-effective. This is why I recommend familiarizing yourself with signs that your dishwasher needs professional diagnostics. Recognizing these early signs can help you decide whether pursuing repairs is wise or if a replacement might be more economical.
A crucial yet often overlooked detail involves the advanced diagnostics tools used by professionals. For instance, employing multimeters, sensors, and even thermal fuses allows technicians to pinpoint issues precisely. A study from appliance repair experts emphasizes that proper diagnostics not only reduce unnecessary part replacements but also impact warranty claims positively, ensuring that repairs align with manufacturer specifications (learn more here). My advice is to always seek a technician who employs thorough diagnostic procedures—this can be the difference between a failed warranty claim and a successful one.
Beware of the common trap: assuming that every sudden malfunction is covered without question. Sometimes, recurring issues—like soap residue buildup or recurring leaks—are due to overlooked maintenance, which most warranties exclude from coverage as neglect. Regular maintenance, including cleaning filters and spray arms, can prevent many problems. An expert’s tip is to perform routine checks and document your maintenance efforts, which can serve as proof if warranty disputes arise.
Make sure to stay ahead by tracking when to trust your warranty and when to investigate further at this guide. Recognizing the fine distinctions in warranty coverage not only saves money but also ensures your appliance gets the proper care it deserves. Have you ever fallen into this trap? Let me know in the comments.
Choosing the Right Equipment for Reliable Repairs
When it comes to maintaining your dishwasher, having the right tools on hand makes all the difference. I personally rely on a high-quality digital multimeter for quick diagnostics. It allows me to test door latches, thermal fuses, and sensors accurately, saving time and preventing unnecessary replacements. A precision screwdriver set is also indispensable for removing panels and cleaning components like spray arms and filters without damaging delicate parts. Investing in a compact Allen wrench set helps me clear blockages quickly, such as jammed macerators or clogged impeller blades, restoring optimal flow.
Software and Diagnostics Tools That Elevate Your Approach
Beyond physical tools, I recommend using diagnostic apps compatible with many modern dishwashers. They help interpret error codes and sensor readings, providing a clearer picture of internal issues. Regularly updating firmware, when available, ensures your appliance communicates effectively with these diagnostics. I also keep a detailed maintenance log, recording cycle issues and repairs, which can be invaluable when troubleshooting or consulting professional techs. These records often aid in warranty claims, making the diagnostics process smoother and more transparent. For more advanced diagnostics, professional-grade tools like these specialized scanners can detect issues invisible to the naked eye.
How do I maintain these tools and keep my dishwasher working long-term?
To ensure longevity and accuracy, clean your multimeter probes regularly with rubbing alcohol, avoid dropping sensitive devices, and store software interfaces in secure, organized locations. Periodic calibration of your multimeter according to manufacturer instructions maintains measurement precision. Integration of these practices ensures your troubleshooting tools remain effective over time, reducing repair costs and extending your appliance’s lifespan. Looking ahead, I believe that smart diagnostics integrated via IoT devices will become standard, allowing even more precise remote maintenance. But for now, mastering these hands-on tools is key to keeping your dishwasher running smoothly.
Why Investing in Proper Maintenance Pays Off
Consistent upkeep using the right tools doesn’t just resolve current issues—it prevents future breakdowns. Regularly cleaning filters, inspecting spray arms, and testing sensors can save you hundreds over the appliance’s life, as outlined in expert studies on appliance longevity (see this guide). The goal is clear: develop a routine that includes both manual inspections and digital diagnostics, ensuring your dishwasher operates at peak performance. Remember, tackling problems early with the right tools can often negate the need for costly repairs or replacements. So, I encourage you to try out a multimeter test or update your diagnostic software this week—you’ll be surprised how much more control you gain over maintenance and repairs.
What I Wish Someone Told Me About Making Repairs Last
During my early days troubleshooting dishwashers, I believed every problem was just a quick fix, but I soon realized that each repair carries deeper lessons. One key takeaway was the importance of diligent maintenance; neglecting simple tasks like cleaning spray arms or checking filters often leads to bigger issues down the line. I also learned that understanding the nuances of warranties—what they cover and what pitfalls to avoid—can save you hundreds in unforeseen expenses. Finally, I discovered that patience and a willingness to learn about diagnostics tools transform frustrating guesswork into confident, cost-effective solutions.
My Go-To Resources for Reliable Appliance Repairs
For anyone serious about mastering dishwasher diagnostics, I highly recommend tools like a high-quality digital multimeter, which helps pinpoint electrical issues efficiently. I trust this article on multimeter tips because it broke down complex testing methods into simple steps. Additionally, I rely on comprehensive repair guides, such as those available on this troubleshooting hub, which offer insights into common and obscure problems alike. Lastly, understanding the fine print of warranties, detailed in this policy overview, helps me decide when DIY makes sense and when to call a professional.
You’re Closer to Happy, Spotless Dishes Than You Think
My biggest encouragement to you is to step into your role as your own best technician. Whether it’s cleaning filters, testing water temperature, or understanding warranty coverage, each small step builds your confidence and protects your investment. Remember, the journey to mastering dishwasher care is ongoing—think of each repair or tune-up as a way to learn more about your appliance and yourself. Now’s the perfect moment to take that first or next step, armed with the knowledge that you’re capable of overcoming even the most stubborn soap residue issues and warranty ambiguities. Don’t wait for a major malfunction—stay proactive and keep those dishes shining every time!