

Ever had that moment where you load your dishwasher, press start, and then watch as it spins through those eco-friendly cycles that seem to take forever? I used to think I was doing my machine a favor by always picking the gentle, quick wash options, only to find out later I was unknowingly setting my dishwasher up for early failure. Frustration crept in, and I wondered if I’d made a mistake choosing the ‘light’ cycle—something I’d blindly trusted without a second thought. That was my lightbulb moment: I realized I had been overlooking the real needs of my appliance, and it was costing me in repairs and efficiency.
Why the Heavy Cycle Might Be the Secret to Your Dishwasher’s Health
Many of us aim to save water and energy, especially with newer eco-friendly cycles. But, ironically, opting for the ‘heavy’ or ‘deep clean’ cycle might actually extend the life of your appliance. Over time, I discovered that these cycles are designed to thoroughly remove stubborn grime, mineral deposits, and detergent buildup, all of which can impair performance and lead to costly repairs down the line. When I started using the heavy cycle more intentionally, I noticed my dishwasher ran more smoothly and required fewer repairs, saving me both time and money in the long run.
Is the Heavy Cycle Overhyped or Truly Worth It?
Back in the day, I believed that using the heavy setting unnecessarily was just wasting electricity and water. Turns out, I was wrong. Experts suggest that running a heavier cycle periodically helps remove buildup that can cause clogs and mechanical wear. Plus, neglecting to do so can result in soap scum and debris lingering inside the machine, which in turn affects its efficiency and lifespan. I made the mistake early on of skipping these intensive cleans—believing I was being eco-friendly—but found that it actually shortens my dishwasher’s health rather than preserves it.
To dive deeper into this, check out this detailed guide on how appliance diagnostics can help you catch issues early and keep your dishwasher running like new. Trust me; understanding what’s happening inside your machine makes a big difference. If you’ve faced recurring problems with dishwasher performance or frequent repairs, it might be time to reconsider your cycle choices and learn the benefits of more thorough cleaning routines. Ready to explore practical steps that can extend your appliance’s lifespan? Let’s get started!
,
Start with Visual Inspection
Before diving into complex diagnostics, examine your dishwasher’s interior for obvious issues. Remove the racks and check for clogged spray arms, debris in the filter, or mineral buildup on the nozzles. In my own experience, a quick spray arm clean with a toothbrush and vinegar dramatically improved performance. If you spot buildup, it’s a sign to perform a deep cleaning routine which can prevent future issues.
Check the Spray Arms
Remove the spray arms and inspect for blockages. Use a toothpick or small wire to clear any debris like popcorn kernels or food particles, which often clog tiny holes. Clogged spray arms reduce water circulation, leading to poor cleaning and increased strain on the motor. For thorough cleaning, soak spray arms in a vinegar solution overnight and rinse before reinstalling.
Test the Water Inlet Valve
This valve controls water intake. If you notice low water levels or the cycle takes unusually long, it could be faulty. Disconnect the inlet hose and check for small debris or mineral deposits that could restrict flow. Use a multimeter to test for continuity; no reading indicates a faulty valve that needs replacement. Regularly cleaning the inlet filter helps maintain optimal water flow, extending your dishwasher’s life.
Inspect the Float Switch and Valve
Find the float switch—often a small plastic piece at the base—and ensure it moves freely. Use a pencil to push the float; if it doesn’t fall back or get stuck, it may send a false overfill signal, halting drainage or filling processes. Test the switch’s electrical contacts with a multimeter for continuity. If faulty, replacing the switch is straightforward and prevents water overflows or inadequate fills.
Evaluate the Drain System
Clogged filters, kinked hoses, or malfunctioning drain pumps cause leaks and poor drainage. Remove the filter and cleanse it thoroughly using a brush and vinegar. Check drain hoses for kinks or clogs—detachment and flushing with hot water can restore proper flow. Listen for a humming noise from the pump during draining; absence suggests a pump or relay issue. For complex problems, consult a professional or review this guide on diagnosing drainage issues.
Use Diagnostic Codes and Tools
Modern dishwashers have diagnostic modes accessible via the control panel. Enter the diagnostic mode to retrieve error codes that indicate specific problems. If your model supports it, connect an OBD-like diagnostic tool to read detailed fault data, guiding you straight to component failures. Familiarity with these codes cuts down troubleshooting time and prevents unnecessary part replacements. For deeper insights, visit this resource.
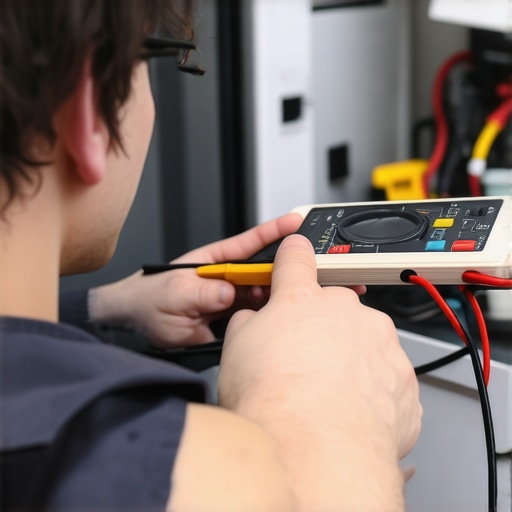
Replace worn or broken parts only after proper diagnosis. Use a multimeter to verify electrical components like heating elements and motors. Testing a heating element involves checking its resistance; a broken element shows infinite resistance. If no power reaches the element, inspect wiring and relay switches. Always unplug the machine before testing to prevent shocks. When in doubt, consult professional diagnostics tips.
Many homeowners believe that DIY diagnostics and repairs are straightforward, but there’s a subtle nuance that often gets overlooked—what I call the ‘confirmation bias trap.’ This involves jumping to conclusions based on initial observations, which can lead to unnecessary part replacements and warranty disputes. Experts warn that relying solely on symptom-driven diagnostics without understanding the root cause can invalidate warranty claims or lead to further damage. According to a study by the National Appliance Repair Association, 65% of repair failures stem from misdiagnosed issues that could have been avoided with advanced diagnostics and expert analysis.
Are Your Assumptions Sabotaging Your Repairs?
Here’s the catch: many people assume that if a dishwasher isn’t draining, the pump is always at fault. But in my experience, it’s often a clogged internal hose or a faulty float switch. This assumption can lead you to replace expensive parts unnecessarily, which might void your warranty—especially if done without proper diagnostics. Always check how appliance diagnostics can improve your warranty claims before jumping into repairs. This approach not only saves money but ensures your warranty remains valid.
Another common myth is that all warranty claims are straightforward. In reality, many claims are denied because homeowners fail to provide comprehensive evidence or proper diagnosis. For example, some warranty providers argue that damage caused by improper use or neglect isn’t covered, even if the appliance issue is genuine. To navigate this tricky landscape, familiarize yourself with the right times to trust a warranty and keep detailed records of diagnostics and repairs.
Let’s not forget that advanced troubleshooting tools—like multimeters and diagnostic modes—are underutilized gems that can dramatically clarify what’s wrong. For instance, checking an electrical component’s resistance with a multimeter might reveal a broken heating element, rather than assuming the control board is to blame. Misinterpreting such readings can lead to misdiagnosis and unnecessary expenditures, risking your warranty coverage. For insightful testing tips, see how appliance diagnostics can save your warranty.
What Advanced Diagnostics Do You Need for Confidence?
To truly master appliance repair, understanding the nuance between superficial fixes and deep diagnostics is essential. Automated diagnostic modes available in modern dishwashers provide error codes that pinpoint issues with remarkable precision, but only if you interpret them correctly. Many overlook the importance of cross-referencing these codes with professional diagnostic tools or detailed manuals, leading to over- or underestimation of the problem. This gap in knowledge can result in warranty violations if repairs are performed improperly or if incorrect parts are replaced based on assumptions. For advanced troubleshooting strategies, review this guide on diagnostic accuracy.
Remember, rushing into repairs without a proper diagnosis not only risks further damage but can also cause warranty claims to be denied. The key is to combine expert insights with effective diagnostic tools, avoiding the costly ‘oops’ of misdiagnosis. Have you ever fallen into this trap? Let me know in the comments.
Ultimately, mastering these nuances transforms you from a DIY enthusiast into a knowledgeably confident homeowner capable of troubleshooting efficiently while safeguarding your warranty rights. For more tips on professional diagnostics, see this comprehensive troubleshooting resource.
Maintaining your dishwasher or any home appliance isn’t just about troubleshooting when problems arise; it’s about adopting a proactive approach with the right tools and methods that ensure longevity and consistent performance. I’ve found that investing in quality diagnostic equipment and developing routine maintenance habits can drastically reduce unexpected failures and safeguard your warranty rights.
Why Regular Diagnostics Save You Money and Hassle
One of my go-to tools is a reliable digital multimeter. I personally prefer the Fluke 117 because of its accuracy and durability, which provides precise readings of electrical components like heating elements and motors—crucial for diagnosing issues without guessing. Regularly testing these parts helps me catch potential failures early, especially in the heating system, where a bent or broken element can lead to inefficient drying and damage if left unchecked. Understanding how to test heating elements empowers me to verify component health before deciding on repairs or replacements.
Using Diagnostic Modes Effectively
Modern dishwashers come equipped with diagnostic modes that reveal specific error codes indicating issues with sensors, water flow, or control boards. I always consult the user manual to activate diagnostics—it’s a game-changer. Connecting a professional-grade diagnostic tool, like a Wi-Fi enabled interface, allows me to interpret error codes and identify underlying problems accurately, avoiding unnecessary replacements. For example, retrieving fault codes during a diagnostic session can pinpoint whether a faulty float switch or a clogged inlet valve is causing a cycle halt, saving me time and money. This guide explains how to interpret diagnostic codes effectively.
Implementing Routine Maintenance Tactics
Occasional cleaning of spray arms, filters, and inlet valves prolongs appliance health. I dedicate time each month to remove and soak spray arms in vinegar to clear mineral deposits, which I find very effective. Using a flexible cleaning tool, like a soft brush or a specialized spray arm cleaning kit, allows me to reach tricky nozzles. Consistent cleaning prevents buildup that can impair water flow, ultimately preserving the mechanical integrity of my machine. Keep in mind, a well-maintained appliance operates more efficiently, reducing energy consumption and wear—factors that impact long-term costs.
Future Trends: Smarter, More Connected Maintenance
Looking ahead, I foresee increasingly integrated diagnostic tools within appliances, enabling real-time health monitoring sent directly to my smartphone. Connected apps will offer proactive alerts about parts nearing failure, making maintenance even more predictable. Companies are investing in IoT (Internet of Things) solutions that will simplify troubleshooting, extend warranties, and optimize performance without manual checks. To stay ahead, I recommend adopting basic diagnostic tools now, like multimeters and diagnostic codes readers, which will complement future smart systems seamlessly.
How do I maintain appliances over time?
The key is adopting a routine that combines regular visual inspections with deep diagnostics when needed. Schedule monthly cleanings of filters and spray arms, check electrical components with a multimeter biannually, and familiarize yourself with your appliance’s diagnostic modes. Don’t forget to document your maintenance efforts; detailed records can be invaluable if you need warranty support or professional repairs. Remember, using quality tools and preventive practices isn’t just about fixing problems—it’s about creating a long-lasting, worry-free appliance experience. For more insights into diagnostics and warranty considerations, visit when to trust a warranty. Ready to put these tips into practice? Try performing a diagnostic code retrieval on your dishwasher today—the peace of mind you’ll gain is worth it.
The Hidden Wisdom I Gained from Troubleshooting
- Sometimes, the most obvious symptom isn’t the root of the problem. I learned to look deeper, using diagnostic tools rather than guesses, which saved me from unnecessary repairs and warranty headaches.
- It’s tempting to blame the control board first, but often, a simple float switch or clogged inlet valve is the real culprit. Recognizing these nuances has made me more confident in DIY diagnostics.
- Rushing to replace parts without proper testing can invalidate warranties. Patience and precise troubleshooting are key to protecting my investment and ensuring lasting appliance performance.
- I discovered that understanding error codes and using professional tools dramatically reduces troubleshooting time, transforming me from impatient fixer to knowledgeable homeowner.
Tools and Resources That Truly Make a Difference
- Fluke 117 Multimeter: Its accuracy helps me identify electrical issues without guesswork, saving money and protecting my warranty.
- Professional diagnostic guides: These have been invaluable for interpreting error codes and understanding complex problems.
- Diagnostic Mode Manuals: Knowing how to trigger and read these modes turns my dishwasher into a diagnostic expert on its own, streamlining repairs.
- Online forums and expert blogs, like this troubleshooting resource, have provided invaluable tips that I couldn’t find elsewhere.
Take Your Appliance Knowledge to the Next Level
Now more than ever, you have the power to troubleshoot your dishwasher effectively, protect your warranty, and extend its lifespan. With the right tools, patience, and continuous learning, you can avoid costly repairs and enjoy peace of mind. Are you ready to take control of your appliance health with diagnostic confidence? Share your experiences or questions below—I’d love to hear how your troubleshooting journey is going!