

I vividly remember the first time my dishwasher flooded my kitchen—water pooling under cabinets, silverware swimming in soap suds. It was one of those frustrating moments where you question whether your trusty appliance is really as reliable as you thought. That lightbulb moment led me down a rabbit hole of troubleshooting, and I discovered a surprisingly common culprit: the dishwasher’s air gap. If you’re tired of dealing with persistent drainage issues, this is a problem you can fix—and I’m here to show you how, based on my own experience.
Why a Clogged Air Gap Can Turn Your Kitchen into a Flood Zone
Most homeowners overlook the air gap, treating it like a minor detail rather than a crucial component in your dishwasher’s drainage system. Think of it as the gatekeeper that prevents dirty water from backing up into your clean dishes. When this little device gets clogged with soap scum, mineral deposits, or debris, your dishwasher’s drainage gets obstructed, leading to leaks, poor cleaning, or even dishwasher failure. According to appliance experts, ignoring a clogged air gap can cause significant damage over time, resulting in costly repairs or even new appliances. Recognizing these signs early can save you money.
Ever Faced a Persistent Drainage Problem That Didn’t Clear?
This was exactly my mistake early on—I thought I could fix the issue with simple rinse cycles or by cleaning the filter. Turns out, I was ignoring the real problem lying in plain sight: a clogged air gap. My mistake was not understanding how this small, but vital, part influences the entire drainage process. If you’re like me, you might have tried every troubleshooting trick under the sun, but the real fix was as simple as clearing out this tiny device. Ready to discover how to do it yourself? Let’s get into the practical steps.
Locate the Air Gap
Find the air gap, typically installed on your sink’s countertop or mounting bracket, resembling a small cylindrical or square plastic cap. I remember the first time I looked for mine; it took a moment to spot it amid the clutter, but once located, the task became clearer. Knowing its position allows for an efficient cleaning process.
Remove the Air Gap Cover
Carefully unscrew or lift off the cap by hand or with a flat-head screwdriver if necessary. Be gentle to avoid damaging the housing. I once used a plastic pry tool to prevent scratches, which proved effective. Keep the cover in a safe place until cleaning is complete.
Check for visible debris
Inspect the opening and surrounding area for soap scum, mineral deposits, or dirt buildup. These blockages cause drainage issues similar to a clogged drain pipe. Remember, a clogged air gap acts like a clogged filter, preventing water from flowing freely and risking leaks in your dishwasher system.
Clean the vent and screen
Use a long, flexible brush or pipe cleaner to remove any debris inside the opening. A toothbrush dipped in vinegar can help loosen stubborn deposits. For a visual understanding, refer to this image: 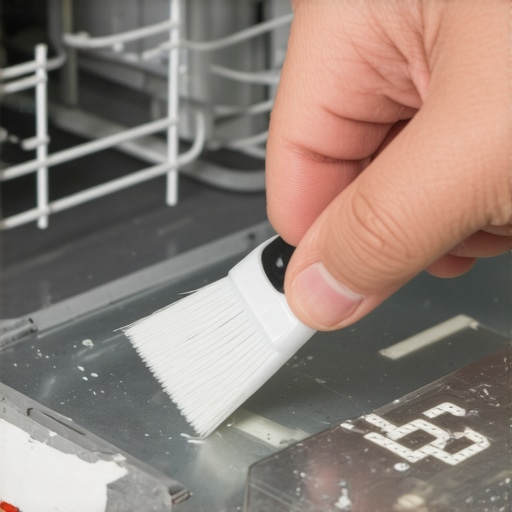 which illustrates the cleaning process. This step cleared my system after only a few minutes, restoring proper drainage.
Don’t forget to check the inside
If accessible, remove any blockage inside the vent tube. Use a flashlight to identify obstructions deep within. I once used a pair of tweezers to extract a stubborn hairball, which allowed water to flow smoothly again. It’s essential to clear these internal passages for optimal operation.
Reassemble and test
Reattach the cover securely and run a short cycle on your dishwasher. Observe the drainage process to confirm the fix. A quick test can prevent future flooding episodes, saving you repair costs, and ensuring your appliance functions correctly. If drainage issues persist, consider consulting a professional. For more troubleshooting tips, visit this guide.
By following these steps, you’ll prevent minor clogs from escalating into costly repairs, prolonging your dishwasher’s lifespan. Regular maintenance of your air gap acts like a health check-up—simple but vital for smooth performance.
Many homeowners believe that repairing dishwashers is always straightforward or that warranties cover everything, but these ideas often lead to costly mistakes. For example, there’s a widespread misconception that all repair issues are caused by obvious problems like broken parts, when in fact, subtle nuances—such as internal sensor failures or calibration errors—are frequent culprits. Experts emphasize that understanding these nuances can significantly improve troubleshooting accuracy. According to appliance repair specialists, over-reliance on general advice without recognizing these subtleties can void warranties or lead to unnecessary service calls. A common trap is assuming that if a dishwasher stops mid-cycle, replacing the entire control board is the only option, but diagnostic tests might reveal a simple faulty float switch or clogged vent, which are easier and cheaper to fix. Therefore, diving deeper into diagnostics can save time and money, and ensure you don’t overstep warranty boundaries. For instance, improperly bypassing components during DIY repairs might damage sensitive circuits or void your warranty—so it’s vital to follow expert-approved procedures. To navigate these complex nuances, consider consulting trusted sources like this guide on diagnostics and warranty. Remember, unraveling the real cause behind appliance issues can differentiate a quick fix from a costly overhaul. Have you ever fallen into this trap? Let me know in the comments.
Investing in Precision: Tools I Trust for Appliance Care
When it comes to maintaining your dishwasher over time, having the right tools can mean the difference between quick fixes and costly repairs. I personally rely on a high-quality multimeter, like the Fluke 117, because it provides accurate readings of electrical components such as thermostats and control boards. Additionally, a flexible inspection camera helps me peer into tight spaces, like under the sump or behind the control panel, without dismantling the entire unit. For cleaning small parts like spray arms, I favor a set of precision screwdrivers and a plastic pick set, which allows me to disassemble and reassemble components without damage.
To diagnose issues efficiently, I use a smartphone-based thermocouple thermometer, like the Amprobe IR-730, to verify heating element temperatures. This ensures that heating problems are diagnosed accurately, avoiding unnecessary replacements. Tool maintenance is equally important; regularly cleaning and calibrating your multimeter and inspecting your inspection camera will save you time and ensure reliable measurements over the years.
The Future of Maintenance: Automation and Smart Diagnostics
As smart appliance technology advances, I predict increasingly sophisticated diagnostic tools will become accessible to homeowners. Devices capable of connecting via Wi-Fi to monitor appliance health and send real-time alerts will revolutionize DIY maintenance. Think of an integrated system that not only detects a failing float switch but also suggests precise troubleshooting steps through an app, reducing guesswork. Already, some manufacturers are embedding diagnostic ports and firmware that can be accessed via smartphones, streamlining repairs further.
How do I keep my dishwasher running smoothly over the years?
Consistent maintenance routines are key. Regularly inspecting and cleaning critical components like spray arms, filters, and the air gap can prevent buildup that leads to leaks or poor cleaning. Setting a periodic schedule—say every three to six months—for these tasks ensures longevity. Additionally, paying attention to signs like unusual noises or cycle irregularities can catch problems early. For complex diagnostics, professional assistance remains invaluable—especially when it involves control boards or internal sensors. Understanding the importance of proper diagnostics can also protect your warranty; consult this guide for comprehensive insights.
Remember, using advanced tools not only accelerates troubleshooting but also prolongs the lifespan of your appliances. I recommend trying out a non-contact voltage tester like the Klein Tools NCVT-3 the next time you’re inspecting wiring or control panels—it’s a game-changer for safety and accuracy. For detailed steps on testing your dishwasher’s heating element or control board with these tools, check this guide.
Stay diligent with maintenance, stay equipped with the right tools, and keep your dishwasher humming reliably for years to come.
The Hardest Lesson I Learned About Dishwasher Troubleshooting
One of my biggest takeaways is that DIY fixes often seem straightforward until you realize the importance of diagnostics. Relying solely on surface symptoms can lead you to replace parts unnecessarily, which is both costly and frustrating. Learning to interpret subtle clues and understanding the nuance behind each component’s role has saved me time and money. This journey taught me that patience and curiosity unlock solutions that quick fixes often overlook.
Tools That Changed My Approach to Appliance Care
Investing in quality diagnostic tools like a reliable multimeter and a flexible inspection camera has made all the difference. They allow me to pinpoint issues precisely rather than guesswork. Trustworthy resources, such as this guide on diagnostics, have helped me make sense of complex signals. These tools empower me to approach each repair with confidence and ensure I don’t overstep warranty protections.
Embracing a Future Where Fixes Are Smarter
As smart appliances become more common, the diagnostic landscape is evolving fast. Devices that connect to apps and offer real-time alerts will transform DIY appliance maintenance from guesswork to precision science. I look forward to a future where troubleshooting is less about trial-and-error and more about data-driven decisions. Staying informed and adaptable is key; I encourage you to explore emerging technologies that make repairs safer and more efficient. Ready to upgrade your toolkit and mindset? Your appliances—and wallet—will thank you.