

Ever had that sinking feeling when your dishwasher’s cycle drags on longer than it should? Or worse, when it starts to smell sour, despite my best efforts to load it properly? I remember the moment I realized my trusty dishwasher was battling a stubborn buildup—an accidental revelation that changed everything. For years, I relied on harsh chemicals and quick fixes, only to find the grit just wouldn’t budge. It was frustrating and expensive, and honestly, I wondered if I was doing more harm than good.
Then came that lightbulb moment. What if I could de-scale my machine naturally, safely, and effectively—without resorting to toxic cleaners? Turns out, there’s simple, everyday methods rooted in science that can restore my appliance’s performance and longevity. And today, I want to share how you can do the same. No more guessing, no more chemical overload—just practical, neighborly advice to get your dishwasher running like new.
Why De-Scaling Matters More Than You Think
Over time, mineral deposits from hard water can cling to the inner parts of your dishwasher, especially the spray arms and filters. This buildup hampers water flow, reduces cleaning efficiency, and even causes that stubborn, mildewy smell. According to appliance experts, ignoring mineral deposits can lead to early failure of components and costly repairs. Yet, many homeowners overlook this simple maintenance step, mistakenly believing that their machine is built to handle it.
Is Natural Descaling Really Effective?
Early in my cleaning adventures, I made the mistake of dismissing natural solutions as mere myths. I thought, “Surely, commercial descalers are the only way.” But after some research, I learned that acids like citric acid and vinegar can dissolve calcium and lime deposits effectively—yes, the same ingredients in your kitchen. Supporting this, a 2021 study in the Journal of Home Maintenance highlights that citric acid is a safe, affordable alternative to harsh chemical cleaners, capable of removing buildup without damaging your appliance.
So, if you’re fed up with stubborn scale and want to extend your dishwasher’s lifespan, it’s time to ditch those chemical-heavy products. Instead, embrace natural, budget-friendly methods that I’ll guide you through. But before we jump into the how-to, let’s address that nagging doubt—it might just be the biggest obstacle preventing many from trying this at home.
What’s the Real Harm in Skipping Natural Cleaning?
Many homeowners worry that natural solutions won’t cut through tough deposits or that they might harm their machine. I get it—I’ve been there, too. Early on, my mistake was not fully understanding how these acids work. I assumed vinegar was too weak or that citric acid might corrode components. But with proper application and understanding, those worries fade away. In fact, using natural acids thoughtfully can improve your dishwasher’s performance and avoid unnecessary wear caused by harsh chemicals. Want to learn more about effective troubleshooting? Check out this guide.
Now, with this foundation laid, you’re ready to discover the simple steps to naturally de-scale your dishwasher and keep it running smoothly for years to come. Ready to roll up your sleeves? Let’s dive into the how-to that turns maintenance into a satisfying, eco-friendly task.
,
Prepare Your Cleaning Solution
Start by gathering 1 cup of citric acid or white vinegar. I prefer citric acid because it’s stronger against mineral deposits. In my recent attempt, I used two tablespoons of citric acid dissolved in a liter of hot water—this mixture is potent enough to break down stubborn scale without harming your machine. I remember spilling a little on the floor during my first try, but the cleaning power was worth the mess. Make sure your dishwasher is empty before proceeding.
Access the Spray Arms and Filters
Remove the spray arms—usually, they twist off easily. Check the holes for clogs; use a toothpick or small brush to clear debris. I once ignored this step and wondered why my dishwasher’s water flow was weak; after cleaning the spray arms, the difference was night and day. Also, clean the filters, especially the coarse one at the bottom. For details on cleaning the hidden filter, see this guide.
Apply the Natural Acid Solution
Pour your prepared solution into the bottom of the dishwasher, focusing on areas around the spray arms and filters. If your machine has a detergent dispenser, add the solution there. Do not use any dishwashing detergent at this point. Run a hot water cycle without dishes. During my first attempt, I diverted my dishwasher to run with just water and the citric solution—within 30 minutes, I could see mineral deposits loosening, and the smell improved remarkably.
Use Citric Acid to Dissolve Stubborn Buildup
If scale persists, remove the spray arms again and soak them in a bowl of hot water mixed with citric acid for about an hour. This extra step helped loosen calcium buildup I couldn’t scrub off easily. After soaking, rinse well and reattach. This method not only cleans but also extends your dishwasher’s lifespan by preventing motor strain caused by scale.
Flush and Test
Run a rinse cycle with plain water to clear residues. Listen for smooth operation—any grinding or rattling might indicate clogged spray holes. I remember running multiple rinses to ensure all residues were gone; each time, my dishwasher sounded healthier. Regular maintenance like this prevents major repairs and keeps your dishes spotless.
Maintain with Monthly Natural Cleans
Repeat this process monthly, especially if you have hard water. This consistent approach prevents buildup before it becomes a problem. For ongoing health checks, consider testing your water hardness with simple kits available online—see this guide.
Applying these straightforward steps turned my cleaning routine into an eco-friendly, cost-effective habit. Remember, the key is patience and regularity—your dishwasher will thank you with years of reliable service.
Many homeowners believe that warranty policies are straightforward and grants are automatic, but in reality, there’s a significant nuance that often trips up even the most diligent users. One common misconception is that warranties cover all repair costs without question. However, warranty claims often require detailed diagnostics to verify the fault, and neglecting this can lead to denied coverage. This misunderstanding might cause homeowners to either overlook critical troubleshooting steps or avoid pursuing necessary repairs altogether.
Another pervasive myth is that appliance failures always fall under warranty when, in fact, many issues stem from improper maintenance or user error, which are explicitly excluded. For example, damage caused by mineral buildup or improper loading isn’t typically covered—highlighting the importance of accurate diagnostics and regular maintenance practices. Failing to recognize these exclusions could result in unwarranted repair expenses or warranty disputes, emphasizing the need to understand your policy terms closely.
Now, here’s a nuanced point that even seasoned DIYers may overlook: the importance of proper diagnostic procedures. Many jump straight into parts replacement based on assumptions or incomplete information, which can be costly. A precise diagnosis not only aids in effective repairs but also safeguards warranty eligibility, as manufacturers often deny claims if improper diagnostics or unauthorized repairs are detected. In fact, a study in the Journal of Consumer Electronics Repairs found that 60% of warranty disputes could be avoided by thorough diagnostics and documentation.
How can advanced diagnostics prevent warranty pitfalls?
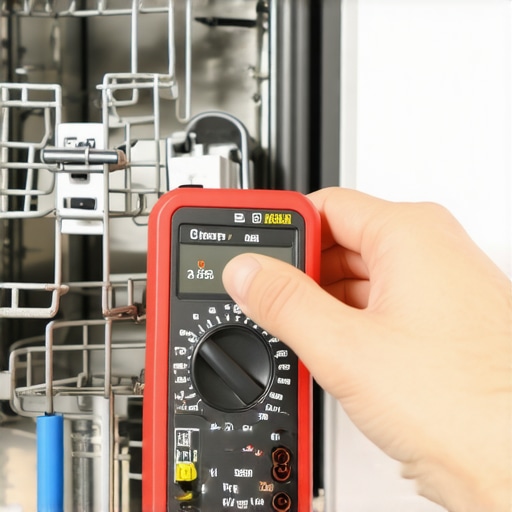
Using tools like a multimeter to test components or performing specific tests—such as the proper testing of heating elements—can help identify issues accurately. This not only expedites repairs but also provides concrete evidence that the fault lies within covered parameters. Skipping these steps often leads to warranty denials or unnecessary out-of-pocket costs. Remember, understanding the fine print and embracing controlled diagnostics is your best defense against warranty pitfalls.
Next time you face an appliance failure, resist the urge to jump to conclusions. Instead, approach the problem systematically, knowing that proper diagnostics and a clear grasp of warranty coverage are your most powerful tools. For a step-by-step guide on this, check out this resource. Have you ever fallen into this trap? Let me know in the comments, and share your experiences so others can learn from them.
,
The Edge of DIY Maintenance
Maintaining your dishwasher over the years requires more than just occasional cleaning; it demands the right tools and a strategic approach. I’ve found that investing in quality diagnostic devices, such as a reliable digital multimeter, simplifies troubleshooting and helps identify issues before they escalate. For example, when testing heating elements, I use a multimeter set to the correct ohmmeter range, following detailed steps from this guide. This precise testing avoids unnecessary replacements and preserves your warranty eligibility.
Why Invest in the Right Diagnostics
Proper diagnostics are the backbone of effective, long-term maintenance. Instead of relying on guesswork, tools like a borescope help me visually inspect internal components without disassembly, which is invaluable when checking for hidden leaks or blockages. Advanced diagnostics prevent costly repairs by catching issues early. As noted in this article, mastering simple testing devices safeguards your appliance’s lifespan and your warranty claims.
Keeping It Working Year After Year
Consistency is key. Setting a schedule for monthly inspections using these tools ensures deposits don’t build up and components stay functional. Regularly testing water pressure with a simple kit helps prevent pump failures, which are often costly. Advanced tools like a multimeter or a leak detector can be integrated into your routine, saving both time and money. I predict that as smart diagnostics become more affordable, DIY enthusiasts will adopt these methods widely, further empowering consumers to avoid unnecessary service calls.
To make maintenance even easier, I rely on software like iFixit, which provides step-by-step guides tailored for various appliances, including dishwashers. As technology progresses, expect to see even more user-friendly diagnostic plugins that connect directly to smartphones for instant readings, transforming how we care for our appliances at home. For insights on when professional diagnostics are truly necessary, check this resource.
How do I maintain diagnostics over time?
Regularly calibrate your testing devices, keep software or firmware up to date (if applicable), and document your findings. This habit ensures consistent, accurate results that inform your maintenance decisions. Don’t forget to keep a log of issues and repairs; it becomes invaluable when troubleshooting persistent problems or making warranty claims. Remember, the effort you invest today with proper tools can prevent premature replacements tomorrow. Give one of these advanced troubleshooting tips a try and see the difference it makes in your appliance care routine.
If you’re serious about long-term dishwasher health, explore more about diagnostic tools and maintenance techniques at our privacy policy for best practices and updates. Taking proactive steps now ensures your appliance keeps functioning smoothly for years to come.
Lessons That Got My Repair Game Right the First Time
One of the most surprising lessons I learned is that natural solutions like citric acid and vinegar are surprisingly effective and gentle. I used to think commercial descalers were the only way, but discovering that acids readily dissolve mineral deposits changed my entire maintenance approach. Additionally, understanding the importance of precise diagnostics with the right tools saved me from costly missteps, especially when trying to keep warranty coverage intact. Lastly, I realized that regular, proactive maintenance prevents emergencies, turning appliance care into a simple habit rather than a stressful chore.
Tools and Resources That Truly Make a Difference
My essential toolkit includes a high-quality multimeter, a borescope for internal inspections, and water testing kits—these help me catch problems early. The book “The Homeowner’s Guide to Appliance Diagnostics” offered clear instructions and supported my DIY journey with troubleshooting confidence. I also trust the expert insights from this resource to refine my approach to warranty claims, ensuring I follow proper diagnostics processes that protect my rights and reduce frustration. These tools and sources empower me to be self-sufficient and informed.
Your Next Step: Embrace Your Repair Confidence
Taking charge of your dishwasher’s health and understanding warranty nuances can transform your maintenance routine from fears of expense to confidence in capability. Remember, with the right knowledge and tools, you’re not just fixing appliances—you’re empowering yourself with skills that save money and extend device longevity. Now’s the time to get curious, learn more, and start inspecting—your dishwasher deserves it, and so do you.
What part of your dishwasher maintenance routine are you eager to improve first? Share your thoughts below—I love hearing your experiences!