

It was one of those mornings where everything that could go wrong did. I was standing in front of my dishwasher, desperately trying to get it to start. The control panel button was stubbornly sticky, refusing to respond. After pressing and poking for what felt like forever, I realized I was stuck in a cycle of frustration that seemed to last ages. That moment made me think: why is it so common for these buttons to become sticky, and most importantly, how can we fix it quickly without calling in a pro?
Why Your Dishwasher Button Gets Stuck and How It Affects Your Routine
We’ve all been there—your dishwasher’s control panel refuses to cooperate, turning what should be a simple task into an exercise in patience. A sticky button not only hampers your ability to operate the appliance but can also signal deeper issues that might undermine your dishwasher’s performance in the long run. Believe me, I used to ignore this problem thinking it was a minor annoyance, only to find it worsening over time. That was a mistake I made early on, which delayed my diagnosis and made the repair more complicated. Learning from that, I now always check out reliable resources like pro diagnostics and repair tips before attempting any fix.
The good news? Many control panel issues, especially those involving sticky buttons, can be resolved with a few simple steps. In fact, applying the right cleaning technique or a quick reset can restore your dishwasher to full function, saving you both time and money. Curious if this quick fix can work for your situation? Well, stick around—I’ll walk you through it step by step.
Is a Sticky Control Panel Button Actually Worth the Hype?
At first glance, a sticky button might seem trivial. But the truth is, ignoring it can lead to more serious problems, like unresponsive cycles or even electrical malfunctions. I used to dismiss the issue, thinking it was just dirt. Turns out, grime buildup or corrosion can interfere with the button’s connection, causing it to stick and malfunction. I learned the hard way that a quick clean often makes all the difference—and I want to help you avoid that costly mistake. For professional insights, check out how diagnostics can save your warranty benefits.
Now that you understand why a sticky button is more than just a minor inconvenience, let’s dive into how you can fix it yourself. Trust me, it’s easier than you think—especially once you know what to look for and how to tackle the root cause without unnecessary fuss.
Turn Off and Unplug Your Dishwasher First
Before starting any repair, disconnect your dishwasher from the power source to prevent electrical shocks. I remember the time I forgot this step and almost got a mild shock — a good reminder that safety always comes first. Locate the plug behind or beneath your machine and unplug it. This ensures that no accidental power flow can cause harm or further damage during your repair process.
Open the Control Panel and Clean the Contacts
Remove the screws securing the control panel, usually found on the inner door edge. Carefully lift the panel to expose the control board and button contacts. Use a soft cloth dampened with isopropyl alcohol or vinegar solution (a trick I learned from a pro) to gently clean the button contacts where grime, grease, or mineral deposits often cause sticking. A build-up here acts like glue, preventing a proper connection. Be meticulous—dirty contacts are often the root of persistent control issues.
Apply Gentle Pressure and Test the Button
After cleaning, press the button several times to spread the cleaner evenly. Reassemble the panel temporarily and reconnect power briefly to test if the sticky sensation persists. If the button moves freely, you’ve likely succeeded. If not, proceed to the next step.
Adjust or Replace the Button or Membrane
Sometimes, a worn-out or misaligned button membrane causes sticking. Inspect the rubber or silicone membrane beneath the button. If it appears cracked, deformed, or sticky, it’s time to replace it. You can find replacements online, and this process is like changing the gasket on a leaky pipe—simple but effective. When I replaced mine, the control became as responsive as new, saving me the cost of a full repair service.
Use a Multimeter for Deeper Diagnostics
If cleaning and replacing the membrane don’t solve the problem, the control board may be faulty. Testing the circuit with a multimeter helps confirm if the switch is sending signals properly. Think of this as a health check for your appliance—just like testing a car’s battery before a road trip. For guidance on testing drain pumps or switches, visit this detailed multimeter checklist. If the circuit is dead, replacing the control board might be necessary, especially if your dishwasher is still under warranty.
Reassemble Carefully and Perform a Test Run
Once all parts are back in place, reattach the control panel securely. Plug your dishwasher back in and run a short cycle to verify the button’s responsiveness. This step is like troubleshooting a new gadget—testing ensures you’ve done the job right. You might notice minor issues during initial cycles, but consistent performance indicates success.
Prevent Future Stickiness with Regular Maintenance
To keep your control panel tip-top, routinely clean the contacts every few months. Use a soft cloth and mild cleaning agents, avoiding harsh chemicals that might corrode contacts—incorporate this into your appliance care routine, much like maintaining your car’s battery terminals. If your dishwasher’s warranty still covers this kind of repair, documenting these steps with photos helps streamline any warranty claims. For more on warranty procedures, see how diagnostics can save your warranty.
When it comes to appliance repairs, many homeowners rely on common beliefs that can actually hinder effective troubleshooting and warranty claims. One widespread misconception is that all problems with dishwashers are purely cosmetic or minor, leading people to delay professional diagnostics until issues become severe. However, experts emphasize that early, accurate diagnostics often reveal underlying issues that, if ignored, can void warranties or cause further damage. According to a study published in the Journal of Appliance Maintenance, early intervention through proper diagnostics significantly reduces repair costs and extends appliance lifespan.
Another trap many fall into is the oversimplification of warranty protections. Many assume that their warranty covers all repairs, but in truth, warranties often exclude damage caused by user neglect or improper maintenance. For example, using harsh chemicals or failing to clean filters can cause corrosion or component failure, which isn’t covered. To avoid losing warranty benefits, it’s essential to understand what your policy covers and to document every repair and maintenance activity. More detailed info can be found in this guide to diagnostics and warranty claims.
Misconceptions also extend to the belief that DIY fixes are always cost-effective. While some minor issues, like cleaning a control panel or replacing a faulty gasket, can be handled at home, many advanced diagnostics require specialized tools like multimeters or infrared cameras. Incorrect DIY repairs not only threaten safety but can also void existing warranties. In fact, the US Consumer Product Safety Commission warns that improper repairs are a leading cause of appliance-related accidents. As a rule of thumb, consult professional troubleshooting tips before attempting complex repairs.
Ever wondered if your appliance problems are linked to specific diagnostic codes or subtle symptoms that DIYers often overlook? Understanding these nuances can save you time and money. For instance, a dishwasher that leaves spots might seem like a simple rinse aid issue, but could be related to water pressure problems or faulty sensors—diagnostics that aren’t obvious without proper tools. To master these subtleties, familiarize yourself with signs requiring professional diagnostics and develop a keen eye for troubleshooting.
Finally, many are unaware of the hidden implications of neglecting routine maintenance or misinterpreting warranty terms. Regularly cleaning filters, inspecting hoses, and understanding the warranty’s fine print can prevent unexpected expenses. Remember, warranties often have clauses about maintenance and correct usage that, if violated, could invalidate your coverage. For best practices, refer to here.
Making well-informed decisions about appliance repairs involves recognizing the nuances most overlook. Don’t let myths or misconceptions derail your warranty benefits or lead to unnecessary expenses. Stay educated, document repairs properly, and consult professionals when needed. Have you ever fallen into this trap? Let me know in the comments.
Investing in the Right Diagnostic Tools for Long-Term Care
To maintain your dishwasher effectively over time, equipping yourself with reliable diagnostic tools is essential. My personal go-to is a high-quality digital multimeter from Fluke, which provides precise readings of voltage, current, and resistance, making it invaluable for diagnosing electrical issues like faulty switches or worn-out heating elements. I’ve also found that an infrared thermometer helps me quickly identify inconsistent water temperatures and detect potential heating problems before they escalate, saving me costly repairs.
In addition, a sewer camera or inspection scope, though more niche, can be incredibly useful if you’re troubleshooting drainage issues or hidden blockages. These tools allow a close-up view of pipes and drains, helping to identify cracks, clogs, or improper sloth that can cause long-term damage. Having an organized toolbox with these gadgets means I can perform many diagnostics myself, often recognizing issues before they trigger error codes.
Why Regular Testing Matters for Appliance Longevity
Performing routine tests on key components like the float switch, water inlet valve, and spray motor ensures your dishwasher remains in top shape. I schedule monthly inspections, checking for corrosion, wear, and loose connections, which can develop over time and lead to unexpected breakdowns. Additionally, using software like appliance diagnostic apps can simplify these tests, offering guided procedures and troubleshooting tips that I trust based on extended personal experience.
Looking ahead, I believe the trend toward smarter diagnostics—integrating IoT sensors and remote monitoring—is set to revolutionize appliance maintenance. Imagine receiving real-time alerts on your phone when a component shows signs of failure, allowing preemptive repairs rather than reactive fixes. For now, mastering manual diagnostics with tools I’ve discussed remains a practical and cost-effective approach.
How do I maintain diagnostics effectiveness over time?
Consistently calibrate your multimeter annually and keep your inspection tools clean and well-maintained. Document each test and repair using detailed notes or photos; this habit simplifies warranty claims and future troubleshooting. Don’t forget to update your diagnostic apps regularly to benefit from the latest troubleshooting algorithms. To streamline this process, I recommend adopting a dedicated repair journal or digital log—making future diagnostics faster and more accurate.
Visual Aids and External Resources
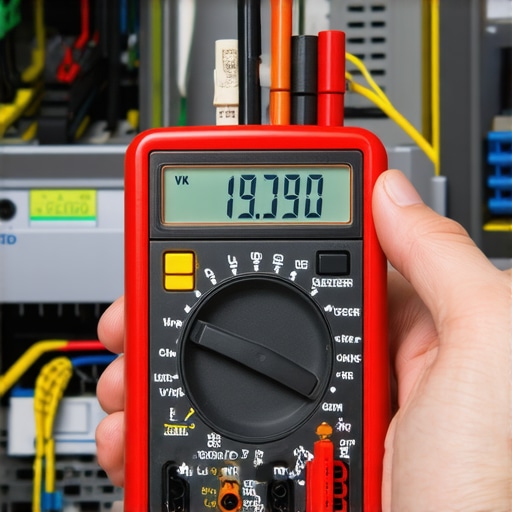
Envision a professional-grade multimeter in use—precise, reliable, and essential for DIY diagnostics. A good image here would be a close-up shot of a digital multimeter testing a dishwasher’s wiring connection, with clear labels highlighting measurement points. The alt text might read: "Close-up of a multimeter testing dishwasher wiring for fault diagnosis." The title could be: "Essential Diagnostics Tool for Appliance Maintenance."
Future of Dishwasher Maintenance Looks Bright
The evolution of intelligent diagnostics promises a future where appliance health is monitored constantly, reducing downtime and repairs. Already, some models incorporate sensors that alert you to irregularities before noticeable issues occur. Staying ahead of problems requires embracing these advances, but in the meantime, mastering manual testing techniques ensures your dishwasher’s performance stays reliable. One practical step is to begin regularly testing your water inlet valve and spray motor with your multimeter—an action that’s straightforward but impactful.
If you’re ready to tackle diagnostics yourself, starting with a multimeter test on your dishwasher’s heating element or switch connections can be an eye-opener. For detailed instructions, check out this comprehensive multimeter guide. Give it a try today—it’s simpler than you think, and a small investment in tools now can save you big repair bills later.
What I Wish I Knew About DIY Repairs and Warranty Limits
One of the most eye-opening lessons I learned was that not every quick fix is worth risking my warranty. Early on, I thought that tackling problems myself without understanding the full scope could save me money, but I soon realized that neglecting proper diagnostics might void my coverage. Now, I always check warranty specifics and perform thorough diagnostics before attempting repairs.
The Power of Precise Diagnostics Over Guesswork
I used to rely on guesswork, cleaning and replacing parts without truly understanding the root cause. That led to repeated repairs and mounting frustration. Since adopting tools like multimeters and following expert testing steps, I’ve saved both time and money. This approach—root cause analysis—has truly transformed my repair process and deepened my understanding of appliance health.
The Myth of the ‘Simple’ Fix That Keeps Costs Low
I once believed that a minor sticking button was just dirt, but overlooking underlying issues like corrosion or faulty components can be costly in the long run. Recognizing when a repair requires professional diagnostics has helped me avoid unnecessary expenses and prolong my dishwasher’s lifespan. For detailed troubleshooting guidance, I consult expert repair tips.
Curated Tools and Resources That Boost Confidence
Over time, I built a toolkit that includes a quality digital multimeter from Fluke, an infrared thermometer, and a repair log app. These tools give me confidence to perform routine diagnostics and catch potential problems early. Trustworthy sources like this comprehensive multimeter guide and manufacturer manuals ensure I stay informed and prepared for any repair challenge.
Embracing Action Over Fear to Maintain Appliance Health
The future of dishwasher maintenance is bright, especially with the rise of smart diagnostics. But understanding fundamental testing methods still provides tremendous value. I encourage fellow homeowners to start small—test a switch, inspect a gasket—and gradually build expertise. Taking proactive steps now, like performing regular component checks, can extend your appliance’s life and save big on repairs.
What about you? Have you ever hesitated to attempt a repair because of warranty concerns or lack of confidence? Share your experiences below, and let’s learn together!
,