

You know that frustrating moment when you’re rushing out the door, only to find your door handle wobbly, loose, and making you wonder if it might fall off completely? I’ve been there too, and let me tell you, that feeling of helplessness is a real buzzkill. One day, after a minor stumble that involved more grunting than I’d like to admit, I finally had my “lightbulb” moment: I didn’t have to call a handyman or spend a fortune. Sometimes, a quick fix is all you need, and it’s surprisingly simple.
Discovering the Power of a Fast Door Handle Repair
The truth is, that tiny wobble isn’t just annoying—it could be a sign of a bigger problem if ignored. But what truly caught my attention was realizing how many homeowners underestimate the importance of a secure handle, especially considering how much threat loose handles pose to both safety and security. Luckily, I learned that most loose door handles are fixable with a handful of basic tools and a little patience. Today, I’ll share my personal experience and the step-by-step process that got my door handle solid and reliable again.
Is This Actually Worth the Hype
I remember thinking, “Is it really that simple?” when I first saw some online tutorials. It sounded almost too good to be true. And yes, my initial mistake was trying to tighten everything without identifying the real cause—sometimes, over-tightening just makes matters worse, and I ended up with a stripped screw or worse. I learned early on that patience, the right tools, and some basic knowledge go a long way. For more insights on diagnosing appliance issues before jumping into repairs, check out [how appliance diagnostics can save your warranty benefits](https://applianceoutletpro.com/how-appliance-diagnostics-can-save-your-warranty-benefits). If you’re tired of feeling helpless every time a handle wobbles, keep reading—I promise, this quick fix will change the way you handle home repairs.
Identify the Root Cause
Before diving into repairs, examine the door handle for visible looseness or damage. In my experience, a loose screw often causes wobbling, but sometimes the handle itself is worn out. Once I noticed the handle shift when I applied pressure, I knew it was time to dig deeper. Think of it like diagnosing a car problem: you need to pinpoint the faulty part before fixing it.
Gather Your Tools
In most cases, you’ll need a Phillips screwdriver, a replacement screw or handle (if damaged), and possibly a hex key. I keep a small toolkit in my drawer for such repairs. Having the right tools is like a mechanic having their wrench set—without them, fixing becomes guesses and frustration.
Secure the Handle
Remove the Door Handle Plate
Start by unscrewing the handle cover or plate. Keep track of all screws—missing one can reintroduce wobbling. When I replaced a handle last summer, I laid out all screws on a cloth to avoid misplacing them. Once the cover is off, inspect the internal components for wear or looseness.
Check and Tighten Screws
If screws are loose, tighten them firmly but avoid over-tightening, which can strip the threads. I once over-tightened and ended up with a stripped screw—don’t be me! If screws are missing or stripped, replace them with similar-sized ones from a hardware store.
Replace Worn Parts
If the internal mechanism is damaged, consider replacing it. Loosen any screws securing the handle or latch assembly, then disconnect and remove the faulty parts. For example, I replaced a worn-out latch cable which was slightly frayed, restoring the handle’s stability. Think of it as swapping out a worn belt in a machine—it keeps everything running smoothly.
Reassemble and Test
Put everything back in reverse order. As I reattached my handle, I made sure all screws were snug and that the handle operated smoothly. Test the handle multiple times to ensure stability. If wobbling persists, revisit the screws or consider replacing the entire handle set. Keep in mind, a secure handle isn’t just about convenience—it’s crucial for safety and security, especially if your door leads outside or houses valuable items.
Maintain for Longevity
Regularly check and tighten handle screws as part of your home maintenance routine. This quick step can prevent future wobbling and extend the life of your hardware. Remember, like all appliances, handles benefit from gentle care and prompt repairs.
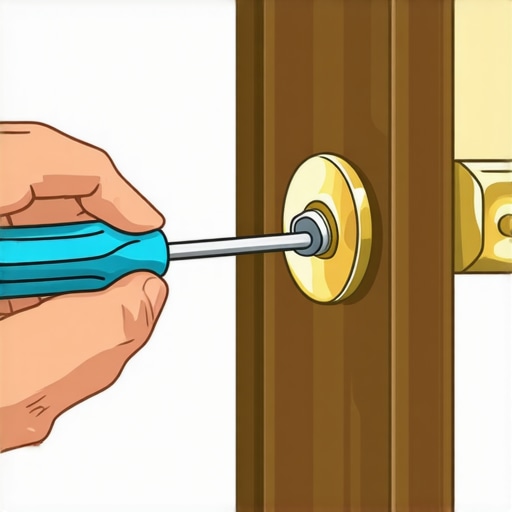
Illustration showing the steps to remove and tighten a door handle screw using a Phillips screwdriver.
When it comes to appliance repair, many homeowners believe the common myths circulating online or among friends. For instance, the idea that all dishwasher issues are easily fixable by simply replacing the parts that seem broken is a misconception I frequently encounter. In reality, diagnosing dishwasher problems requires a nuanced understanding of the appliance’s internal components and their interactions. Rushing to swap parts without proper diagnostics can lead to unnecessary expenses and even void your warranty.
A prevalent trap is assuming that a warranty will cover all repairs indefinitely. While warranties are valuable, they come with fine print that many overlook. For example, DIY repairs or using non-approved replacement parts can automatically void the coverage, leaving you unprotected when a true fault occurs. According to a white paper by appliance repair experts, understanding the terms and conditions of your warranty can save you significant headaches and costs down the line.
A common myth is that if the dishwasher isn’t dead, it’s not worth repairing. Conversely, I’ve seen cases where minor electronic glitches were mistaken for major failure, leading to costly replacements. Using advanced diagnostics—like those outlined in [how appliance diagnostics can save your warranty benefits](https://applianceoutletpro.com/how-appliance-diagnostics-can-save-your-warranty-benefits)—helps in accurately identifying issues. This prevents unnecessary part replacements and preserves your warranty by ensuring repairs are properly documented.
For experienced DIYers, it’s tempting to attempt complex repairs based on YouTube tutorials. However, this can be risky if you don’t fully understand the appliance’s circuitry. A simple example is resetting electronic control boards, which may seem straightforward but often requires precise multimeter testing to avoid damaging sensitive components. Curious about more advanced troubleshooting? I recommend exploring [troubleshooting dishwasher problems with expert diagnostics](https://applianceoutletpro.com/troubleshooting-dishwasher-problems-expert-diagnostics-repair-tips) to avoid costly missteps.
Have you ever fallen into this trap? Let me know in the comments. Remember, proper knowledge and diagnostics not only extend your appliance’s lifespan but also protect your warranty rights, ensuring you get the best value for any repairs needed.
Prioritize Routine Maintenance to Extend Your Dishwasher’s Life
Consistent upkeep is vital for preventing small issues from turning into costly repairs. Regularly inspecting and cleaning parts such as filters, spray arms, and seals helps maintain optimal performance. Incorporate a bi-annual deep clean using a specialized dishwasher cleaner to remove mineral deposits and grime that can impair operation. Don’t forget to check the water inlet valve for blockages or leaks—these small steps can significantly improve longevity.
Essential Tools for Effective Dishwasher Care
Having the right equipment makes maintenance straightforward and prevents unnecessary damage. I personally rely on a multimeter when diagnosing electronic components, ensuring I can identify faulty control boards or sensors accurately. A digital thermocouple thermometer helps verify the heating element’s efficiency, critical for proper cycle completion. For cleaning, a small brush and toothbrush are perfect for scrub parts like spray jets and filters without causing abrasion. Investing in a foam sealant gun can assist if you’re replacing door gaskets, ensuring airtight sealing and energy efficiency. Keep a detailed repair log—digital or paper—to track issues and maintenance routines, streamlining future diagnostics.
Utilize Diagnostic Software for Long-Term Results
Modern dishwashers often come with diagnostic modes accessible via touchpad sequences or external diagnostic tools. These modes instantly identify problems, saving time and supporting warranty claims if applicable. For more advanced diagnostics, consider a professional-grade appliance scanner that connects via Bluetooth or Wi-Fi, providing real-time data and error codes. These tools are especially valuable when issues are intermittent, or visual inspection doesn’t reveal the root cause. Over time, integrating diagnostic software into your routine helps anticipate failures, avoiding unexpected breakdowns and costly repairs.
Steps to Keep Your Appliances Under Warranty
Proper upkeep and documented diagnostics can preserve your warranty coverage. Always follow manufacturer maintenance schedules, which are usually listed in the user manual. When issues arise, performing basic diagnostics—like testing the heating element’s resistance with a multimeter—can show that you’ve attempted proper troubleshooting, supporting your warranty claims. Be cautious about DIY repairs; use only manufacturer-approved parts to prevent voiding coverage. Regularly review your warranty terms via this guide to understand what is and isn’t covered.
Future Trends in Appliance Maintenance and Diagnostics
Advancements in IoT and AI are poised to revolutionize appliance diagnostics. Imagine smart dishwashers that self-diagnose issues in real-time and notify you via smartphone, guiding maintenance steps or even requesting professional service automatically. Staying ahead requires adopting compatible tools now—like diagnostic apps and wireless sensors—to leverage these innovations when they become mainstream. Embracing these tools now ensures your appliances stay in top shape and continue to serve reliably for years to come.
How Do I Maintain My Dishwasher Over Time
The key to longevity is consistent, proactive maintenance combined with accurate diagnostics. Regularly inspect seals, filters, and spray arms; run cleaning cycles with descaling agents; and stay attentive to error messages or unusual noises. Document any diagnostics performed, and don’t hesitate to reach out for professional assessments when unsure—visiting this contact page can help connect you with specialist support. Remember, staying vigilant today prevents major repairs tomorrow.
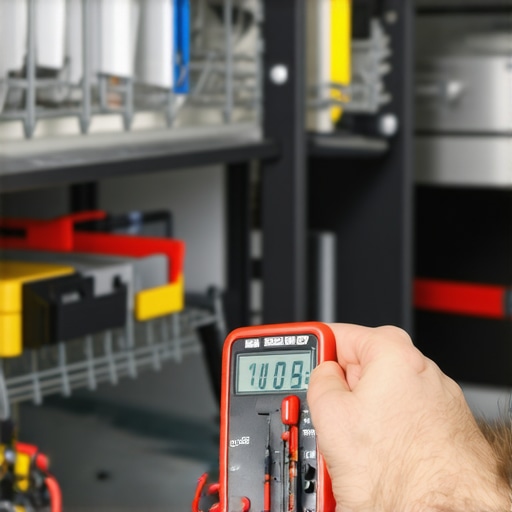
Close-up image of a technician using a multimeter to test a dishwasher’s control panel, highlighting essential diagnostic practices.
Start incorporating a multimeter check into your routine—testing your control board can be quick and saves you from bigger surprises later. This small step ensures your appliance remains reliable and under warranty. Stay prepared, and keep your dishwasher running flawlessly for years!
When I first started troubleshooting dishwashers, I fell into the trap of assuming every issue was a quick fix or a matter of replacing parts blindly. My biggest lesson? The importance of accurate diagnostics and understanding your appliance’s true needs. Once I learned to read error codes thoroughly and use proper testing methods, the whole repair process became less daunting and more predictable. Investing in tools like a multimeter and learning to interpret diagnostic modes transformed my DIY efforts from guesswork into precise, confident actions. Now, I approach each repair with patience and knowledge, saving time and money while preserving warranties. If you’re eager to improve your repair skills, embracing a diagnostic-first mindset offers benefits you can’t find in generic advice—trust me, it’s a game-changer.