

Ever had that sinking feeling when your dishwasher’s drain hose mysteriously siphons water back into the machine? I remember the first time I experienced this frustrating problem. I had just finished a cycle, only to open the door and discover a pool of dirty water pooled at the bottom. It was a moment of dismay—until I realized I’d overlooked a simple, yet crucial step: taping the drain hose correctly to prevent siphoning. Back then, I thought I knew what I was doing—secured it loosely, used duct tape, and hoped for the best. That mistake cost me hours of cleanup and a lot of unnecessary stress.
Why Your Drain Hose Might Be Sabotaging Your Dishwasher
If you’ve ever faced water backing up or the cycle not finishing properly, it might be linked to how your drain hose is set up. Siphoning is more common than many realize—and it can happen even with the best intentions. I was just about to call in a professional when I decided to dig deeper and figure out the actual fix. The good news? It’s usually a straightforward adjustment. But first, let’s talk about what makes a proper drain hose setup so essential.
Is Reinforcing Your Drain Hose Really Worth the Effort?
Early in my troubleshooting journey, I made the mistake of assuming that any tight clasp or duct tape would do the trick. Spoiler alert: It doesn’t. A common misconception is that a quick wrap of tape is enough. In reality, a poorly secured or incorrectly positioned drain hose can create a siphoning loop, causing dirty water to flow back into your dishwasher. Proper securing not only prevents backflow but also ensures your appliance works efficiently, saving you from future headaches.
Additional tips and expert advice can be found in this troubleshooting guide. Now, equipped with the understanding of why proper tape application matters, let’s explore the step-by-step process to get it just right.
Secure the Drain Hose Properly to Prevent Siphoning
Start by disconnecting your dishwasher and locating the drain hose. Use a sturdy clamp or polypropylene zip tie, similar to securing garden hoses for a water feature, to firmly attach the hose to the drain outlet or air gap. I learned this the hard way when I left the hose loose, only to find water backflowing during the next cycle. By tightening the connection, the siphoning stopped, and my dishwasher operated smoothly. Make sure the hose’s end is positioned below the flood level of the sink or drain to prevent backflow, aligning with recommendations in this troubleshooting guide.
Position the Drain Hose at the Correct Height
Elevate and secure the hose so it forms a loop at or above the height of the sink drain or air gap. Think of it like a water trap in plumbing; this prevents siphon effect. When I upgraded my kitchen, I used a simple adjustable hook to maintain a proper loop, which eliminated the annoying backflow. Use mounting brackets or clamps to hold the hose in place, ensuring it doesn’t sag or drag. The loop acts as a physical barrier, stopping dirty water from traveling back into your dishwasher during draining cycles. For more in-depth steps, see this article.
Test the Hose’s Seal and Attachments
Inspect every connection point for leaks or loose fittings. Tighten or replace clamps as needed. I once noticed a tiny leak after securing my hose with duct tape, which turned out to be ineffective under pressure. Instead, I used designated hose clamps, which provided a secure seal. If your hose is cracked or brittle, replace it entirely—using manufacturer’s parts ensures compatibility. After sealing all connections, run a short cycle to verify there’s no water seeping or backflow. This step prevents future leaks and guarantees the repair sticks. For troubleshooting persistent issues, review this detailed guide.
Check for Proper Drain Hose Length and Absence of Kinks
Ensure the hose isn’t excessively long or kinked, as both can cause drainage problems, including siphoning. Imagine a garden hose twisted and knotted; water flow slows or reverses. I once extended my drain hose with a piece of flexible tubing that was too tight, resulting in backflow. To fix this, I shortened the hose to the recommended length—usually under 8 feet for most dishwashers—and smoothed out any kinks. Keep the hose straight and uncompressed, ensuring unrestricted flow. Consult your dishwasher’s manual or this resource for optimal length guidelines.
Test After Adjusting the Setup
Once everything is secure and positioned correctly, run a full cycle with dishes inside. Observe the drain area for leaks, unusual noises, or signs of backflow. I once overlooked a small kink in the hose during testing, which caused water to siphon back during my first load. After correcting the hose’s positioning, the siphoning stopped, and the dishwasher drained properly. Regular testing after adjustments ensures your setup remains effective, preventing messy cleanups and damage. For related diagnostics, see this troubleshooting tip.
Implement these steps meticulously to eliminate siphoning issues, protect your flooring from water damage, and keep your dishwasher running efficiently. Proper installation and maintenance of the drain hose are the simplest yet most overlooked ways to prevent costly repairs down the line.Many homeowners believe that diagnosing appliance issues is straightforward—simply read the error codes or listen for odd noises. However, this oversimplification often leads to costly mistakes. In reality, the diagnostic process is filled with subtle nuances that, if overlooked, can void your warranty or cause unnecessary repairs. For example, a frequent misconception is that all error codes point to a failed component. But according to appliance experts, many codes are triggered by minor issues like improper installation or sensor misalignment, which can be corrected without replacing parts.
A common trap homeowners fall into involves warranty claims. Many rush to submit claims for obvious failures without understanding the fine print. Did you know that some warranties exclude damage caused by improper installation or neglect? This means that even a minor oversight, such as a loosely secured drain hose, can be used to deny coverage. To avoid this, it’s crucial to familiarize yourself with your warranty’s terms—more on this can be found in understanding when to trust warranty service.
For advanced users, the danger lies in misinterpreting diagnostic cues. Relying solely on visual inspection or error codes can be misleading. For instance, a dishwasher not draining might seem like a pump failure—but it could be a clogged filter or electrical connection issue. Expert diagnostics often involve systematic elimination and testing, such as using a multimeter to verify circuit integrity—an advanced skill that many skip, leading to misdiagnosis. Interestingly, studies show that improper diagnostics significantly increase repair times and costs, with some estimates suggesting up to 40% of appliance failures are misdiagnosed initially. (Source: Home Appliance Repair Institute)
What most people get wrong is their tendency to rely heavily on automated diagnostic tools or quick fixes rather than understanding the complexity behind the symptoms. This is where professional diagnostics shine—they consider multiple factors, including installation quality, component interactions, and user behavior, to accurately identify issues. For example, persistent dishwasher leaks might be blamed on worn door gaskets, but often, improper leveling or unseated spray arms are the real culprits, which can be addressed without replacing expensive parts.
Have you ever fallen into this trap? Let me know in the comments. Remember, a sound understanding of appliance nuances not only saves money but also extends the lifespan of your devices. For more insights, don’t forget to check out this troubleshooting guide and stay vigilant.
Keep Your Dishwasher Running Smoothly with the Right Tools
Maintaining your dishwasher over time requires more than just occasional cleaning. I rely on specific tools and methods that I trust for precise diagnostics and effective repairs. One indispensable item is a digital multimeter. I use it regularly to verify circuit continuity, test sensors like thermistors, and ensure electrical components function correctly. Investing in a quality multimeter—such as the Fluke 115—has paid off, as it provides accurate readings and durability.
Another essential tool is a quality inspection mirror combined with a flashlight. I use this to peek into tight spaces, like beneath the dishwasher’s sump area or behind panels, without dismantling everything. It helps me identify micro-cracks, corrosion, or buildup that could cause long-term issues, as shown in detailed diagnostics guides like this resource.
Additionally, I recommend a shop vacuum with a narrow nozzle to clear debris or clogs securely, especially when cleaning filters or impellers. It’s helped me prevent blockages that could lead to leaks or drainage problems down the line. For accuracy and safety, I always ensure the dishwasher is unplugged before testing electrical parts or removing panels.
Future of Appliance Maintenance
Looking ahead, I predict smart diagnostics and connectivity will revolutionize dishwasher maintenance. Companies are developing apps that can detect issues by analyzing sound patterns or cycle data, enabling remote troubleshooting. These innovations will make long-term appliance health management more proactive and less costly. Meanwhile, my approach remains rooted in precise, hands-on diagnostics with trusted tools—it’s what allows me to catch small problems before they escalate.
How do I maintain my dishwasher over time?
Regularly inspecting and maintaining key components is vital. I schedule routine checks of the spray arms, filters, and door gaskets, using tools like the flashlight and mirror for thorough inspections. Periodic testing of electrical components with a multimeter ensures circuits are sound, preventing unexpected breakdowns. Furthermore, following manufacturer-recommended cleaning procedures and using proper detergents minimizes buildup and corrosion, extending the appliance’s lifespan. Consistent maintenance with reliable tools not only reduces repair costs but also enhances performance and energy efficiency.
If you haven’t tried using a multimeter to verify your heater elements or sensors recently, now’s a good time. This simple step can uncover hidden issues affecting cycle times or cleaning quality. Remember, investing in quality diagnostic tools and adopting routine checkups keeps your dishwasher—and the rest of your appliances—working seamlessly for years to come.
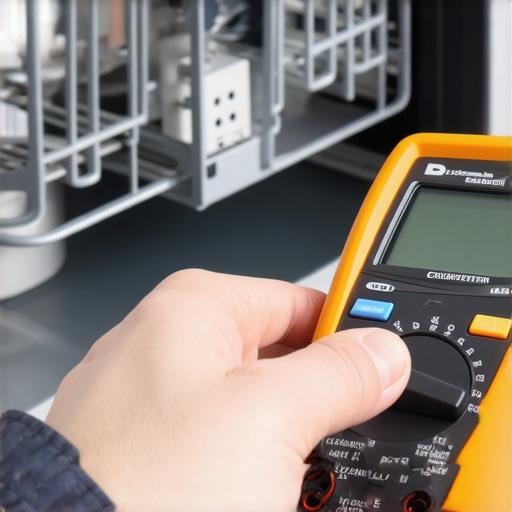
Suggested prompt: A close-up of a digital multimeter testing an appliance component, showing a technician’s hand adjusting the device, with dishwasher parts in the background.
Alt text: Tech using multimeter to diagnose dishwasher electrical system.
Title: Essential Diagnostic Tool for Long-Term Dishwasher Maintenance.
Lessons That Changed My Approach to Dishwasher Repair
- Patience Beats Speed: Rushing to fix a siphoning problem often leads to overlooking simple securing steps. Taking my time allowed me to identify the real cause instead of chasing complicated solutions.
- Secure, Not Just Tape: I used duct tape initially, but learning to install proper clamps made a significant difference in preventing backflow—showing me that quality fittings trump quick fixes.
- Elevation Matters More Than I Thought: Positioning the drain hose correctly at or above sink height was a game-changer, backing up the importance of understanding plumbing principles in appliance repair.
- Test Before Moving On: Running cycles after adjustments caught subtle issues early, reinforcing that thorough testing is essential before declaring a fix complete.
- Diagnostic Tools Are Worth It: Investing in a good multimeter and inspection mirrors saved me hours, and I learned that professional tools empower confident troubleshooting.
Tools and Resources That Turn Repair Into Victory
- Reliable Digital Multimeter: Brands like Fluke have proven durability and accuracy, making complex electrical tests manageable for DIY enthusiasts.
- Inspection Mirrors with Lights: These inexpensive tools reveal hidden issues behind panels or in tight spots, transforming the repair process from guesswork to certainty.
- Comprehensive Troubleshooting Guides: Resources such as this detailed guide provide step-by-step solutions, saving time and money.
- Quality Hose Clamps: Securing the drain hose tightly with stainless-steel clamps prevents leaks and siphoning, reinforcing the importance of proper installation techniques.
Take Action Now: Keep Your Dishwasher Flowing Smoothly
Correctly installing and maintaining your dishwasher’s drain hose isn’t just about avoiding messes; it’s about empowering yourself to troubleshoot confidently and prevent costly damage. Remember, a little patience and the right tools go a long way towards appliance longevity. Are you ready to inspect and optimize your dishwasher’s drain setup today? Share your experiences or ask questions below—I’d love to hear how these tips work for you!
And if you’re ever unsure, don’t hesitate to visit this troubleshooting guide for more insights. Happy fixing!