

I vividly remember the moment I realized I’d been neglecting a crucial part of my dishwasher routine. After a long day, I loaded the dishwasher, pressed start, and then heard that annoying, persistent beeping at the halfway point. Frustrated, I opened the door to find a puddle of water pooled at the bottom. That experience was my lightbulb moment—discovering that the real culprit wasn’t just a clogged filter but a hidden, often-overlooked component that can cause serious headaches if ignored.
The Fix Is Closer Than You Think
Many homeowners fixate on obvious issues—blocked spray arms or worn-out seals—yet forget about a tiny, behind-the-scenes part that keeps everything running smoothly: the air gap. It’s a small device located under the sink or behind the dishwasher that prevents contaminated water from flowing back into your appliance. Neglecting to clean the air gap can lead to water backing up and potentially damaging your machine or creating a health hazard. And trust me, I learned this the hard way, almost facing expensive repairs because I didn’t pay attention to this overlooked detail.
Could This Be Sabotaging Your Dishwasher’s Performance?
Here’s the thing—many homeowners assume that regular cleaning of visible parts is enough. But a neglected air gap can silently cause drainage issues, funky odors, and even water leaks. I had a friend who replaced her entire dishwasher only to find that the problem persisted—guess what? She hadn’t cleaned her air gap. It’s a simple step that can save you money and prolong the life of your appliance.
Is Cleaning the Air Gap Really Necessary?
Until I faced a similar problem, I thought the same. But according to professional diagnostics experts, a dirty air gap is a common culprit behind drainage failure. Cleaning it regularly—just a quick wipe or flush—can keep your dishwasher functioning efficiently and prevent costly repairs. Plus, it’s easier than you might think. I’ll walk you through the exact steps soon. Are you tired of dealing with drainage issues that seem to crop up out of nowhere? If so, keep reading—this small but mighty part might just be the hero you’ve been overlooking.
Locate the Air Gap and Prepare Your Tools
First, identify the air gap device, usually a small cylindrical component with a cap, located above the sink or behind the dishwasher. Wear gloves to prevent contact with dirty water. Keep a towel nearby for spills and a screwdriver if needed to remove the cap.
Remove the Air Gap Cover and Inspect for Blockages
Carefully unscrew or pull off the cap. Check for visible debris, soap scum, or stubborn gunk. If the cover is stuck, gently twist it or use pliers. Remember, over-tightening during installation can make removal tricky later—be gentle.
Flush the Air Gap and Clear Internal Clogs
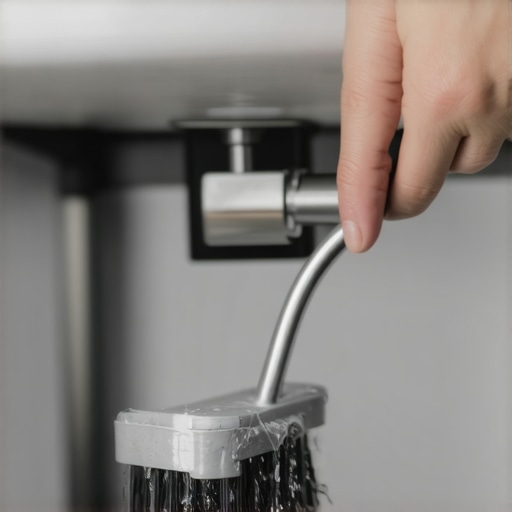
Attach a flexible pipe or a turkey baster to a hose and insert it into the opening. Flush with clean water or a vinegar solution to dislodge buildup. For stubborn clogs, insert a small brush or pipe cleaner to scrub inside. This is similar to the “hidden gasket cleaning trick” that pros use to keep appliances running smoothly.
Use Food Coloring to Detect Gaps in the Door Gasket
While not directly related to the air gap, adding food coloring to your dishwasher detergent can help spot leaks or gaps in door seals, which can compound drainage problems. This little trick can save you from more invasive repairs later.
Reassemble and Test for Proper Drainage
Once cleared, replace the cap securely. Run a short cycle with no dishes and observe the drainage; water should flow out smoothly without backing up. If issues persist, it might be time to consider professional diagnostics—learn more about how appliance diagnostics can save your warranty.
Maintain Regularly to Prevent Future Clogs
Schedule monthly checks and flushes to keep the air gap free of debris. This proactive approach avoids water backing up and prevents costly repairs, similar to routine gasket cleanings that pros recommend. For detailed troubleshooting tips, visit these expert repair tips.
Many homeowners assume that troubleshooting their dishwasher or claiming warranty repairs is as straightforward as following the manuals or trusting the technicians at face value. However, this oversimplification hides critical nuances that can make or break your chances of a successful repair or warranty coverage. As an industry insider with years of hands-on experience, I’ve seen countless misconceptions that can lead even savvy consumers astray, costing them time and money.
Myth Busting: The Diagnostic Process Isn’t Just About Resetting Codes
One common misconception is that modern sensors and control boards automatically handle diagnostics, so any issue logged will be self-explanatory and instantly fixable. But in reality, many appliance errors are symptoms of deeper, often overlooked problems—like corrosion in wiring harnesses or subtle water pressure drops—not simply a faulty sensor. Relying solely on diagnostic codes without understanding the underlying mechanics can lead to incorrect repairs, which may void warranty coverage or cause recurring failures. Experts recommend understanding the nuances of diagnostics, delving into internal sensor behaviors, and even manually testing components with multimeters for precise assessments. For a detailed guide on this, see how appliance diagnostics can save your warranty benefits.
Beware the Warranty Trap: When Service Visits Might Not Cover Your Damage
Many homeowners assume that a warranty guarantees free repairs whenever an appliance malfunctions. But this is often a trap—warranties typically exclude damage caused by user error, neglect, or external factors like rodents or hard water buildup. Unbeknownst to many, improper installation or failure to perform regular maintenance can void the warranty, leaving you responsible for costly fixes. Moreover, some technicians recommend replacing entire units rather than diagnosing specific issues—an approach that can be unnecessary if you understand the diagnostic process better. For comprehensive insights, visit when to trust a warranty for dishwasher repairs.
Are You Overlooking the Nuances That Make Diagnostics Effective?
Advanced repair requires more than just replacing parts; it involves interpreting subtle signals like variance in motor sounds, temperature fluctuations, or minor water leaks. For example, persistent drainage issues might seem straightforward but could be the result of internal gaskets or hidden clogs beyond the visible filter. Recognizing these nuances, such as how sediment buildup affects heating elements, elevates your troubleshooting from guesswork to an expert level. I recommend regularly testing components using precise tools and techniques, such as the quick tools for testing heating elements.
Finally, understanding the intricacies of internal sensors and control systems empowers you to distinguish between superficial fixes and root causes, reducing unnecessary service calls and cost. Consider how detailed sensor testing, like inspecting turbidity sensors or float switches, can prevent false alarms and ensure genuine issues are addressed promptly. Explore these expert repair tips for more advanced troubleshooting strategies.
Have you ever fallen into this trap? Let me know in the comments.
< >
>
Tools That Keep Your Dishwasher Running Smoothly
Maintaining a dishwasher’s optimal performance relies heavily on having the right tools for diagnostics and routine checks. My top recommendation is investing in a high-quality multimeter, such as the Fluke 117. This device allows me to precisely test motors, sensors, and control boards, identifying issues before costly failures occur. I personally calibrate and test wiring harnesses and control modules with this multimeter, which helps me distinguish between electrical faults and mechanical problems effectively.
Alongside a multimeter, I use a flexible pipe cleaner or a small brush specifically designed for cleaning air gaps and internal conduits. Regularly flushing the air gap is one of the simplest yet most overlooked maintenance steps. For thorough testing of heating elements, I employ a simple, affordable tool—a temperature sensor gun like the HygroSet Infrared Thermometer—which helps verify if your dishwasher is reaching the right temperature consistently. You can find detailed instructions on testing heating elements with such an inexpensive device here.
Software Solutions for Diagnostic Clarity
Software plays an increasingly vital role. I rely on diagnostic apps compatible with smart appliances or USB adapters that connect to control boards, providing instant error codes and troubleshooting guidance. These tools cut down diagnostic time significantly and often reveal subtle fault patterns invisible to the naked eye.
Keeping It Working Over Time
In my experience, the most effective way to sustain long-term performance is through scheduled maintenance, such as cleaning filters, inspecting hoses, and running diagnostic checks at least every three months. Scheduling these steps helps catch problems early > preventing minor issues from turning into major repairs. Remember to also revisit internal components like door seals and spray arms periodically, as buildup and wear can cause performance drops.
As appliance technology advances, expect diagnostics to become more integrated with IoT systems, allowing remote monitoring and predictive maintenance. Keeping abreast of these developments will give you an edge in appliance care.
How do I maintain my dishwasher’s diagnostics over time?
Regularly updating your appliance’s firmware and familiarizing yourself with error codes through trusted resources like this guidance is vital. Also, investing in a multimeter with data-logging capabilities can help track performance trends over weeks or months, revealing issues before they escalate. Practicing routine checks with these tools allows you to act proactively, minimizing repairs and maximizing warranty benefits.
Remember, consistent maintenance with the right tools isn’t just about preventing breakdowns; it’s about extending the life of your appliance while ensuring optimal operation. For an in-depth guide on diagnostics, this resource is indispensable. Try scheduling your first comprehensive diagnostic this week—your dishwasher will thank you for it!
The Biggest Lesson I Had to Learn About Appliance Diagnostics and Warranties
Early on, I believed that simply resetting error codes or replacing worn parts was enough to keep my dishwasher running smoothly. But I quickly discovered that overlooking tiny details like internal wiring corrosion or subtle water pressure shifts often led me back to the same problems, wasting time and money. My lightbulb moment was realizing that true appliance mastery requires a deep understanding of the system’s nuances, not just surface-level fixes. This insight transformed how I approach diagnostics, making me more patient, observant, and precise—a lesson I wish I had grasped sooner.
My Recommended Arsenal for Diagnosing and Repairing Dishwashers
Over the years, I’ve cultivated a toolkit that’s been invaluable. First, a high-quality multimeter like the Fluke 117 offers pinpoint accuracy when testing sensors and wiring, helping me prevent guesswork. I also swear by a flexible pipe cleaner and small brushes for cleaning hard-to-reach crevices, such as air gaps and internal filters. An infrared thermometer like the HygroSet guides me in verifying proper heating—crucial for reliable diagnostics. Lastly, diagnostic apps compatible with modern appliances provide instant error codes and patterns, saving precious troubleshooting time. These tools elevate my confidence and effectiveness, and I trust them because they’ve consistently caught subtle issues before they escalate.
The Power of Consistent, Intentional Maintenance
Taking action now can prevent future headaches. Scheduling routine checks—think of it as a health scan for your dishwasher—can reveal early signs of wear or clogging. Regularly inspecting door seals or flushing the air gap helps maintain optimal drainage and reduces the risk of water backing up or odor problems. Embracing this proactive mindset isn’t just about avoiding repairs; it’s about extending your appliance’s lifespan and ensuring your household runs smoothly. Remember, the integration of IoT diagnostics will soon make maintenance even simpler—stay curious and open to adopting new tech to keep your dishwasher in peak condition.