

I was standing in my kitchen last Tuesday, staring down at a load of glasses that looked like they had been dusted with fine gray sand. My dishwasher was humming, the water was hot, and I had just cleaned the main filter. Yet, every single cycle left my plates feeling gritty. I felt like a total failure. I even started looking at new models online, dreading the thought of filing a complex warranty claim. But then I remembered a hard-learned lesson from my early DIY days when I accidentally voided a service contract by misdiagnosing a simple clog. I decided to pull out my tools and look deeper than the manual ever suggests.
The Gross Truth Resting Under Your Spray Arm
Most of us regularly pull out the cylindrical mesh filter at the bottom of the tub, give it a quick rinse under the tap, and call it a day. I used to do the exact same thing. But there is a silent, hidden debris trap located directly behind and beneath the bottom spray arm mount that standard maintenance guides completely ignore. Over months of washing, tiny seeds, broken toothpick bits, and hardened grease bypass the main screen and settle inside this plastic housing. This build-up chokes the water pressure, preventing your spray arms from spinning properly and recirculating dirty grit all over your clean dishes. If you do not clean this specific spot, you might end up paying for costly professional diagnostics when all you really needed was a ten-minute deep clean.
Is this hidden cleaning job really worth your time?
You might be skeptical. Why would manufacturers hide a filter area if it actually needed to be cleaned? The truth is, appliance brands design machines for average use cases, and deep-clearance areas are often left out of basic user manuals to keep things simple. According to appliance engineering standards highlighted by the Applied Mechanics Division, fluid recirculation systems are highly sensitive to micro-debris accumulation at structural junction points. When this junction gets choked, the entire wash cycle suffers. Early in my homeownership journey, I actually called out a technician for this very issue, only to watch him remove one single screw, pull out a clump of petrified spaghetti, and hand me an expensive bill. It was embarrassing, but it taught me exactly where the real dirt hides.
Today, we are going to walk through how to safely access and clean this hidden debris trap yourself without damaging your machine. Have you noticed a gritty film on your dishes lately, even after cleaning your main filter? Let us get those tools ready and clear out the grime before you spend money on unnecessary repairs.
Step-by-Step Breakdown of the Ultimate Deep Clean
Cleaning this hidden zone requires a systematic approach, but do not let that intimidate you. Think of your dishwasher like a high-performance sports car; if the intake manifold is choked with dust, even the best premium fuel won’t make it move. The same applies here. If your recirculating pathway is clogged with old grease, no amount of premium detergent will clean your plates. Before you start, turn off the power at your breaker box or unplug the unit under the sink to guarantee absolute safety.
Remove the Lower Spray Arm Assembly
Open the door fully and slide the bottom rack completely out of the machine. Set it aside on a towel. In most modern models, the lower spray arm is secured by either a hand-threaded plastic nut or a simple push-and-twist lock system. Spin the nut counter-clockwise to release the arm. Once removed, you will see the central mount where water is pumped up into the spinning arm. If you have ever wondered about your wash quality, learning the simple way to check if your sprayer is spinning will give you an idea of how critical this unimpeded water pressure really is.
Extract the Structural Junction Housing
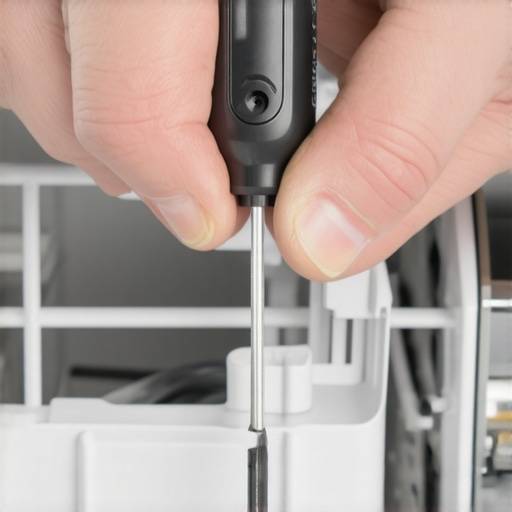
Directly beneath the spray arm mount, you will find a small plastic manifold secured by two or three Torx-head or Phillips screws. Remove these carefully. I remember doing this on my own machine three years ago; as I lifted the plastic cover, I dropped the tiny metal screw directly into the dark sump. It took me forty minutes of fishing with a magnetic wand to retrieve it, so keep a steady hand! Underneath this housing, you will find the narrow, curved channel where micro-particles accumulate. Use a damp microfiber cloth and a soft toothbrush to scrub out the hardened grease and solid debris packed inside. This area acts as a physical junction, and when it is restricted, you might notice why your dishwasher leaves a white film on everything you wash.
Clear the Micro-Nozzles
Before putting everything back together, inspect the tiny exit holes on the spray arm itself. Use a wooden toothpick or a straightened paperclip to gently clear any hard water deposits or tiny seeds lodged inside the nozzles. Flush the arm with hot water under your kitchen tap to ensure it flows freely from end to end. Neglecting this part of the job can lead to uneven spray patterns, which often forces homeowners to pay for top signs your dishwasher needs professional diagnostics when the issue is merely a set of blocked nozzles.
Reassemble and Perform a Diagnostics Test Run
Place the plastic housing back over the junction, tighten the screws firmly (but do not over-tighten, or you will crack the plastic), and reinstall the spray arm. Once secured, run a short, hot rinse cycle with a cup of white vinegar on the top rack. This helps dissolve any remaining micro-particles you loosened during the scrub. Familiarizing yourself with troubleshooting dishwasher problems expert diagnostics repair tips will help you confirm whether your machine’s cycle is performing up to factory standards.
When most people realize their appliance is acting up, their immediate instinct is to look up the customer service hotline or file an online claim. But after spending years fixing my own kitchen gear, I have learned that the relationship between DIY maintenance and professional service is a delicate dance. There is a massive, expensive misunderstanding about how manufacturers view your handiwork, and falling on the wrong side of that line can cost you hundreds of dollars.
The Great Warranty Myth That Costs Homeowners Thousands
Everyone tells you that opening up your appliance or attempting a repair yourself will instantly void your warranty. In my experience, this is a major oversimplification that keeps people from saving money. Under federal laws like the Magnuson-Moss Warranty Act, a manufacturer cannot legally deny warranty coverage simply because you opened a panel or performed basic maintenance. However, they absolutely can deny it if your DIY attempt directly caused the failure. For example, if you accidentally crack a plastic manifold while cleaning a clog, they will not cover the resulting water damage. Understanding why your warranty claim for a clogged pump might get denied is critical before you start unscrewing internal housings, as normal wear-and-tear or user neglect is rarely covered by factory plans.
Why does my service agreement cover parts but still leave me with a massive bill?
This is the ultimate “gotcha” of modern home ownership. You dig up your original paperwork, see the word “Warranty” in bold letters, and assume you are completely protected. But when the technician leaves, they hand you an invoice for travel fees and diagnostic time. It helps to study why your appliance warranty covers parts but not labor costs. Often, the manufacturer will gladly ship a free five-dollar plastic bracket but will refuse to pay the local technician’s ninety-dollar hourly rate to install it. If you want to protect your wallet, you need to understand the real difference between service plans and manufacturer warranties so you can decide when to call a pro and when to grab your own toolkit.
The Diagnostic Pitfall You Must Avoid
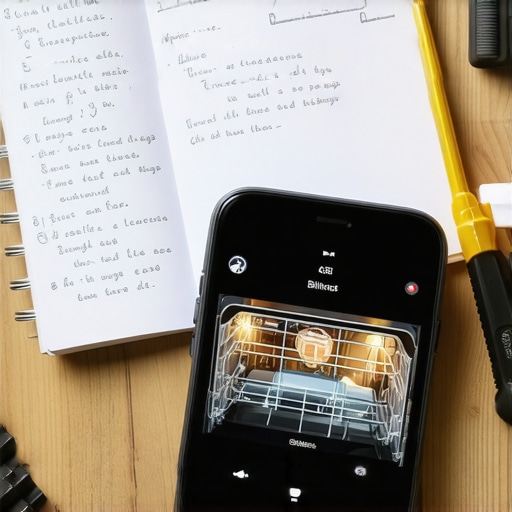
The biggest trap of all is failing to document your appliance’s bad behavior before calling for service. Techs are busy, and if your machine’s issue is intermittent, it will almost certainly behave perfectly the minute the repair expert steps into your kitchen. If they cannot reproduce the error, you will still pay their diagnostic fee, but walk away with zero repairs. Learning how to document intermittent noises for a repair claim is your best defense against this wasted expense. Take quick phone videos, write down exactly when the cycle failed, and note any flashing error sequences. Have you ever fallen into this diagnostic trap and paid for a visit that solved nothing? Let me know in the comments below, and let’s keep sharing these hard-earned homeowner lessons!
When you commit to managing your own home repairs, relying on a basic screwdriver and some guesswork won’t cut it anymore. Over the years, I have transformed my utility closet from a disorganized mess of random tools into a precise tactical kit. Having the right diagnostic gear not only saves you hours of physical labor but also ensures you have concrete evidence if you ever need to negotiate a service claim. If you want to protect your investment and avoid unnecessary service calls, mastering a few specialized instruments is the best way forward.
How do I maintain my dishwasher diagnostics over time?
Consistent, proactive tracking is the secret to long-term appliance health. Instead of waiting for a massive pool of water to warp your kitchen flooring, you should actively monitor your machine’s electronic vitals. I personally use a digital multimeter during my biannual kitchen audit to check the ohms on key components before they fail completely. By learning the only multimeter settings you need for appliance repair, you can spot a declining heating element or a weak drain pump coil months before they trigger a system-wide shutdown. Keeping a simple log of these electrical readings helps you build a solid baseline for your machine’s performance.
Beyond electrical testing, physically inspecting the structural components prevents major disasters. I recommend keeping a flexible plumbing camera in your toolkit. These affordable, USB-enabled borescope cameras plug directly into your smartphone, allowing you to inspect the dark, inaccessible areas behind the kickplate and under the sump assembly. This makes tracing the source of that mystery water leak under your kitchen sink incredibly simple, saving you from tearing out your cabinetry to find a minor drip.

The Pro-Grade Tool Arsenal Every Homeowner Needs
If you are serious about DIY diagnostics, you must move beyond the generic toolbox. For instance, I always keep a specific three-inch flexible straw handy to test the physical pressure switches. It sounds basic, but stopping the overflow testing the pressure switch with a straw is a classic technician trick that instantly tells you if your water-level sensor is physically stuck or electronically dead. Additionally, keeping a set of non-marring plastic pry tools ensures you can access delicate control panels without scratching the exterior finish or breaking delicate plastic clips.
For the electronic brain of the machine, you need to understand how the motherboard communicates. Modern appliances use light-emitting diodes to broadcast internal fault conditions. According to the comprehensive diagnostic protocols published by RepairClinic Technical Services, learning to decode flashing pattern sequences is the fastest way to pinpoint silent errors before they lock up your control interface. Taking the time for reading the hidden blinking lights on your dishwasher brain allows you to skip the expensive exploratory labor fees usually charged by local repair services.
The Future of Home Diagnostics and Your Wallet
We are rapidly moving toward an era of hyper-connected, self-diagnosing kitchen setups. In the near future, smart dishwashers won’t just stop working and show an obscure error code; they will run automatic utility checks and directly communicate with local parts distributors to order their own replacement gaskets. However, until that automated future arrives, the burden of proof still rests on your shoulders. Knowing understanding appliance diagnostics improving your warranty claims will always remain your strongest leverage against denied service plans. I highly encourage you to try the multimeter check on your heating terminal this weekend—taking that one proactive step will completely change how you view your household maintenance.
I was standing in my kitchen last Tuesday, staring down at a load of glasses that looked like they had been dusted with fine gray sand. My dishwasher was humming, the water was hot, and I had just cleaned the main filter. Yet, every single cycle left my plates feeling gritty. I felt like a total failure. I even started looking at new models online, dreading the thought of filing a complex warranty claim. But then I remembered a hard-learned lesson from my early DIY days when I accidentally voided a service contract by misdiagnosing a simple clog. I decided to pull out my tools and look deeper than the manual ever suggests.
The Gross Truth Resting Under Your Spray Arm
Most of us regularly pull out the cylindrical mesh filter at the bottom of the tub, give it a quick rinse under the tap, and call it a day. I used to do the exact same thing. But there is a silent, hidden debris trap located directly behind and beneath the bottom spray arm mount that standard maintenance guides completely ignore. Over months of washing, tiny seeds, broken toothpick bits, and hardened grease bypass the main screen and settle inside this plastic housing. This build-up chokes the water pressure, preventing your spray arms from spinning properly and recirculating dirty grit all over your clean dishes. If you do not clean this specific spot, you might end up paying for costly professional diagnostics when all you really needed was a ten-minute deep clean.
Is this hidden cleaning job really worth your time?
You might be skeptical. Why would manufacturers hide a filter area if it actually needed to be cleaned? The truth is, appliance brands design machines for average use cases, and deep-clearance areas are often left out of basic user manuals to keep things simple. According to appliance engineering standards highlighted by the Applied Mechanics Division, fluid recirculation systems are highly sensitive to micro-debris accumulation at structural junction points. When this junction gets choked, the entire wash cycle suffers. Early in my homeownership journey, I actually called out a technician for this very issue, only to watch him remove one single screw, pull out a clump of petrified spaghetti, and hand me an expensive bill. It was embarrassing, but it taught me exactly where the real dirt hides.
Today, we are going to walk through how to safely access and clean this hidden debris trap yourself without damaging your machine. Have you noticed a gritty film on your dishes lately, even after cleaning your main filter? Let us get those tools ready and clear out the grime before you spend money on unnecessary repairs.
Step-by-Step Breakdown of the Ultimate Deep Clean
Cleaning this hidden zone requires a systematic approach, but do not let that intimidate you. Think of your dishwasher like a high-performance sports car; if the intake manifold is choked with dust, even the best premium fuel won’t make it move. The same applies here. If your recirculating pathway is clogged with old grease, no amount of premium detergent will clean your plates. Before you start, turn off the power at your breaker box or unplug the unit under the sink to guarantee absolute safety.
Remove the Lower Spray Arm Assembly
Open the door fully and slide the bottom rack completely out of the machine. Set it aside on a towel. In most modern models, the lower spray arm is secured by either a hand-threaded plastic nut or a simple push-and-twist lock system. Spin the nut counter-clockwise to release the arm. Once removed, you will see the central mount where water is pumped up into the spinning arm. If you have ever wondered about your wash quality, learning the simple way to check if your sprayer is spinning will give you an idea of how critical this unimpeded water pressure really is.
Extract the Structural Junction Housing
Directly beneath the spray arm mount, you will find a small plastic manifold secured by two or three Torx-head or Phillips screws. Remove these carefully. I remember doing this on my own machine three years ago; as I lifted the plastic cover, I dropped the tiny metal screw directly into the dark sump. It took me forty minutes of fishing with a magnetic wand to retrieve it, so keep a steady hand! Underneath this housing, you will find the narrow, curved channel where micro-particles accumulate. Use a damp microfiber cloth and a soft toothbrush to scrub out the hardened grease and solid debris packed inside. This area acts as a physical junction, and when it is restricted, you might notice why your dishwasher leaves a white film on everything you wash.
Clear the Micro-Nozzles
Before putting everything back together, inspect the tiny exit holes on the spray arm itself. Use a wooden toothpick or a straightened paperclip to gently clear any hard water deposits or tiny seeds lodged inside the nozzles. Flush the arm with hot water under your kitchen tap to ensure it flows freely from end to end. Neglecting this part of the job can lead to uneven spray patterns, which often forces homeowners to pay for top signs your dishwasher needs professional diagnostics when the issue is merely a set of blocked nozzles.
Reassemble and Perform a Diagnostics Test Run
Place the plastic housing back over the junction, tighten the screws firmly (but do not over-tighten, or you will crack the plastic), and reinstall the spray arm. Once secured, run a short, hot rinse cycle with a cup of white vinegar on the top rack. This helps dissolve any remaining micro-particles you loosened during the scrub. Familiarizing yourself with troubleshooting dishwasher problems expert diagnostics repair tips will help you confirm whether your machine’s cycle is performing up to factory standards.
When most people realize their appliance is acting up, their immediate instinct is to look up the customer service hotline or file an online claim. But after spending years fixing my own kitchen gear, I have learned that the relationship between DIY maintenance and professional service is a delicate dance. There is a massive, expensive misunderstanding about how manufacturers view your handiwork, and falling on the wrong side of that line can cost you hundreds of dollars.
The Great Warranty Myth That Costs Homeowners Thousands
Everyone tells you that opening up your appliance or attempting a repair yourself will instantly void your warranty. In my experience, this is a major oversimplification that keeps people from saving money. Under federal laws like the Magnuson-Moss Warranty Act, a manufacturer cannot legally deny warranty coverage simply because you opened a panel or performed basic maintenance. However, they absolutely can deny it if your DIY attempt directly caused the failure. For example, if you accidentally crack a plastic manifold while cleaning a clog, they will not cover the resulting water damage. Understanding why your warranty claim for a clogged pump might get denied is critical before you start unscrewing internal housings, as normal wear-and-tear or user neglect is rarely covered by factory plans.
Why does my service agreement cover parts but still leave me with a massive bill?
This is the ultimate “gotcha” of modern home ownership. You dig up your original paperwork, see the word “Warranty” in bold letters, and assume you are completely protected. But when the technician leaves, they hand you an invoice for travel fees and diagnostic time. It helps to study why your appliance warranty covers parts but not labor costs. Often, the manufacturer will gladly ship a free five-dollar plastic bracket but will refuse to pay the local technician’s ninety-dollar hourly rate to install it. If you want to protect your wallet, you need to understand