

Ever been in the middle of laundry, only to have your dishwasher suddenly stop working, with no apparent reason? Or maybe you’ve opened up your appliance, stared at the broken part, and felt that rush of uncertainty—should I just call in a pro, or is this something I can handle myself? I’ve been there, and I know how frustrating it can be when appliances fail at the worst moment. The lightbulb moment for me was realizing that understanding how to test a thermal fuse for continuity isn’t just for repair pros—it’s something any homeowner can learn to diagnose and sometimes even fix.
Why Testing Your Thermal Fuse Is a Game-Changer
Thermal fuses are tiny but mighty protectors inside your appliances, preventing overheating and potential fires. When they blow, your machine often stops working altogether—no warning, just silence. The tricky part is figuring out whether it’s the fuse or something else. If you mistake a blown fuse for a different problem, you might waste time and money chasing ghosts. That’s where testing for continuity comes in. It’s like peering inside the fuse with a secret decoder ring, revealing whether it’s still good or needs replacing.
Knowing how to perform this simple test can save you hours of guesswork and avoid unnecessary repairs. Plus, it helps you understand your appliances better—empowering you to make smarter decisions, especially before calling a technician. After all, a lot of appliance failures boil down to one small part gone bad. I’ve learned that by testing the fuse myself, I often find the root cause before calling for help, saving me both time and cash. And according to experts, properly diagnosing your appliance with diagnostic tools enhances your ability to make warranty claims and prolongs the life of your devices (here’s how diagnostics can save your warranty).
Have you ever faced a situation where your appliance just refused to turn on, and you weren’t sure why? This simple test could have made all the difference.
Before diving into the testing process, I want to share a mistake I made early on—assuming that if an appliance isn’t working, the problem must be complex. Sometimes, it’s just a blown fuse, but without knowing how to test it, I’d call in a repair tech unnecessarily. I learned that testing a thermal fuse for continuity is surprisingly straightforward, and it’s a skill worth having in your DIY toolkit. Ready to learn the ins and outs? Let’s get started.
Remove the Appliance Panel Carefully
Start by unplugging your appliance from the power source to ensure safety. Use a screwdriver to remove the panel covering the thermal fuse, which is typically located near the heater element or inside the control panel. Remember, appliances like dishwashers often have accessible panels on the back or bottom. During my first attempt, I overlooked this step and nearly shocked myself—always prioritize safety.
Locate the Thermal Fuse Accurately
The thermal fuse is a small, rectangular or cylindrical component attached with two wires, often with a temperature rating printed on it. It resembles a tiny ceramic or plastic piece with metal terminals. If you’re unsure, consult your appliance’s manual or look for diagrams online. I once replaced a fuse I thought was faulty, only to find I was testing the wrong part—precision is key.
Prepare a Multimeter for Resistance Testing
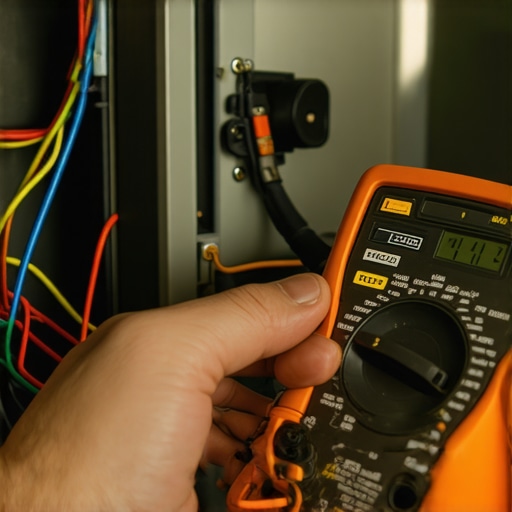
Set your multimeter to the continuity or resistance (ohms) setting. If your multimeter has a buzzer function, turn it on; it will beep if continuity exists. I carry a multimeter in my toolbox now, as it’s invaluable for quick diagnostics and helps avoid unnecessary replacements. Double-check your multimeter’s batteries and calibration for accurate readings.
Perform the Continuity Test
Connect the multimeter probes to the fuse terminals—red to one terminal and black to the other. A good fuse will show a low resistance, typically below 1 ohm, or will beep if on continuity mode. If the reading is infinite or shows ‘open circuit,’ the fuse is blown. Once, I tested a dishwasher fuse and got an infinite reading—this revealed a blown fuse that was causing the appliance to fail without any other visible damage.
Interpret Your Results and Take Action
If the fuse tests as blown, replace it with an identical part, paying attention to the voltage and current ratings. If you’re unsure about the exact fuse, visit your appliance’s manufacturer website or contact a professional. Remember, a blown fuse often indicates underlying issues like overheating or wiring faults, so consider inspecting related components. I once replaced a thermal fuse only to find a faulty thermostat causing it to blow repeatedly—a lesson in thorough diagnostics.
Reassemble and Test the Appliance
After installing the new fuse, reattach the panel securely. Plug the appliance back in and run a test cycle to ensure it operates smoothly. Make sure no error codes appear. Testing the fuse saved me from unnecessary service visits and gave me confidence in my DIY skills. For more complex issues or if the fuse keeps blowing, consulting a professional might be the best move. Visit our contact page for expert assistance or to learn about diagnostic services that can extend your appliance’s lifespan and warranty coverage.
 Many homeowners believe that troubleshooting appliances is straightforward—inspect, replace, and hope for the best. However, seasoned repair professionals understand that most misconceptions stem from oversimplified beliefs and overlooked details. One common myth is that a simple visual inspection suffices before declaring a part dead. In reality, an experienced technician always performs diagnostic tests like checking for continuity on components such as thermal fuses or testing control boards with multimeters, ensuring accurate diagnosis. Relying solely on visual cues can lead to unnecessary part replacements and, paradoxically, void warranties if the repair isn’t properly documented or performed within manufacturer guidelines.
Another advanced nuance often missed involves the implications of warranty coverage. Many assume that invoking a warranty automatically covers all repairs. Yet, warranties typically exclude damage caused by improper repairs or DIY fixes. Experts emphasize that understanding your warranty terms and documenting diagnostics, including detailed images or test results, can be pivotal—especially when contesting denials. For example, correctly testing a dishwasher’s drain pump with an insulation resistance test can prevent unjust warranty refusals.
A trap to avoid is misinterpreting diagnostic results. For instance, a multimeter reading showing ‘open circuit’ might tempt you to replace a fuse or control board without further checks. But higher resistance or intermittent faults could require more nuanced testing, like observing the component under operating conditions or using specialized tools such as thermal cameras. Failure to recognize these subtleties may lead to secondary damage or incomplete repairs, ultimately reducing your appliance’s lifespan.
Controversially, some believe that DIY diagnostics always save money. While this can be true for minor issues, complex problems involving microcontrollers or control circuitry often demand professional expertise. Relying on guesswork may result in exacerbated faults or warranty violations—especially if improper disassembly causes damage. Consulting experts through services listed at our contact page can be a smarter move.
Ever fallen into this trap of oversimplification? Let me know in the comments. Developing a nuanced understanding of appliance diagnostics not only extends your device’s life but also safeguards your warranty rights. Remember, thorough testing, proper documentation, and consulting professionals when in doubt ensure you’re making informed decisions rather than costly mistakes. For deeper insights on extending your warranty claims through effective diagnostics, visit this detailed guide.
Investing in Reliable Diagnostic Equipment
One of the most valuable tools I keep in my toolkit is a high-quality digital multimeter, preferably with auto-ranging capabilities. I personally use theFluke 117 because of its accuracy and durability. It allows me to perform precise resistance, voltage, and continuity tests on components like thermal fuses and control boards. Additionally, a good thermal camera, such as the Seek Thermal Compact, helps identify overheating parts before they fail completely. Periodic testing with these tools ensures you catch issues early, minimizing downtime and expensive repairs, and can be particularly useful when confirming the health of major components before they escalate into warranty issues (discover how diagnostics can save your warranty).
Establishing Routine Maintenance Habits
Beyond diagnostics, regular cleaning and inspection are critical. For dishwashers, I recommend monthly checks of the spray arms and filters, as clogs can cause poor performance and increase strain on the motor. Use a flexible brush or a toothpick to clear blocked nozzles—this simple habit can prevent costly repairs. For the control panels and electronic modules, keep the surfaces dust-free with a soft cloth, avoiding harsh cleaning agents that might damage sensitive components. Implementing a maintenance schedule based on your appliance usage patterns helps in prolonging the lifespan and ensuring warranty coverage remains valid. Remember, preventive care often costs less than reactive repairs and keeps your appliances performing at peak efficiency.
Modern Optimization with Smart Tools
Looking ahead, smart diagnostic devices and apps are becoming increasingly accessible. I personally use theSensibo Sky thermostat monitor and thePiVe Smart Appliance Diagnostic app to track appliance performance remotely. These tools gather real-time data on temperature fluctuations and cycle times, allowing me to detect anomalies before they manifest as failures. Integrating these systems offers long-term benefits by enabling predictive maintenance and reducing unexpected breakdowns, which is especially important for maintaining warranty validity. As technology advances, expecting future appliances to include built-in diagnostic and self-healing features will transform maintenance into a more proactive, less disruptive process.
How do I keep appliances reliable over time
Consistent inspection, understanding your diagnostic tools, and adopting routine maintenance practices are keys. For example, regularly testing heating elements with a multimeter or infrared thermometer can preempt failures. Moreover, ensuring components like water inlet valves or drain pumps are free from debris sustains optimal operation. When in doubt, consulting expert services or reviewing detailed diagnostic guides—such as our comprehensive diagnostics overview—can help you make informed decisions. Try scheduling a monthly equipment check using your multimeter; early detection of faults can save you significant repair costs and preserve your warranty coverage.
Throughout my journey diagnosing and repairing appliances, I’ve uncovered that the deepest insights often come from the moments when everything seemed to go wrong. One of the most valuable lessons I learned about appliance diagnostics, especially when testing thermal fuses or other critical components, is that the process is as much about patience as it is about technical skill. For instance, I once replaced a fuse only to find later that the real culprit was a wiring fault I overlooked; it was a reminder that diagnostics require a holistic approach—not just testing isolated parts. Another insight is that investing in quality diagnostic tools like a reliable multimeter or thermal camera pays dividends, helping prevent unnecessary repairs and preserving warranty benefits. Trusting reputable sources for guides and tutorials has also transformed my troubleshooting confidence, enabling me to handle complex issues that previously seemed daunting. Ultimately, these lessons emphasize that mastery in appliance diagnostics combines practical experience, proper tools, and a growth mindset—making DIY repairs not just feasible but fulfilling.
My Secret Hacks for Smarter Appliance Troubleshooting
Using high-quality tools like the Fluke 117 multimeter or a thermal imaging camera has revolutionized the way I approach repairs. These devices allow me to pinpoint problems accurately, reducing guesswork and avoiding costly part replacements. Additionally, I’ve found that maintaining a detailed troubleshooting journal, including test results and photos, can be invaluable when dealing with warranty claims or consulting professionals. For guidance, trusted resources such as the comprehensive articles available at this expert guide have saved me countless hours. And don’t underestimate the power of routine maintenance—simple checks and cleanings can prevent minor issues from escalating into major repairs, often extending the life of your dishwasher and maintaining warranty coverage. Combining these strategies turns appliance repair from a chore into a skill that boosts your confidence and reduces expenses.
Step Into the Future with Confidence
Remember, becoming proficient in appliance diagnostics isn’t about being perfect but about being proactive. Each troubleshooting session brings new insights and skills, making you more self-reliant and prepared. Whether it’s testing a thermal fuse or inspecting control boards, every step you take adds to your knowledge and independence. So, why not start today? Embrace diagnostics as a fun, empowering part of maintaining your home appliances—your future self will thank you for it. Ready to tackle that next repair with newfound confidence? Share your experience or questions below, and let’s grow together in mastering appliance diagnostics and warranty knowledge.