

I remember the moment clearly—my heater started making strange noises, and I just knew something was off. That stubborn white crust had taken over the heating element, and despite my attempts to scrub it away with harsh chemicals, it remained victorious. Frustration washed over me as I realized I was caught in a never-ending battle against mineral deposits, especially calcium buildup, that clog up our beloved appliances.
Have you ever faced a similar plight? The feeling of helplessness when your heater just isn’t performing like it used to because of hard water deposits? Well, you’re not alone. Calcium buildup is a common nemesis for many homeowners, and understanding the best way to remove it can save you time, money, and the hassle of premature appliance replacements.
Discovering the Most Effective Solution for Calcium Removal
In my journey to conquer mineral deposits, I’ve learned that not all cleaning methods are created equal. Early on, I made the mistake of relying solely on vinegar, thinking it would magically dissolve the deposits. While vinegar can be helpful, it often isn’t enough for stubborn buildup. After experimenting with different techniques—including commercial descaling agents and DIY mixes—I found that a combination of mechanical scrubbing and targeted cleaning solutions yields the best results. Interestingly, according to the expert advice, hard water is responsible for significantly reducing appliance efficiency, and regular maintenance can extend their lifespan.
Is Homemade Cleaning Better Than Professional Service?
Here’s where many get skeptical. I’ve been there—wondering if a quick DIY fix will do or if I should call in a professional. Early in my experiments, I tried to save money by ignoring the problem until it worsened. That mistake led to more costly repairs later. Trust me, skipping proper diagnostics can leave hidden issues lurking, ultimately costing you more. For a comprehensive understanding of how diagnostics can protect your warranty and prevent unnecessary expenses, check out this guide. So, today, I’ll walk you through the most effective methods I’ve found to remove calcium buildup from your heater—and how to do it safely and efficiently. Ready to reclaim your appliance’s performance? Let’s dive in.
Turn Off and Prepare Your Appliance
Before starting, unplug your heater and let it cool down completely. Remove accessible panels or parts following your manufacturer’s instructions, ensuring your safety. I once skipped this step and burned my hand on a hot surface, so remember, safety first.
Identify the Areas with Mineral Deposits
Inspect the heating element and surrounding areas for white crusty deposits. These mineral deposits are usually stubborn and require targeted removal. Using a flashlight or a mirror can help you see hidden spots; I used my phone’s flashlight and discovered deposits I hadn’t noticed before.
Apply a Descaling Solution
Use a Commercial Descaler or Homemade Mix
Prepare a descaling solution using white vinegar diluted with water at a 1:1 ratio or purchase a commercial descaler designed for appliances. Pour the solution into the heating chamber or apply it directly onto the affected parts, ensuring full coverage. I used vinegar, and after soaking for 30 minutes, the deposits softened noticeably.
Let it Sit and Loosen Deposits
Allow the solution to sit for 30-60 minutes. During this time, the acetic acid works to dissolve the calcium buildup. Be patient—rushing this step may result in less effective cleaning.
Mechanical Scrubbing for Stubborn Buildup
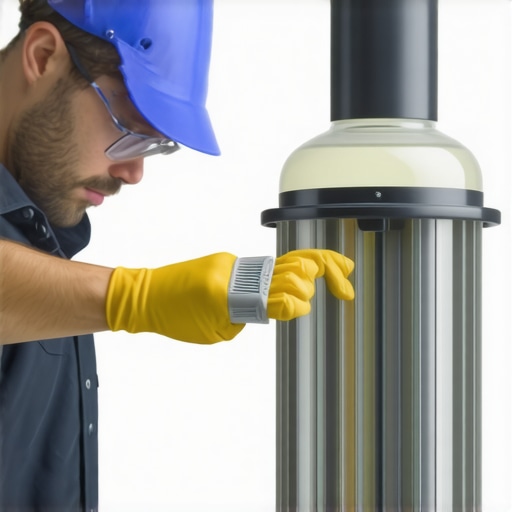
Use a non-abrasive brush or a plastic scrubber to gently remove loosened deposits. Avoid metal tools that could damage the heating element. I gently scrubbed, and with a little effort, the crust came off easily. Remember, the goal is to dislodge deposits without damaging the surface.
Rinse and Dry Thoroughly
Use a damp cloth to wipe away residual solution and loosened deposits. Dry all parts completely before reassembling to prevent rust or future buildup. I used paper towels to ensure no moisture remained in crevices.
Prevent Future Calcium Buildup
Regular maintenance helps. Consider installing a water softener to treat hard water. Also, perform periodic inspections and cleaning—it’s like brushing your teeth regularly to avoid cavities. For a thorough understanding of how to troubleshoot ongoing issues, explore this troubleshooting guide.
Important Tips and Warnings
Never use abrasive tools or harsh chemicals that could corrode parts. Always wear gloves and safety glasses during cleaning. If deposits are extensive or stubborn, consulting a professional is advisable. Remember, misdiagnosing a faulty heating element as calcium buildup can lead to unnecessary expenses; for insights, check this article on diagnostics.
 Many homeowners assume that warranty terms are straightforward and that appliance diagnostics are always clear-cut, but in my experience, there’s a complex nuance many overlook. A common myth is that if an appliance has a fault, a simple warranty claim automatically covers repairs. However, manufacturers often have fine print that excludes issues caused by neglect, such as mineral buildup from hard water, which is frequently mistaken for a mechanical failure. According to industry experts, understanding the true scope of your warranty can save you from unexpected costs and frustration. For example, many fail to realize that improper maintenance or neglecting regular diagnostics can void warranty protection, even if the initial problem seems covered.
Why Do So Many Diagnostic Errors Occur During Repairs?
One of the subtle pitfalls is misdiagnosing the root cause of a problem. Diagnostic tools are invaluable but only as good as the technician interpreting them. For instance, a clicking noise in a dishwasher might be attributed to a worn motor, but sometimes it’s a simple debris obstruction or a faulty door latch. Jumping to aggressive component replacement without thorough diagnostics can lead you down an expensive and unnecessary repair path. A recent study from the Technical Repair Institute highlights that improper diagnosis accounts for almost 45% of warranty claim rejections, emphasizing the importance of correct fault identification. To improve your chances of successful warranty claims, investing in proper diagnostics—either through professional services or by learning how to use diagnostic tools effectively—is crucial. Discover how expert diagnostics can protect your warranty at this resource. Also, knowing when to trust your warranty is vital; sometimes, manufacturers’ assessments are incomplete or biased. Reliable information about such processes can be found at this guide. Remember, understanding these nuances doesn’t just save money—it prevents unnecessary appliance replacements and extends the lifespan of your machines. If you’re unsure about your diagnostics or warranty coverage, consider professional evaluation before proceeding. To further grasp advanced diagnostics and ensure your warranty stays intact, explore these repair tips. Don’t fall into the trap of assuming all faults are straightforward—deep knowledge and precise diagnostics are the keys to smarter repairs.
Invest in Diagnostic Tools for Reliable Maintenance
One of the most invaluable investments I’ve made is a high-quality digital multimeter. It’s not just for electricians; it helps diagnose heating elements, control boards, and electrical connections in appliances. I prefer a multimeter with at least a 600V range and an autoranging feature for precision and ease of use. Having this tool has saved me hours of troubleshooting and prevented unnecessary part replacements. For instance, testing a heater’s continuity or verifying voltage supply can be done swiftly, reducing downtime and ensuring accurate diagnostics. Remember, proper diagnostics not only extend your appliance’s life but also safeguard your warranty, especially if you understand the ins and outs through comprehensive guides like this resource.
Lessons That Changed My Approach to Repairs
One of the most eye-opening lessons I learned was that rushing into repairs without proper diagnostics can cost you more in the long run. I once replaced a heating element believing it was the culprit, only to find out later that a faulty control board was the root cause. This experience taught me the importance of thorough testing and understanding the underlying issue before jumping to conclusions.
Another insight was the myth that DIY fixes always save money. While some repairs are straightforward, others, like complex capacitor issues, require specialized tools and knowledge. Investing in diagnostic tools might seem costly initially, but it pays off by preventing unnecessary replacements and ensuring accurate repairs.
Lastly, I realized that understanding your warranty’s terms and limitations is crucial. Many overlook fine print that excludes damage from neglect or hard water buildup, which can invalidate claims. Knowing these nuances helps you advocate for your rights and avoid surprises during the repair process.
The Tools and Resources That Elevated My Repair Game
My top recommendation is a high-quality digital multimeter. It’s invaluable for testing electrical components like heating elements and control boards. I trust brands like Fluke because of their durability and precision, which makes troubleshooting much more manageable.
For deeper insights, I rely on comprehensive guides such as this resource. It explores how proper diagnostics can safeguard your warranty and extend your appliance’s lifespan.
Additionally, diagnostic apps compatible with smart appliances have become game-changers, providing quick error codes and troubleshooting tips. Combining these digital tools with traditional testing gives me confidence in every repair.
Last but not least, engaging with online communities and forums has connected me with experienced technicians willing to share tips and troubleshooting stories. Sometimes, a fresh perspective is the missing key to solving stubborn issues.
Empower Yourself to Tackle Repair Challenges
Tackling appliance repairs with confidence begins with understanding diagnostics and respecting your warranty. Every challenge you face is an opportunity to learn something new—don’t shy away from exploring and asking questions. The more knowledgeable you become, the better equipped you’ll be to maintain your appliances and protect your financial investment.
Are you ready to take control of your appliance repairs? Share your experiences below or ask questions—I love hearing how others are mastering their repairs and diagnostics!
.