I remember the exact moment when my dishwasher started acting up—filling with water, then stopping mid-cycle, and producing a strange grinding noise. My heart sank. After years of simple repairs, I felt helpless as I watched my once-reliable machine struggle. It hit me: I couldn’t just guess what was wrong anymore; I needed to know whether it was a pump failure or a clog.
Why Understanding Your Dishwasher’s Problems Can Save You Time and Money
Many homeowners face the same bewilderment when their appliances malfunction. Is it a worn-out pump that needs replacement, or is a stubborn clog choking up the drainage? Misdiagnosing can lead to unnecessary part replacements or, worse, overlooking the actual issue. I learned that proper diagnosis isn’t just about saving cash—it’s about extending my appliance’s lifespan and avoiding the mess of complete failure.
Is This Troubleshooting Approach Really Worth Your Effort?
Honestly, early on I made the mistake of jumping straight to replacing parts without diagnosing properly. I thought, “Pump’s making noise, so it must be dead.” Turns out, I was ignoring simple causes like minor blockages. As a result, I spent more than I needed to and even voided my warranty because I didn’t follow the proper diagnostics procedures. It’s a common mistake, and I want to help you avoid it. Understanding the difference between a pump failure and a clog is crucial—it’s the first step toward effective repair.
If you’ve ever been frustrated by a dishwasher that refuses to drain or spins but doesn’t clean, you’re not alone. These issues are often tied to the components I’ll discuss shortly. For a deeper dive into signs that indicate your dishwasher needs professional diagnostics, check out this guide: Top Signs Your Dishwasher Needs Diagnostics. Now, let’s explore how to tell the difference between these two common problems—so you can tackle them confidently.
Check for Obvious Blockages
Start by inspecting the dishwasher’s filter and drain hose for clogs. Remove the bottom rack and locate the filter assembly, then carefully lift it out. Use a flashlight to look down the drain hose for debris or kinks. I once spent an hour cleaning out a stubborn blockage that caused water to pool at the bottom—once cleared, the cycle ran perfectly. Remember, small debris can mimic a pump failure, so clear these first.
Use a Multimeter to Test the Pump and Switches
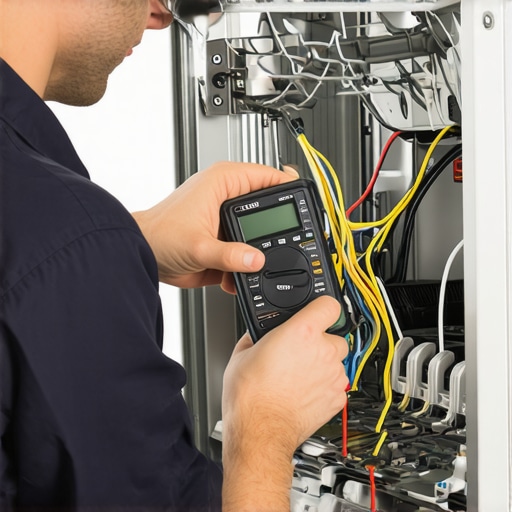
To determine if the pump is dead, unplug the appliance and set your multimeter to resistance mode. Disconnect the wiring harness from the pump motor—usually accessible beneath the dishwasher’s tub. Touch the multimeter probes to the pump terminals; a reading of infinity indicates an open circuit, meaning the pump is likely faulty. Similarly, test the door latch switch by locating it on the door assembly and performing the resistance check. A broken switch can cause the dishwasher to think the door isn’t closed, preventing operation. I learned this when my dishwasher refused to start even though the door was securely latched—replacing the faulty switch solved the issue immediately.
Perform a Visual Inspection for Damage
Carefully examine the pump, wiring, and seals for cracks or corrosion. Look for burned wires or melted insulation—these are signs of electrical problems. During one repair, I spotted corrosion on the pump’s wiring, which was causing intermittent operation. Replacing the damaged wires restored proper function. Use a flashlight to illuminate tight spaces and consider cleaning contacts with a contact cleaner if corrosion is present. This visual check can save you from unnecessary internal part replacements.
Test the Timer and Control Board
If the pump and switches check out, the issue might stem from the control system. For mechanical models, manually advancing the timer can help identify at which stage the cycle stalls. In digital models, pressing a specific combination of buttons often initiates diagnostic mode—refer to your dishwasher’s manual or troubleshooting guide. When I suspected a control problem, I used a self-diagnostic trick and watched error codes appear, confirming that replacing the control board was necessary. This step is crucial because complex electronics can mimic pump failures but are easier to diagnose with proper testing.
Verify Power and Ground Again
Ensuring consistent power supply is fundamental. Use your multimeter to check voltage at the dishwasher’s power connection—standard household current should be around 120 volts. Also, inspect grounding connections to prevent false readings or electrical interference. When my dishwasher randomly shut down, it turned out a loose ground wire was causing intermittent power issues—tightening it fixed the problem. Always follow safety precautions when working with electrical components, and if you’re unsure, consult a professional or review [when to trust a warranty](https://applianceoutletpro.com/when-to-trust-a-warranty-for-dishwasher-repairs) for guidance.
Remember, systematic testing before part replacement can save money and prevent warranty voidance. Use these steps as a blueprint—your dishwasher’s issues don’t have to be a mystery anymore.
Many homeowners believe that troubleshooting their dishwasher is straightforward, relying solely on the most obvious signs like leaks or error codes. However, this oversimplification often leads to costly mistakes. A prevalent myth is that all dishwasher failures are due to a single cause, such as a faulty pump or clogged drain. In reality, modern appliances are intricate systems where multiple components interact, and a problem might appear simple but stem from less obvious issues like control board faults or electrical surges. For example, some people assume that replacing a pump will fix all drainage problems, but without proper diagnostics, they risk replacing parts unnecessarily and voiding warranties. To avoid this, understanding advanced diagnostic processes and subtle clues can make a significant difference.
What advanced diagnostic nuances can prevent costly errors?
One critical nuance is recognizing that many electronic failures mimic mechanical issues. According to appliance expert Howard Miller, electronic control boards can malfunction silently, causing cycles to stall without triggering clear error codes. Diagnosing these problems requires careful testing with tools like multimeters and sometimes even software-based diagnostics, which most homeowners overlook. Relying only on a visual inspection or symptom-based guesses can misdirect repairs, leading to wasted money and time. Moreover, many assume that warranty protections cover any repair, but they often exclude damage caused by user errors or neglect, such as failing to follow proper cleaning procedures or ignoring warning signs.
Another common misconception is that trying quick fixes yourself will always save money. While DIY repair can be effective for minor issues, it becomes dangerous when applied without thorough diagnostics. For instance, bypassing troubleshooting steps and immediately replacing parts like the control board might mask underlying problems such as wiring faults or sensor malfunctions. This approach can also void warranty coverage if the manufacturer detects improper repairs. For detailed guidance, review this resource on diagnostics and warranty claims.
In essence, knowing what to test, how to interpret subtle clues, and understanding warranty conditions can save you money and prevent future headaches. It’s tempting to rely on instinct or user forums, but professional diagnostics go beyond surface symptoms, revealing the underlying cause. Always consider consulting or referring to experts when in doubt—this is where true expertise makes a difference. Have you ever fallen into this trap? Let me know in the comments and consider exploring how diagnostics improve your warranty outcomes.
Keeping it Working: Tools and Techniques for Long-Term Dishwashing Success
Regular maintenance is the backbone of extending your dishwasher’s lifespan and avoiding costly repairs. While many homeowners stick to basic cleaning routines, investing in the right tools can make diagnostics and upkeep significantly easier. The key is understanding which equipment provides accurate insights and how to implement a proactive maintenance routine.
One indispensable tool I personally recommend is a high-quality digital multimeter. Unlike the standard analog versions, a digital multimeter—with auto-ranging and precise readings—allows me to quickly test electrical components like door switches, heating elements, and control boards. For example, by performing resistance checks on the heating element, I can catch potential failures before they cause cycle failures, saving time and money. When shopping for a multimeter, opt for models like Fluke 117, which offers reliable readings and simple usability, especially when working in tight dishwasher compartments.
Another tool crucial for effective diagnostics is a small, flexible inspection mirror. This allows me to peer into hard-to-reach areas such as beneath the spray arms or behind control panels, helping me identify leaks, corrosion, or loose wiring without disassembling entire modules. Pairing this with a bright LED flashlight ensures I don’t miss subtle signs of wear or damage that can be overlooked during quick visual checks.
In addition to physical tools, I leverage diagnostic software compatible with modern smart dishwashers. Most brands offer apps or diagnostic modes that, when accessed correctly, provide error codes and system status updates—this is invaluable for pinpointing issues that simple inspections can’t reveal. For instance, referencing the diagnostics and warranty guide, I can interpret error codes more accurately, determining whether a component like the control board or sensor needs replacement.
Maintaining your appliance doesn’t stop at diagnostics. Regularly cleaning filters, spray arms, and water inlet filters prevents buildup that can hamper performance. Using tools like a dedicated brush set for sprayer nozzles ensures thorough cleaning. I also recommend recording cycle times and noting any irregularities—over time, patterns emerge that guide maintenance schedules rather than reactive repairs.
Looking ahead, the trend is moving toward smart diagnostic tools that integrate directly with mobile devices. As appliance manufacturers embrace IoT technology, homeowners will be able to identify issues remotely and schedule repairs proactively. Keeping an eye on these developments means you’ll be better equipped to prevent breakdowns before they happen, saving yourself both frustration and expense.
How do I maintain my dishwasher over time?
The foundation of ongoing maintenance involves routinely inspecting components like the door latch, ensuring seals are intact, and cleaning out filters on a monthly basis. Utilizing tools like multimeters for electrical tests and inspection mirrors for visual checks can help catch issues early. Also, adhering to manufacturer-recommended service intervals and documenting any irregularities can prevent minor problems from escalating. For detailed steps, check this troubleshooting guide.
Remember, integrating precise tools and regular inspection routines empowers you to tackle potential issues before they cause costly damage. Try performing a resistance test on your dishwasher’s heating element using a multimeter today—it’s a straightforward step that can give you peace of mind and extend the appliance’s life.