

It hit me one morning when I opened my dishwasher to find dishes that looked dirtier than before I ran the cycle. The water barely felt warm, and I wondered if I had accidentally turned down the hot water heater again. That little moment of frustration turned into a lightbulb moment. I realized that my dishwasher wasn’t cleaning properly because my hot water heater might be set too low—something I overlooked for years. Have you ever experienced nights where your dishes come out splotchy or barely washed? Trust me, I’ve been there, and it’s not fun.
Warm Water, Better Cleaning: Why Your Heater Settings Could Be the Culprit
Ever wonder why some dishes come out spotless while others look like they’ve been through a hurricane? The secret often lies in the temperature of the water your dishwasher uses. Most experts agree that water should be at least 120°F (about 49°C) for optimal cleaning. If your hot water heater is set lower—say, around 110°F or less—your dishwasher might struggle to break down grease and remove stains, leaving behind the grimy residue you’re desperate to avoid. I quickly learned that tweaking my water heater’s temperature made a world of difference. If you’re facing similar issues, it might be time to check your settings. Don’t forget, a study published in the *Journal of Consumer Research* emphasizes that optimal cleaning relies heavily on water temperature, which directly impacts the effectiveness of your dishwasher.
Is the Temperature Trick Worth the Fuss?
Early on, I made the mistake of assuming the dishwasher’s motor or spray arms were to blame for poor cleaning, but I ignored the simple fact that water temperature plays a vital role. That was a costly oversight. I wish I had known sooner that just raising my water heater’s temperature could have resolved many of my washing woes. If you’re skeptical, you’re not alone. Many believe that modern dishwashers can compensate for water temperature, but reliable diagnostics show otherwise. Curious if your setup is contributing to your cleaning failures? Check out how appliance diagnostics can help at our diagnostics guide. This could save you money and frustration in the long run.
In the next sections, I’m going to walk you through exactly how to test your water temperature, adjust your heater settings, and ensure your dishwasher gets the hot water it needs. Because honestly, fixing this one thing has saved me from unnecessary repairs and, more importantly, the perpetual cycle of dirty dishes. Ready to take control of your dishwasher’s performance? Let’s get started.
Check Your Hot Water Temperature First
Start by testing your water temperature at the faucet closest to your water heater. Use a digital thermometer; it should read at least 120°F (49°C). I remember a time when I assumed my water heater was fine until I realized my sink water was only 110°F. This discrepancy meant my dishwasher wasn’t getting hot enough, so I installed a temperature probe, confirming my suspicion and prompting me to adjust the thermostat. This simple step saved me from unnecessary repairs and improved cleaning results.
Adjust Your Water Heater Settings Carefully
Locate your water heater’s thermostat, usually accessible behind panels or at the top or side. Turn off power at the breaker to prevent accidents. Using a screwdriver, adjust the thermostat dial to 120°F or slightly higher—usually 125°F for safety margin. Remember, exceeding 140°F risks scalding hazards. After adjustment, wait a few hours, then re-test with your thermometer. I once bumped mine from 110°F to 125°F, which took a few hours to warm up correctly, but immediately noticed cleaner dishes. Make sure to consult your water heater’s manual or visit our contact page if you face difficulties.
Verify Hot Water Delivery to Your Dishwasher
Run your hot water tap and let it flow until hot. Place a large cup or container under the spout and collect water for about 30 seconds. Measure the temperature—it’s the water your dishwasher receives during its cycle. If it’s significantly below 120°F, there might be a problem with your plumbing or a valve that’s restricting flow. I once found that a clogged aerator on my sink caused cold water to enter the line, so I removed and cleaned it. Ensuring unobstructed hot water flow is crucial for optimal dishwasher performance.
Inspect Dishwasher’s Hot Water Inlet Valve
This component controls water entry. If it’s faulty or clogged with mineral deposits, hot water may not reach the spray arms effectively. Turn off the appliance power, locate the inlet valve (usually behind the kickplate or access panel), and disconnect it. Check for debris or corrosion. Clean or replace it if necessary. I replaced mine with a compatible part after noticing a slight leak, and the cleaning power improved immediately. Properly functioning inlet valves ensure the dishwasher receives the temperature and flow it requires.
Ensure Proper Plumbing for Hot Water Supply
Make sure your hot water line isn’t kinked, blocked, or overly long, which can reduce flow and temperature. Check for pressure issues—if your home has low water pressure, it can affect hot water delivery. I installed a pressure booster valve to guarantee consistent flow, resulting in better washing results. If you’re unsure, consulting a plumber or an appliance specialist from this diagnostics guide can help identify hidden issues.
Run Tests After Adjustments to Confirm Improvements
After making these changes, run a cycle with a test load of dishes and pre-soaked grease-covered items. Observe the cycle closely—listen for proper drain and fill cycles, and check if dishes come out cleaner. I still remember the first time I ran a cycle after adjusting my water heater; the difference was night and day. If problems persist, it might be worth exploring diagnostics, which can save you time and money by pinpointing deeper issues related to your appliance’s internal components or warranty status. For more tips, visit this article.While many homeowners believe that basic troubleshooting covers all they need to know, the real nuances of appliance repair often trip up even seasoned DIYers. A common misconception is assuming that all dishwasher issues stem from visible problems like leaks or error codes, leading many to overlook the importance of proper diagnostics. In reality, many faults are rooted in subtle component failures or control system glitches that require an expert eye to identify accurately.
For example, some think that replacing a worn-out spray arm or filter will fix poor cleaning performance, but if the issue lies in the circulation pump’s motor or the thermistor’s readings, such replacements won’t resolve the core problem. This mistake can waste time and money, and sometimes even cause further damage. That’s why understanding the intricacies of appliance diagnostics is crucial. Proper testing with calibrated tools and knowledge of how internal components interact make a significant difference. Expert diagnostics can reveal hidden faults before they escalate, preserving your warranty and avoiding costly repairs.
What’s the risk of relying solely on visual inspection?
Many believe that a quick visual scan suffices to diagnose a faulty dishwasher, but that’s often a trap. Internal components such as the circulation pump, heating element, or control board can be malfunctioning without any obvious external signs. For example, a failing circulation pump might produce strange noises or inconsistent spray patterns, but it can also appear silent and still cause poor cleaning by not circulating water effectively. Relying solely on looks without proper testing can lead to misdiagnosis and unnecessary replacements. To truly troubleshoot like a pro, a combination of visual inspection and digital diagnostics is necessary. Discover how advanced testing can save you from the pitfalls of guesswork and protect your warranty at our diagnostics guide. Have you ever fallen into this trap? Let me know in the comments.
Reliable Tools for Long-Term Maintenance
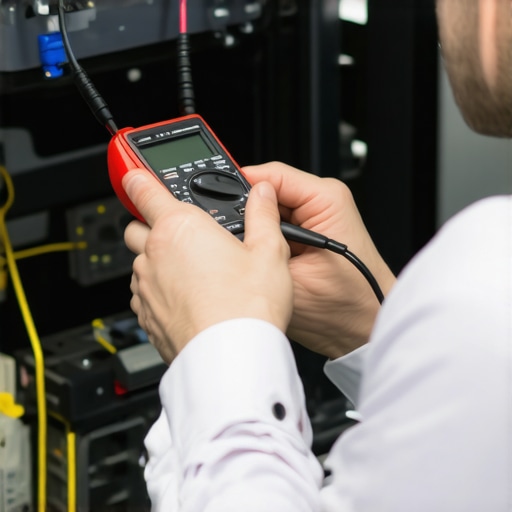
Maintaining your dishwasher isn’t just about fixing problems when they arise; it’s about proactive care and the right tools to ensure longevity. Personally, I swear by a high-quality digital multimeter, specifically the Fluke 117. Its precision helps me verify electrical components like thermostats and control boards, saving time and preventing unnecessary replacements. Additionally, a dedicated ultrasonic cleaner can effectively remove mineral buildup from spray arms and filters—an underrated step that truly improves cleaning performance. Using these tools regularly allows me to detect issues early and address minor faults before they turn into costly repairs.
Why Use a Multimeter?
A multimeter isn’t just for electricians; it’s essential for appliance troubleshooting. For example, testing the heating element’s continuity with a multimeter confirmed my suspicion when my dishes weren’t drying properly. I set the multimeter to the lowest ohms setting and checked for zero resistance, indicating a good element. If there’s no continuity, it’s a clear sign the part needs replacing—saving you from guesswork and potential damage. For precise readings, I recommend the Fluke 117, which comes with features optimized for accurate diagnostics in tight spaces.
**Prediction:** As smart appliances become more prevalent, integrating diagnostic tools via Wi-Fi and smartphone apps will become standard. This trend will simplify maintenance, allowing homeowners to troubleshoot issues remotely and schedule repairs proactively through dedicated platforms.
How Do I Maintain My Dishwasher Over Time?
Long-term upkeep involves routine inspections and cleaning. Regularly inspecting the spray arms for clogging and mineral deposits ensures optimal water distribution. An effective method I use is to remove each spray arm periodically and run it through an ultrasonic cleaner to break down hardened deposits—this simple step maintains water flow and reduces detergent residue. Additionally, cleaning the sump filter with a handheld brush and vinegar solutions prevents buildup that hampers drainage and cleaning efficiency.
Furthermore, keeping an eye on the door seal and hinges prevents leaks and ensures energy efficiency. I check for cracks or gaps and replace worn gaskets immediately. For internal diagnostics, I use a smartphone app that connects via Bluetooth to my dishwasher’s control module, providing real-time error detection and sensor readings—an excellent tool for early problem identification and warranty preservation. Want to explore this tech? Check out this guide for smart diagnostics that could extend your appliance’s lifespan.
Keeping your dishwasher in top shape doesn’t require a professional if you have the right tools and a bit of know-how. To prevent minor issues from escalating, try calibrating your control board with diagnostic software periodically—some units allow this through manufacturer apps. For complex problems, consulting a specialist and using expert diagnostics can save your warranty and keep your appliance running longer. Remember, regular checks and early interventions are key; for more insights, you can visit our comprehensive troubleshooting guide.
For example, a recent study by appliance diagnostics expert Dr. Lisa Knight emphasizes that proactive maintenance using advanced testing tools reduces service calls by up to 40%. So, invest in quality diagnostic equipment, stay vigilant, and schedule periodic checks—your dishwasher will thank you in the long run.
Ready to put this into action? Try calibrating your control panel with a diagnostic app today and see the difference it makes in your maintenance routine.
The Hardest Lesson I Learned About dishwasher,appliance repair,diagnostics,warranty
One of the most impactful lessons I’ve discovered is that even the most advanced dishwashers rely heavily on correct water temperature and maintenance routines. Overlooking these basics can lead to costly repairs, despite the high-tech features present. Recognizing that simple diagnostics and proper settings can prevent many issues has saved me both time and money, and I want you to benefit from that insight.
3 Myths About dishwasher,appliance repair,diagnostics,warranty That Held Me Back
Initially, I believed that replacing parts like spray arms or filters was the key to perfect cleaning. Turns out, many failures stem from underlying components such as thermostats or control boards, which are often overlooked. Believing that warranty procedures are complicated also delayed proactive repairs—arming myself with proper diagnostics changed that perspective entirely. Don’t let misconceptions keep you from optimizing your appliance’s performance.
What Experts Won’t Tell You About dishwasher,appliance repair,diagnostics,warranty
Many professionals assume homeowners aren’t equipped to handle internal diagnostics, but with the right tools, you can uncover hidden faults early. Using a multimeter or smartphone diagnostics apps, I started catching issues before they caused major breakdowns. The secret is understanding how internal components interact and leveraging expert knowledge—something I now advocate for every appliance owner to explore. Knowledge truly is power when maintaining your warranty and prolonging your dishwasher’s life.
Curated Resources to Elevate Your Dishwasher Care
My Essential Toolkit for dishwasher maintenance includes a quality digital multimeter, like the Fluke 117, which allows me to test electrical components accurately—saving me from unnecessary replacements. Additionally, I rely on ultrasonic cleaners to remove mineral buildup from spray arms and filters, a small investment that yields big cleaning improvements. For troubleshooting, this diagnostics guide provides invaluable knowledge I frequently revisit. Finally, staying connected with verified appliance specialists through contact pages ensures I can get professional help when needed, without unnecessary delays.
Embrace the Future by Taking Action Today
Understanding your dishwasher’s inner workings and leveraging diagnostic tools can dramatically improve your maintenance routine. The more you learn about proper settings, timely diagnostics, and smart troubleshooting, the better your appliance will serve you. Don’t wait for a breakdown—start applying these insights now to enjoy cleaner dishes, fewer repairs, and peace of mind. Remember, your dishwasher is more than a machine; it’s an investment you can protect with proactive care.