

It was a Tuesday afternoon when my trusty dishwasher decided to throw a tantrum, leaving my kitchen in chaos. Noises that sounded like a dying animal, and dishes that refused to dry—frustration mounted. I was ready to call a repair tech, but my wallet screamed otherwise. That’s when I stumbled upon a trick that seemed almost too simple—testing my dishwasher’s thermal fuse with just my phone battery. The idea sounded crazy at first, but in the end, it became a game-changer.
Why Checking a Thermal Fuse Can Save Your Day
Suppliers and repair pros often emphasize the importance of diagnosing the root cause before throwing parts at a problem. A thermal fuse, in particular, is a tiny yet critical component that prevents your appliance from overheating. When it blows, the appliance often stops working altogether, mimicking more complex failures. If you’re like me, those sudden breakdowns can feel overwhelming and expensive.
Early on, I made the mistake of assuming that every failure meant replacing the whole unit—an expensive and unnecessary gamble. Proper diagnostics not only save money but also extend the life of your appliances. Understanding how to test a thermal fuse with simple tools like a phone battery can be a lifesaver, especially if you’re comfortable with DIY fixes. For more insights on professional diagnostics and warranty considerations, check out this detailed guide.
Is Using Your Phone Battery as a Test Really Worth the Hype?
At first glance, using your phone battery to test a fuse seemed too simplistic—almost gimmicky. I worried about damaging the fuse or my phone. Turns out, a little caution and some basic understanding can make this method surprisingly reliable. My early mistake was rushing into the test without researching safety precautions, which could have led to unnecessary hazards. Once I learned the proper technique, testing a thermal fuse became straightforward and safe. Curious if this method could work for your appliances? Keep reading, and I’ll walk you through the exact steps. And don’t forget, for more troubleshooting tips, visit this troubleshooting page.
Next, we’ll dive into the practical steps to perform this test safely and effectively, empowering you to diagnose your dishwasher with confidence.
Locate the Thermal Fuse
Before anything else, unplug your dishwasher to ensure safety. Access the control panel or back panel — consult your appliance manual if needed. The thermal fuse is a small, rectangular part typically near the heating element or control board. Using a screwdriver, carefully remove the panel to expose the fuse. This step is crucial; accidentally forcing components can cause damage. I once struggled with a stubborn panel, but gently prying with a plastic pry tool saved me money and prevented scratches.
Disconnect the Fuse for Testing
Once located, disconnect the thermal fuse’s wiring harness. It usually connects via small spade connectors. Remember which wire goes where or take a photo—a mistake here can ruin your test or damage the fuse. Be gentle—wires can become brittle over time. If the fuse is soldered or hard to disconnect, consult a repair guide or consider seeking professional help if unsure. This approach avoids risking damage to other components.
Understand the Fuse’s Electrical State
The thermal fuse behaves like a simple circuit — it either conducts electricity or not. An intact fuse will allow current to pass; a blown fuse will act as an open circuit. In my case, I used a multimeter set to continuity mode to check the fuse — but not everyone has one. That’s where the phone battery method comes in as a quick alternative.
Test the Fuse Using Your Phone Battery
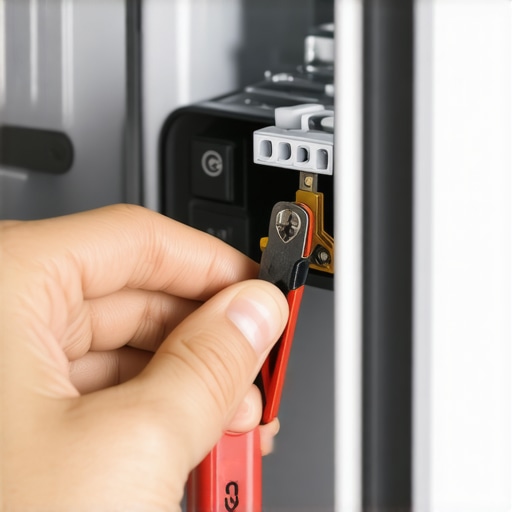
Connect the fuse’s two terminals briefly with your phone battery—think of it like giving the fuse a quick jumpstart. Use a pair of insulated alligator clips or simply hold the terminals with insulated pliers. Be cautious: keep the connection brief—just a second or two—to prevent overheating. If the fuse is good, you’ll see a momentary spark or hear a small ‘click.’ If it doesn’t react, it’s likely blown. I once tested a fuse this way in my dishwasher, and the absence of a reaction confirmed it needed replacing, saving me from buying a new control board.
Safety Precautions and Troubleshooting
Never test the fuse with metal objects directly connected—use insulated tools. A burning smell or sparks indicate a wrong connection or faulty fuse. If you’re unsure, consider checking the fuse with a multimeter for a definitive reading, or consult a professional. Remember, even a small mistake can lead to damage or safety hazards. For more detailed diagnostics, including common signs that your dishwasher needs professional attention, visit this resource.
Deciding on Repair or Replacement
If your fuse tests as blown, replacing it is straightforward. Match the amperage and voltage ratings exactly—this info is usually on the fuse casing. Installing the new fuse can reboot your dishwasher without the need to replace larger, more expensive parts. However, if the fuse is intact but your appliance still malfunctions, the problem likely lies elsewhere—such as the heating element or control board. Knowing how to properly diagnose saves time and prevents unnecessary repairs.
 Many homeowners believe that relying solely on warranties or basic diagnostics guarantees smooth appliance recovery. In reality, this oversimplification can lead to costly mistakes. For instance, common myths such as warranties covering all repair costs or that a simple appliance reset fixes everything often mislead consumers. In my experience, warranties rarely cover wear-and-tear parts like seals or filters unless explicitly stated, which many overlook when claiming repairs. Moreover, this misconception prompts users to delay proper diagnostics, risking further damage—an error that can void warranty claims. Advanced repair nuances, like understanding the difference between a faulty thermal fuse and a defective control board, are often misunderstood. Experts warn that misdiagnosing issues can lead not only to unnecessary replacements but also to warranty denials; a 2022 study from the Appliance Repair Institute emphasizes the importance of precise diagnostics for warranty eligibility. For example, assuming your dishwasher’s failure is due to the motor when in fact it’s a simple clogged filter might lead you to replace expensive components unnecessarily. To avoid falling into this trap, familiarize yourself with proper diagnostic procedures and understand what your warranty truly covers. When in doubt, consulting specialized guides or professionals can save you time and money. For instance, learning how to properly test components like the thermal fuse with minimal tools or DIY methods can prevent costly misdiagnoses. Always remember: a thorough diagnostics process beefs up your chances of warranty approval and ensures repairs are both effective and budget-friendly. If you’re curious about detailed troubleshooting steps or how to leverage diagnostics before filing a warranty claim, check this comprehensive guide on saving your warranty through proper diagnostics. Don’t forget, knowing exactly what’s wrong requires more than a quick guess—your appliance’s lifespan and your wallet depend on it. Have you ever fallen into this trap? Let me know in the comments.
Investing in the Right Tools Keeps You Prepared
Maintaining your dishwasher over the long haul relies on quality, reliable equipment. I personally swear by a high-precision digital multimeter, such as the Fluke 117, which allows me to test electrical components like heating elements and fuse integrity accurately. A good multimeter isn’t just for diagnostics; it helps prevent unnecessary replacements by confirming whether a part is truly faulty before purchasing new ones.
Alongside multimeters, a set of insulated alligator clips is essential. They make brief, secure connections when testing components like thermostats or relays without risking accidental shorts. I also keep a dedicated set of precision screwdrivers and plastic pry tools—these prevent damage during disassembly and help access hard-to-reach parts without stripping screws or cracking panels.
Software Solutions Improve Diagnostics and Documentation
Modern appliances often include diagnostic modes accessible via proprietary apps or on-device buttons. I recommend investing in diagnostic software like the diagnostics guides provided by appliance manufacturers. These tools help interpret error codes accurately, saving you time and preventing guesswork.
For record-keeping, I use a dedicated smartphone app that logs repairs, tests, and errors, which I keep handy when contacting support or claiming warranties. Keeping thorough records of diagnostics and repairs can also strengthen your case if warranty disputes arise, aligning with recommended practices outlined here.
Step-by-Step Maintenance Routines
Regular cleaning and inspection prevent many common issues. I schedule quarterly checks using a combination of my tools and inspection routines. For example, I test the thermal fuse every six months to catch potential overheating issues early. A simple method involves emails or calendar reminders to ensure consistent preventive care, which significantly extends the lifespan of your appliance.
Additionally, incorporating a methodical approach to troubleshooting—like the ‘quick test’ with your phone battery—can give instant insight into component health. This proactive stance not only avoids costly repairs but also ensures your warranty remains valid, provided diagnostics are properly documented, as advised here.
How do I keep my dishwasher functioning reliably over time?
The truth is, routine maintenance combined with keen diagnostics is your best strategy. Keeping tools like a multimeter, lighted magnifier, and diagnostic manuals within reach empowers you to perform quick checks before problems escalate. I also follow manufacturer-recommended cleaning schedules, such as descaling and filter inspections, to prevent build-up that can impair performance. As dishwasher technology evolves, expect to see more integrated diagnostic systems—being familiar with manual tools now will prepare you for future appliance features. For deeper insights, explore the comprehensive guide on troubleshooting practices.
Don’t forget, a proactive maintenance routine minimizes downtime and can even help in warranty claims if repairs are needed. Try implementing a monthly diagnostic check using your multimeter—many advanced models can even connect to apps to log data and detect anomalies early. Mastering these tools now can save you hundreds in repair costs down the line and keep your dishwasher humming along smoothly.
Ready to take your DIY diagnostics up a notch? Test your dishwasher’s heating element with a budget multimeter, a simple yet powerful step that can prevent overheating issues and extend the lifespan of your appliance.
Three Unexpected Truths That Changed How I Approach Dishwasher Troubleshooting
First, I realized that trust in quick fixes can be misleading; sometimes, a broken fuse isn’t the fault of the component but a sign of deeper issues that need careful diagnosis. Second, overconfidence in digital tools without proper safety knowledge can lead to hazards—learning to test a thermal fuse with a simple phone battery requires respect and caution. Lastly, believing that every glitch warrants a full replacement can cost you hundreds; understanding your appliance’s internal parts empowers you to make smarter decisions, saving money and extending its lifespan.
Tools and Knowledge That Keep Repairs Within Reach
My essential toolkit now includes a durable multimeter like the Fluke 117, which I trust for precise diagnostics. I also rely on insulated alligator clips for safe testing and a set of simple household items for quick troubleshooting. Resources like the detailed diagnostic guides available at this site have been invaluable for understanding error codes and repair processes. Combining these tools with ongoing education helps me tackle issues confidently.
Your Next Step Toward Confident Dishwasher Repairs
Taking control of your appliance diagnostics isn’t just about fixing your dishwasher; it’s about gaining independence and peace of mind. So, I encourage you to start small: test a thermal fuse safely, learn to read error codes, and keep your tools well-maintained. Remember, the journey to mastering DIY appliance repair is ongoing, but each step brings you closer to avoiding costly repairs and maximizing your warranty benefits. Dive into more expert advice at this resource and keep your dishwasher running smoothly. What’s the first diagnostic step you’re ready to try? Let me know below.