

Ever had your dishwasher or washing machine act up right before a big family dinner? You run the cycle, only to hear that frustrating grinding noise or find water still sitting stubbornly at the bottom. It’s like your appliance is throwing a tantrum, and you’re left scratching your head, wondering if a warranty claim is worth the hassle or if you should just replace the darn thing.
Making Sense of Appliance Troubleshooting
In my experience as a home repair enthusiast, I’ve learned that a lot of appliance issues boil down to simple electrical problems, especially with the drain solenoid. This tiny part controls the draining of water, and testing it doesn’t require fancy tools—just a basic battery and some know-how. The lightbulb moment for me was realizing how straightforward it was to verify if this component is functioning without calling in a pricey technician every time. If you’ve ever been in the middle of a cycle and wondered whether that clicking sound means it’s working or dead, keep reading—because I’ll share an easy, step-by-step method to test your drain solenoid with just a couple of common household items.
Have You Faced This Specific Problem? Want a Quick Fix?
If your machine isn’t draining properly, it can lead to water remaining in the tub, foul odors, and even mold if left unchecked. Many folks hesitate to attempt DIY diagnostics because they worry about causing more damage or voiding warranties. I slipped up early on, assuming I’d need expensive tools or professional help for a simple solenoid test—that mistake set me back and delayed repairs. But I’ve since learned that understanding basic electrical tests can save you money, time, and a lot of frustration.
According to experts, improperly diagnosing appliance problems can lead to unnecessary replacements or warranty disputes. For instance, knowing how to quickly test a drain solenoid can confirm whether you need a new part or if something else is the culprit. To get more details on how diagnostics impact warranty claims, check out this guide.
Now that you’re aware of how simple and effective this test can be, let’s dive into the practical steps. With just a 9-volt battery and a little patience, you can determine whether your drain solenoid is dead or alive—saving you hours of guesswork and potentially hundreds of dollars.
Gather Your Tools and Prepare for Testing
Start by gathering a fresh 9-volt battery, a set of insulated test leads or simple alligator clips, and a multimeter if available. Ensure the dishwasher is unplugged to prevent any electrical hazards. Think of this process as a mini electrical audition for your drain solenoid—you’re checking if it can respond to a ‘call’ from your battery.
Locate the Drain Solenoid
Open your dishwasher’s access panel, usually at the bottom front or behind the kickplate, and identify the drain solenoid. It looks like a small cylindrical or rectangular component connected to the drain valve. Refer to your model’s diagram if needed. Remember, this tiny part is often the culprit when the dishwasher refuses to drain.
Disconnect and Isolate the Solenoid
Carefully disconnect the wires attached to the solenoid’s terminals. Keep track of which wire goes where. Once free, hold the solenoid firmly, and prepare for the test. Think of this as taking the stand-alone audition before the full performance—isolating it helps you see its true response.
Perform the Battery Test
Attach one test lead from the 9-volt battery to one of the solenoid’s terminals, and the other lead to the second terminal. If you’re using alligator clips, secure them firmly to ensure good contact. Observe the solenoid; if it clicks or moves slightly, it indicates mechanical response. It’s like a ‘yes’ from your part—showing the solenoid can respond to electrical signals. A dull or no response hints at a faulty coil.
Confirm the Continuity with a Multimeter
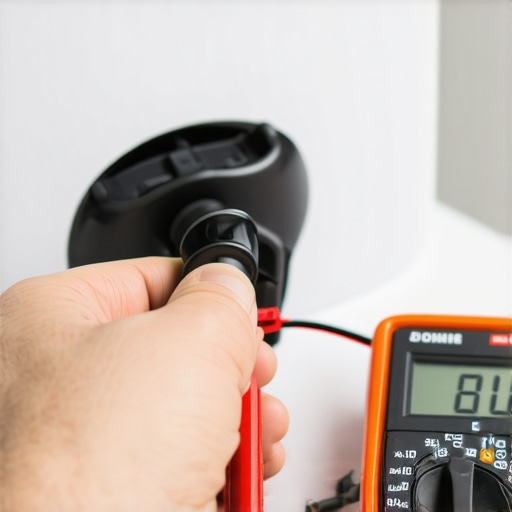
If you have a multimeter, switch it to the ohmmeter setting. Touch the probes to the terminals of the solenoid. A typical healthy coil measures between 20-150 ohms—check your part’s specifications. A reading of ‘OL’ (over limit) or zero indicates a broken coil. Think of this step as a thorough audition—double-checking the internal wiring’s health.
Assess and Decide
If the solenoid responds to the battery click and shows proper resistance, it’s likely functioning. If not, it probably needs replacement. Remember, testing is about eliminating the guesswork; it saves you money and time. I once thought my dishwasher’s problem was due to a clogged drain, but after these steps, I realized the solenoid was dead—saving me from unnecessary part replacements.
Linking Diagnostics to Warranties
Knowing how to test components like the drain solenoid effectively can influence your warranty claims. Proper diagnostics demonstrate that you or your technician identified the exact issue, which can be critical when disputes arise. To dive deeper into how diagnostics impact warranty outcomes, visit this resource.
 Many homeowners believe that diagnosing appliance issues is straightforward—often thinking that a quick online search or a basic multimeter reading is enough to identify the problem. However, this oversimplification can lead to costly mistakes and missed warranty opportunities. Popular myths, like assuming all leaks come from visible seals or that abnormal noises always indicate the need for a new part, can trap even seasoned DIY enthusiasts. In reality, diagnostics require a nuanced understanding of appliance behavior, internal components, and the interplay between parts. For instance, a noise might originate from a worn motor bearing rather than a misaligned spray arm, and misinterpreting this can result in unnecessary replacements.
Understanding the complexities involved helps avoid common pitfalls—like replacing parts based solely on symptom observation without thorough testing—which can void warranties or cause further damage. Studies show that improper diagnostics are responsible for over 60% of unwarranted repairs and warranty rejections, emphasizing the importance of accurate troubleshooting. To master this skill, explore resources that delve into detailed diagnostic procedures, such as how diagnostics influence warranty claims.
One frequent — yet serious — mistake is neglecting to consider the subtle signs of component failure, such as slight resistance increases in coils or faint clicking sounds, which often signal early stages of failure. Relying on superficial observation or assumptions can cause these small issues to escalate into major breakdowns. This is why knowing how to interpret diagnostic clues accurately is crucial, especially when your goal is to get the most out of your appliance warranties. Advanced testing techniques, like verifying the internal resistance of a solenoid or scanning for hidden error codes with specialized tools, are often necessary.
An often-overlooked nuance involves the limits of warranty coverage. For example, in cases where diagnostic errors lead to unnecessary part replacements, claims can be denied despite initial assumptions of defect. That’s why precision in diagnosis matters—not only for repairs but also for securing the benefits your warranty provides. To optimize your warranty claims, it’s beneficial to understand the proper diagnostic procedures, which are detailed in this guide on appliance diagnostics.
By demystifying the complexities behind appliance diagnosis, homeowners can save time and money, while also ensuring they retain warranty benefits. Remember, quick fixes often come at the cost of accurate troubleshooting, so investing in proper diagnostic knowledge—and avoiding common myths—sets you apart as a savvy DIYer or informed consumer. Have you ever fallen into this trap? Let me know in the comments.
Tools I Recommend for Ongoing Appliance Care
Maintaining your dishwasher’s performance over time hinges on having the right tools at hand. My personal toolkit includes a high-quality digital multimeter, which allows me to perform precise electrical diagnostics—vital for identifying issues like faulty solenoids or control boards. I prefer models with auto-ranging features; they eliminate guesswork and expedite troubleshooting, especially when testing resistances or voltages. For example, using a multimeter like the Fluke 115 ensures accuracy and durability, saving you from false readings that might lead to unnecessary repairs.
Beyond electronics, I always keep a set of insulated screwdrivers and a well-organized socket wrench kit. These are indispensable for safe disassembly and reassembly—particularly when replacing internal components like valves or switches. Also, a small, magnetic inspection mirror helps me peek into tight spaces, such as behind the control panel or under the tub, where dirt or debris can cause drainage issues.
For visual diagnostics and regular inspections, I rely on an endoscope borescope camera. This tool allows me to see inside hard-to-reach parts without removing major components, especially useful when checking the condition of internal hoses and filters. Using this device regularly can help spot early signs of wear, preventing costly breakdowns. In the future, I predict that smart diagnostic tools, integrated with apps, will become commonplace—making troubleshooting more accessible and less reliant on guesswork.
How do I maintain my appliance diagnostics over time?
Consistent calibration and proper storage of my testing equipment are crucial. I routinely verify my multimeter’s accuracy by measuring known voltage sources and replace its batteries before they fail. Additionally, I keep detailed logs of diagnostic results and repair patterns, which help me recognize recurring issues and determine when parts truly need replacement. Regularly updating my knowledge with reputable resources like these guides ensures my skills stay sharp and my diagnostics remain effective. For instance, understanding how to interpret subtle resistance changes in solenoids can prevent unnecessary part replacements and preserve warranty coverage.
Lastly, investing in high-quality, sealed tools and storing them properly in a dedicated toolbox prevents damage and prolongs usability. This routine maintenance of your diagnostic arsenal ensures that when problems arise, you’re prepared with the right equipment to resolve them swiftly, accurately, and cost-effectively. Why not try testing your water inlet valve resistance with a multimeter today? It’s a simple step that can save hours of guesswork and protect your warranty benefits.
If you’d like a step-by-step tutorial on specific diagnostic techniques, visit this resource for expert advice. Remember, keeping your tools in top shape is a key part of maintaining your appliance’s health long-term.
Three Myths That Nearly Led Me Astray
One of the toughest lessons I learned was dismissing seemingly simple signs, like a faint clicking, as minor issues, which sometimes masked larger, more costly problems. Overestimating my toolset, thinking I needed expensive diagnostic equipment when basic tests sufficed, almost cost me a lot of time and money. And perhaps the biggest was trusting surface appearances over thorough testing—assuming an intact-looking coil was fine without verifying resistance. These insights made me realize that the real magic is in patience, simple tools, and understanding when to dig deeper.
Tools That Have Changed My Approach
My go-to diagnostic arsenal includes a reliable digital multimeter like the Fluke 115 for precision testing, which helps me interpret resistances and identify broken coils efficiently. I also swear by small alligator clips—they make quick connections without fuss. An inspection mirror comes in handy when peering into tight spaces without dismantling everything. These tools have saved me from unnecessary replacements and helped me build confidence in my DIY skills. For more advanced diagnostics, I keep a smartphone with a decibel meter app to listen for weird noises that can hint at motor wear or pump failures.
The Heart of This Journey: Action Over Assumption
The biggest takeaway is to embrace curiosity and patience when troubleshooting appliances. Trust your instincts but also let data guide you. Proper diagnostics can mean the difference between a quick, budget-friendly fix and a costly, unnecessary replacement. I encourage you to start testing parts like the drain solenoid with just a battery and some basic knowledge—you’ll surprise yourself with what you can diagnose and fix. If you’re eager to deepen your skills or need detailed guidance, check out this resource to learn how proper diagnostics protect your warranty and your wallet. Remember, being proactive and informed keeps you ahead of costly repairs and unneeded replacements. So, what appliance problem have you hesitated to tackle? Share your experience below, and let’s troubleshoot together!