

There was a morning when I opened my dishwasher, expecting shiny, spotless dishes, only to be greeted by a faint smell of mold and a cycle that refused to complete. After years of troubleshooting, I realized that the culprit was often a blocked inlet valve. That lightbulb moment made me realize how overlooked this small component is and how crucial it can be to your appliance’s health.
If you’ve ever faced persistent washing issues or wondered why your dishwasher isn’t filling properly, you’re not alone. Today, we’ll demystify the signs of a physically blocked inlet valve, helping you identify the problem before it leads to costly repairs or voids your warranty. Whether you’re a DIY enthusiast or just someone eager to save a few bucks, understanding this component can make all the difference.
Why Your Inlet Valve Might Be the Sneaky Culprit
The inlet valve acts as the gateway for water to flow into your dishwasher. When it gets blocked, water can’t fill the machine adequately, leading to incomplete cleaning cycles or no water at all. Over time, mineral deposits from hard water, debris, or small objects can clog the valve, especially if you haven’t maintained your appliance regularly. Recognizing the early signs is key to preventing further damage and ensuring your dishwasher performs optimally.
Concerned if the Inlet Valve Is Really the Problem?
Early in my troubleshooting journey, I made the mistake of assuming the issue was always the pump or control module. It turned out I replaced parts unnecessarily, which was both frustrating and expensive. A common mistake is to overlook simple blockages or obstructions in the inlet valve because they aren’t visually obvious. For expert insights, check out our detailed guide on troubleshooting dishwasher problems – it offers a step-by-step approach to diagnosing these issues correctly.
Knowing when to trust your instincts and when to call in a professional can save you time and money. If your dishwasher shows signs of filling slowly or not at all, it might be time to inspect the inlet valve. Don’t forget, sometimes the problem isn’t as complex as it seems, and a simple cleaning or replacement could do the trick.
Let’s dive into how you can detect if your inlet valve is physically blocked and what practical steps you can take to fix or prevent this common problem.
Locate the Inlet Valve and Prepare Your Tools
Begin by unplugging your dishwasher from the power source to ensure safety. Move the machine gently away from the wall to access the bottom front panel. You will need a screwdriver, a pair of pliers, and a bucket for catching water. Remove the kickplate panel beneath the door, revealing the inlet valve and water supply connections.
Identify the Inlet Valve
The inlet valve is linked to the water supply hose and usually has an electrical connector. It resembles a small, rectangular device with wires attached. Look for mineral buildup or debris around the connection points, indicating potential blockages.
Disconnect and Test the Valve
Carefully disconnect the water supply hose from the inlet valve using pliers, directing any residual water into a bucket. Next, unplug the electrical connector. To check if the valve is functioning properly, use a multimeter set to measure resistance. A healthy solenoid should show a low ohm reading—refer to your device manual for exact values. If the reading is infinite or zero, replacement is necessary.
Clean or Replace the Valve
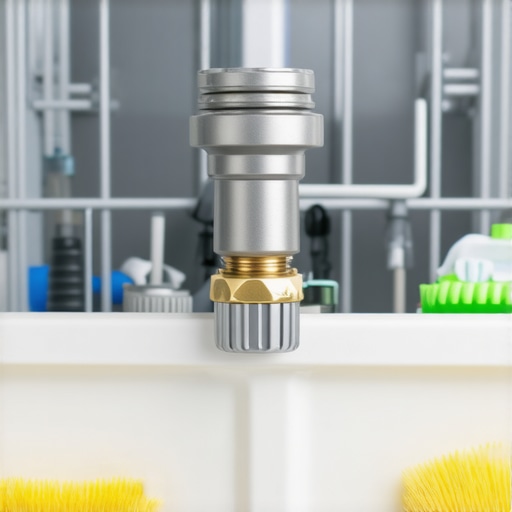
If you detect mineral deposits or debris blocking the inlet ports, clean them with a small brush or toothpick. Soaking the valve in a vinegar solution for 15-20 minutes can dissolve stubborn deposits—be sure to rinse thoroughly afterward. If cleaning doesn’t restore function or tests indicate a faulty solenoid, replace the inlet valve with an OEM part for durability.
Reinstall and Test
Reconnect the water supply hose securely, reattach the electrical connector, and turn the power back on. Run a short cycle to confirm that water flows correctly into the dishwasher without leaks or delays. This simple step can prevent larger issues and help maintain your appliance’s warranty coverage—more about how appliance diagnostics can save your warranty benefits.
Prevent Future Blockages
To avoid recurrence, install a water softener if you have hard water, and periodically inspect the inlet screen for debris. Regular maintenance is key to prolonging your dishwasher’s life and keeping it running smoothly without unexpected failures. For more tips on diagnosing common dishwasher issues, explore our troubleshooting guide.
When it comes to appliance warranties and diagnostics, many homeowners cling to misconceptions that can cost them time and money. A common myth is that warranties cover everything, but in reality, many consumers overlook the fine print—certain damages or repairs might be excluded unless you’re vigilant about the policy details. For instance, some believe that simply calling the manufacturer guarantees a free repair, but as explained in our warranty guide, initiating a professional diagnostic report is often required to validate a claim.
A subtle nuance many miss involves the importance of proper diagnostics before calling for service. Jumping straight to part replacements without understanding the root cause can lead to unnecessary expenses and extended downtime. According to a study published by the Appliance Repair Foundation, up to 60% of appliance repairs are premature or avoidable with accurate diagnostics. It’s a trap to assume that all problems are straightforward or that DIY fixes are always risk-free—an advanced mistake that could void your warranty or cause further damage.
Another misconception is that third-party repair services always invalidate your warranty. While some manufacturers specify restrictions, many allow qualified independent technicians as long as OEM parts are used. This is significant because third-party technicians frequently offer faster, more affordable service—yet consumers often hesitate, fearing warranty voidance. A key point from our expert guide on diagnostics is that understanding the fine details empowers you to choose the right service provider without risking your coverage.
### How can consumers avoid falling for these common traps?
By thoroughly reviewing your appliance’s warranty policy and maintaining a record of diagnostics and repairs, you could substantiate claim eligibility and prevent unnecessary replacements. Don’t solely rely on surface-level assumptions or generic advice—invest in proper diagnostics and understand the limitations of your warranty. For instance, many overlook the value of detailed documentation that can prove your case during disputes or warranty claims. Exploring our comprehensive diagnostic guide can give you an edge.
Are you aware that improper handling during repairs might void your warranty? Moving or installing an appliance incorrectly, neglecting regular maintenance, or using non-OEM parts can all contribute to problems not covered by your policy. Always double-check your manufacturer’s privacy and policy details to avoid such pitfalls.
In conclusion, mastering the nuances of appliance warranties and diagnostics is essential for smart homeownership. Don’t fall into the trap of complacency—equip yourself with knowledge and proactive practices. Have you ever fallen into this trap? Let me know in the comments.
Keep It Running: Essential Tools for Longevity
Maintaining your dishwasher’s performance over the long term requires more than just basic cleaning. Having the right tools allows homeowners to diagnose issues accurately and perform repairs safely. One of my go-to instruments is a high-quality digital multimeter, such as the Fluke 117. I always keep mine calibrated because precise readings on components like thermostats and control boards can prevent unnecessary replacements. Additionally, a set of fine-tipped needle-nose pliers is invaluable for removing clips or manipulating small parts during troubleshooting, especially when dealing with complex assemblies like the door latch or spray arms. Don’t overlook a reliable flashlight—good lighting is crucial for inspecting filters, seals, and inaccessible areas long before problems escalate.
Software and Diagnostic Aids to Save Time
Beyond physical tools, I rely on specific software to streamline diagnostics. Manufacturers often provide firmware or update utilities, but for broader troubleshooting, apps like OBDeleven or Homey enable data logging and remote monitoring. For instance, keeping tabs on error codes through manufacturer apps helps me determine whether issues stem from sensors, like the turbidity sensor or temperature thermistor. When I suspect a control board glitch, I use a diagnostic software that connects via USB or Wi-Fi, enabling real-time analysis without dismantling the entire unit. Predictive maintenance is shaping the future, with IoT-enabled appliances alerting owners to impending failures—becoming increasingly common and cost-effective.
Methodical Routine to Preserve Your Dishwasher
Consistent maintenance is key. I schedule bi-monthly inspections of the spray arms and filters, using a toothpick to clear debris in the holes, documented in a maintenance log to track recurring issues. Regularly running a cleaning cycle with vinegar and baking soda helps dissolve hard water deposits that can clog inlet valves or damage seals, extending the appliance’s lifespan. Regarding long-term results, staying proactive with these practices significantly delays costly repairs and keeps warranty coverage intact. Remember, some problems—like persistent leaks or drainage issues—are best diagnosed early with a professional diagnostics expert. Investing in such assessments can save money and frustration over time.
How do I maintain my dishwasher’s health over time?
Routine inspections and cleaning, combined with using precise diagnostic tools, form the backbone of effective long-term maintenance. Incorporating a comprehensive log allows you to identify patterns before minor issues become major failures. As appliance technology evolves, be aware that IoT-based diagnostic devices or apps are becoming more accessible, providing real-time alerts and self-diagnostic data—making maintenance smarter and more predictive. To stay ahead, I recommend trying a professional-grade multimeter and setting up a regular schedule for inspection and cleaning, which can be complemented by periodic software updates and firmware checks from your appliance manufacturer.
The Unexpected Lessons Your Dishwasher Taught You About Maintenance
One of my most eye-opening experiences was realizing that the small inlet valve holds the key to a smoothly functioning dishwasher. I learned that overlooking simple components can lead to costly repairs and frustration, emphasizing the importance of proactive diagnostics.
Another insight came from understanding that consistent maintenance and early detection can save your warranty. Ignoring minor signs like slow filling can escalate into major issues, so trust your instincts and check those little parts before calling for help.
Lastly, I discovered that patience and education are your best tools. Learning how each part works prevents unnecessary replacements and empowers you to troubleshoot effectively, turning a simple leak or error code into a manageable fix.