

It hit me like a punch to the gut. I was in a rush, arms full of laundry, when suddenly—I heard that dreaded snap. The door wouldn’t stay open anymore, and my heart sank. That frayed cable had finally given up after months of slow wear and tear. I knew I couldn’t wait for a professional repair; I had to tackle this myself, pronto. And I got to thinking—if I had known earlier that swapping out a frayed door cable is this straightforward, I wouldn’t have spent so much time stressing over it.
The Lightbulb Moment: Fixing the Fray in Minutes
Here’s the good news: you don’t need to be a seasoned handyman to replace that worn-out cable. With just a handful of tools and a little bit of patience, you can have your door functioning smoothly again in no time. I’ve gone through the process myself, and honestly, it’s simpler than you might think. Plus, it’s satisfying to say goodbye to that annoying squeak or saggy door that was ruining your mornings. Today, I promise to guide you step-by-step so your door operates like new without waiting for a repair appointment—or shelling out a fortune.
Will the Repair Last or Just Be a Band-Aid?
One mistake I made early on? I assumed that just tightening things up was enough. But a quick inspection revealed that the cable was frayed beyond simple fixes. That led me to learn that replacing the cable completely ensures a long-lasting solution. For a trusted overview of what to look for before jumping into repairs, check out top signs your dishwasher needs diagnostics. Understanding when to DIY and when to call in the pros can save you money and headaches later on.
Now, let’s get into the nuts and bolts—so your door can glide open and shut without a fuss again. Ready? Here’s what you need to do.
Disconnect Power and Access the Cable
Before diving into the repair, unplug your dishwasher from the power source to ensure safety. Remove the lower kickplate by unscrewing the screws securing it—this is usually held with just a few screws at the bottom front of the unit. Once the kickplate is off, locate the door assembly and identify the cable attached to the door springs.
Inspect the Old Cable for Damage
Carefully examine the cable for fraying, tears, or signs of wear. I once overlooked a subtle fray, which caused the new cable to snap within days. Use a flashlight to check for any corrosion or rust that might affect the new cable’s longevity.
Gather Your Replacement Parts and Tools
Make sure you have the correct replacement cable compatible with your dishwasher model. You’ll also need pliers, a screwdriver, and possibly a socket wrench. Check manufacturer instructions or consult your user manual if unsure about part numbers.
Remove the Old Cable
Detach the cable from the door spring mechanism and the tension pulley. Use pliers to gently release any clips holding the cable in place. Document or remember the routing—taking photos can save you headaches during reassembly.
Install the New Cable
Attach the new cable at the tension pulley first, then route it along the same path as the old one. Connect it to the door spring mechanism, ensuring it sits snugly without slack. Be cautious: improper routing can cause the door to jam or not seal correctly.
Test the Installation
Before reassembling everything, manually pull the cable to verify smooth operation. Reconnect the power, and run a short cycle to observe the door’s movement. Watch for any hesitations or unusual noises, which might indicate misalignment.
Secure and Finish
Once satisfied with the operation, replace the kickplate and tighten all screws securely. Clean any dust or debris from the area. Remember, a properly installed cable can last years, but if you notice persistent issues, it might be time to consult a professional. If you want to understand more about diagnosing issues before attempting repairs, review troubleshooting tips for dishwashers.
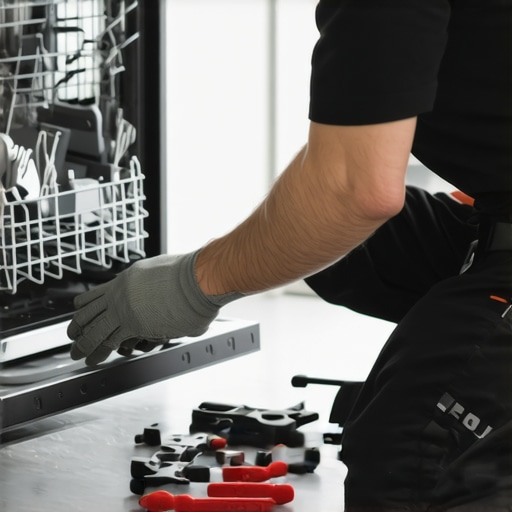 Many homeowners believe that running multiple diagnostic tests or relying solely on online troubleshooting tips guarantees accurate appliance repair diagnosis. However, this common misconception overlooks crucial nuances that can lead to costly mistakes. As an appliance expert, I’ve seen countless cases where DIY diagnostics seemed promising but ultimately resulted in wasted time, unnecessary part replacements, or voided warranties. One widespread myth is that all error codes are straightforward indicators of specific faulty components. In reality, error codes often mask underlying issues that require a nuanced approach to diagnosis. For example, a dishwasher displaying a pump error might actually be due to a clogged filter or a tripped float switch rather than a faulty pump itself. Misinterpreting these signs can lead to replacing parts unnecessarily, which can be costly and may void your warranty if not advised by a professional.
Why You Should Think Twice Before Buying a Multimeter or Jumping to Conclusions
A common advanced mistake is assuming that testing a single component—like a heating element or a motor with a multimeter—gives a complete picture of your appliance’s health. In reality, appliances are intricate systems with many interconnected parts; testing one component without considering its context or the overall system can be misleading. For instance, a faulty thermal fuse might appear intact when tested, but the underlying cause of overheating could be a damaged control board or a blocked vent. Experts recommend combining diagnostic tools with professional knowledge, especially when dealing with complex issues linked to critical components. According to recent studies in appliance diagnostics, a holistic diagnostic approach reduces false positives and unneeded repairs, ultimately protecting your warranty. To learn more about how diagnostics can help maintain your warranty and avoid pitfalls, check out how appliance diagnostics can save your warranty benefits.
Another trap to avoid is ignoring the fine print in your warranty agreement. Some warranties are very specific about what repairs or diagnostics are covered, and attempting repairs outside recommended procedures can void your coverage. It’s essential to understand the scope of your warranty and when to call a professional. For example, tackling electrical repairs without proper training not only risks personal injury but might also breach warranty terms, leaving you unprotected during future claims. To better understand when your warranty applies and how diagnostics factor into it, review understanding appliance diagnostics and improving your warranty claims.
In summary, effective appliance diagnostics requires a nuanced understanding of how systems interact, awareness of warranty limitations, and the wisdom to know when professional assistance is worth the investment. Have you ever fallen into this trap? Let me know in the comments to share your experiences and learn from others.Maintaining your dishwasher and appliances over time requires more than just periodic cleaning; it demands the right tools, strategic routines, and a clear understanding of system longevity. One of my top recommendations is investing in a quality infrared thermometer. I personally use the **Tempmeter IR-550** because it allows quick surface temperature checks of heating elements without dismantling the unit, providing safe and instant diagnostics. This tool has saved me hours by pinpointing inefficient heating elements early, preventing costly replacements and extending appliance life. Additionally, for electronic diagnostics, I rely on a **Fluke T6-600** multimeter, which is renowned for its precision and durability. It helps me verify voltage and resistance across components like control boards and float switches, ensuring all parts work optimally. As technology advances, I predict smart diagnostic apps will play a bigger role, integrating real-time data with AI to anticipate failures before they happen, revolutionizing appliance maintenance. To stay ahead, combining traditional tools with these innovations will be essential.
How do I maintain appliance performance over the long haul?
Regularly inspecting and cleaning critical parts like filters, float switches, and spray arms can dramatically improve longevity. For instance, keeping your dishwasher’s sump filter clear prevents clogs that can cause motor strain, ultimately prolonging its life. It’s also vital to review your manufacturer’s warranty guidelines; understanding coverage for repairs can help decide when professional diagnostics are worthwhile. For example, if you notice inconsistent spray patterns, consulting trusted troubleshooting resources such as expert repair tips can prevent unnecessary part replacements and safeguard your warranty. Remember, integrating precise diagnostic tools like a thermal camera or multimeter is a smart way to stay ahead of potential issues. I encourage you to try using an infrared thermometer on your heating elements this week. It’s simple, effective, and can catch early signs of failure that might otherwise lead to costly repairs. By establishing a routine that combines these tools with regular manual inspections, you ensure your appliances keep running smoothly for years. Investing in proper maintenance tools now saves money and stress down the road, making appliance care both smarter and more efficient.
The Hardest Lesson I Learned About diagnostics,dishwasher,appliance repair,warranty
One of the most profound insights I gained was realizing that not every error code points directly to a faulty part. Sometimes, a simple clog or a misaligned component can mimic a major failure, leading to unnecessary replacements and warranty claims. Recognizing the subtle signs and understanding the interconnected system saved me time, money, and headaches in the long run.
3 Myths About diagnostics,dishwasher,appliance repair,warranty That Held Me Back
I once believed that replacing the most obvious faulty part would resolve all issues, but I learned that holistic diagnostics and system understanding are crucial. Another myth was that error codes are foolproof indicators—often, they mask deeper, less obvious problems. Lastly, I thought professional repair was always necessary; with proper knowledge, many fixes are achievable DIY, provided you approach them with caution and thorough research.
What Experts Won’t Tell You About diagnostics,dishwasher,appliance repair,warranty
Most professionals caution against relying solely on error codes or quick fixes. They emphasize the importance of system-wide inspections and understanding the root causes. A key takeaway is that attempting DIY repairs without proper tools or knowledge can void warranties or cause further damage. Investing in diagnostic tools like a good multimeter or infrared thermometer—choices I trust personally—empowers homeowners to make smarter decisions and detect problems early, ultimately protecting your warranty and extending appliance life. For more insights, see how diagnostics can safeguard your warranty.
My Essential Toolkit for appliance diagnostics and repair
Equipping yourself with a quality multimeter, like the 10-Function Multimeter, and an infrared thermometer, such as the Tempmeter IR-550, has transformed my troubleshooting approach. These tools help isolate issues without guesswork, saving money and reducing unnecessary repairs. I also recommend keeping a detailed repair log to track patterns and improvements over time, which can be invaluable if you need professional assistance later.
Stay Sharp and Proactive for Long-Term Happiness
The future of appliance maintenance lies in proactive diagnostics and knowing when to step back and call in a pro. Developing an intuitive understanding of your dishwasher’s behavior—like unusual noises or inconsistent cycles—can alert you before a small issue turns into costly damage. Regular inspections, combined with the right diagnostic tools, empower you to extend your appliance’s lifespan and ensure warranties remain valid. I encourage you to start small: check your float switch or run a quick resistance test on your heating element. These simple steps can reveal hidden vulnerabilities and give you confidence in your DIY skills. Remember, every repair or diagnostic effort is a step toward mastery and peace of mind—so take action today and enjoy the satisfaction of a well-maintained home appliance.