

Ever been in the middle of doing a load of dishes when suddenly the upper rack stops sliding smoothly? That frustrating moment when your trusty dishwasher begins to act up, and you realize you might have to call a repair tech — or worse, replace the entire unit. I vividly remember the first time this happened to me. I was rinsing off stubborn casserole dishes, only to hear that dreaded clunk as the upper rack refused to slide back into place. It was a wake-up call that DIY repair isn’t just a cost-saving measure; it can also bring back your confidence in handling minor appliance glitches.
Why Fixing Your Upper Rack Adjuster Matters More Than You Think
One of the sneakiest problems with dishwashers is a broken or misaligned upper rack adjuster. This tiny component keeps the rack at the right height, allowing you to load pots, pans, and tall glasses without hassle. When it malfunctions, your dishes don’t get the proper wash, and the rack may even come crashing down or get stuck altogether. Plus, ignoring the issue can lead to more significant damage to the rack rollers or the entire door assembly.
What makes this problem especially tricky is that many folks assume it requires a costly service call. But I’ve learned from personal experience—and countless online tutorials—that replacing the upper rack adjuster is often straightforward, if approached carefully. The key is understanding the mechanics and having the right tools. If you’re like me, you’d rather save yourself some time and money by tackling this repair on your own. And trust me, once you get the hang of it, it’s incredibly satisfying to fix a common problem without waiting around for an appointment.
Before jumping into the repair, it’s helpful to arm yourself with a little knowledge. For instance, knowing how to interpret appliance diagnostics can prevent unnecessary parts replacements and ensure you’re targeting the right issue. Want to learn more about how diagnostics can help you save on repair costs? Read our comprehensive guide on understanding appliance diagnostics.
Have you already faced this frustrating problem with your dishwasher? If so, you’re not alone—and I promise, replacing that small but vital part is easier than it seems. Let’s go step-by-step through the process so you can restore your dishwasher’s full function without breaking the bank or waiting for a technician.
Gather Your Tools and Prepare
Before diving into the repair, assemble a Phillips screwdriver, a flat-head screwdriver, and a pair of pliers. Wear gloves to protect your hands from sharp edges. Unplug the dishwasher or turn off the circuit breaker to ensure safety. Clear the surrounding area for workspace. I learned this the hard way when I didn’t disconnect power, and a sudden shock made me reconsider the safety measures—never skip this step.
Remove the Lower Panel and Access the Rack
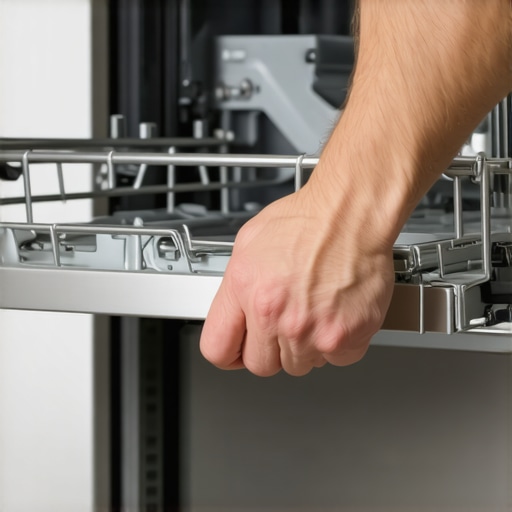
Use the screwdriver to loosen the screws securing the lower front panel. Carefully set the panel aside. Now, pull out the upper rack fully. Examine the sides for any screws holding the adjuster mechanism; if found, remove them with your screwdriver. Think of it like diffusing a tense situation—patience and careful disassembly prevent further damage.
Identify the Broken Part
Check the existing adjuster for cracks, deformation, or missing pieces. If the adjuster is loose or wobbly, it confirms it’s the culprit. I once replaced an intact-looking part that turned out to be okay, wasting time; verify thoroughly before purchasing replacements. To be sure you’re targeting the right part, consult your dishwasher’s manual or look for online diagrams.
Remove the Old Adjuster
Use the flat-head screwdriver or pliers to gently pry or unscrew the broken part. If stuck, wiggle gently—force damages the nearby components. Remember, like trying to extract a stubborn sticker, patience is key. During one repair, a stubborn adjuster snapped, leaving me with a jagged edge—lesson learned: take it slow.
Install the New Adjuster
Take the new part, align it carefully with the mounting points, and secure it with screws or snap-fit as required. Ensure it’s firmly attached—wiggle test can confirm stability. Think of this step as putting a new piece into a puzzle; alignment matters. I once installed a misaligned adjuster, which caused the rack to tilt, so double-check positioning before tightening everything.
Test Your Repair
Before replacing the panel, plug the dishwasher back in or flip the circuit breaker. Run a short cycle without dishes to observe the rack operation. Watch for smooth sliding and correct height adjustment. If the rack still sticks or is misaligned, revisit the installation steps. This moment reminded me of test-driving a car after repairs—small checks save bigger headaches later. If issues persist, consult online troubleshooting guides or consider professional diagnostics, especially if your warranty might be impacted—see how diagnostic tools can help at this resource.
Reassemble and Final Check
Replace the lower panel and secure it with screws. Push the rack into the dishwasher and verify it slides smoothly and is at the correct height. Confirm no leftover tools or parts inside. Proper reassembly ensures longevity of the repair and prevents water leaks. My first attempt ended poorly because I forgot to reattach the panel, leading to an annoying rattle during operation—attention to detail counts.
 Many DIY enthusiasts and even seasoned homeowners believe that diagnosing appliance problems is straightforward, often focusing solely on visible symptoms or what the manufacturer suggests. However, this simplification can lead to overlooked nuances that are crucial for accurate repairs and warranty considerations. For instance, a common myth is that all error codes directly point to a single faulty part. In reality, error codes often mask underlying issues, such as improper water pressure or clogged filters, which can mislead even experienced troubleshooters. Recognizing these subtleties can make a significant difference in achieving a long-lasting fix.
Another misconception is that replacing a failed component always resolves the problem permanently. This isn’t necessarily true—many failures are symptoms of larger systemic issues, like electrical surges or wear patterns that precede part failure. For example, repeatedly replacing heating elements without inspecting the power supply and control boards can result in recurring failures, wasting time and money. Proper diagnostics, often assisted by professional tools, help identify root causes instead of just treating symptoms. To deepen your diagnostic skills and avoid common pitfalls, consider exploring understanding appliance diagnostics.
A sneaky trap many fall into involves the misapplication of warranty coverage. It’s tempting to think that any repair within the warranty period is free and straightforward. However, manufacturers often exclude damage caused by user mishandling, improper maintenance, or even minor repairs performed by unqualified individuals. This misconception can lead to denied warranty claims—an outcome that frustrates many. Being aware of what your warranty covers and how to document repairs with evidence, like photo proof of damages, enhances your chance of successful warranty claims.
For advanced DIYers, there’s a frequently overlooked nuance concerning diagnostics: the importance of system calibration and updates. Modern appliances are equipped with firmware that can be reset or updated to fix bugs or improve performance. Ignoring this step might cause persistent false error codes or non-responsiveness, sabotaging your repair efforts. Learning how to perform these updates safely can be a game-changer. Curious about this process? Check out how to reset error codes.
Make no mistake—appliance diagnostics are a sophisticated science blending electrical theory, mechanical insight, and system-level thinking. While some believe ‘replacing the last part tested’ is enough, real expertise involves understanding interconnected systems. A comprehensive diagnostic approach not only saves money but also extends the lifespan of your appliances. Have you ever fallen into this trap? Let me know in the comments and share your experience with tricky repairs.
Keeping your dishwasher running smoothly over time requires more than just occasional cleaning; it demands the right tools and a strategic approach to maintenance. As an experienced DIY enthusiast, I rely on a set of specific equipment that helps me troubleshoot and prevent issues before they become costly repairs. Investing in quality tools not only extends your appliance’s lifespan but also enhances your confidence in handling unforeseen problems.
My Favorite Multimeter for Appliance Diagnostics
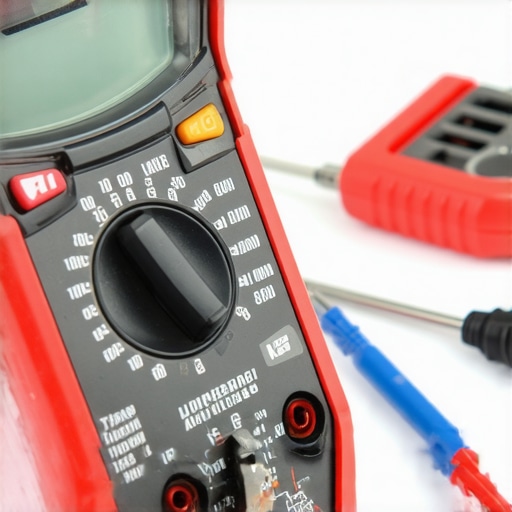
The cornerstone of my diagnostic toolkit is a reliable multimeter. I prefer the Fluke 115 True RMS Multimeter because it offers precise readings of voltage, current, and resistance, all within a durable and easy-to-handle design. Accurate measurements are critical when testing components like heating elements or door switches—an area where cheap meters just fall short. Regularly testing parts with this multimeter allows me to catch early signs of wear, preventing sudden breakdowns.
Inspection Cameras Offer Visual Clarity
Getting a clear view inside the dishwasher’s tight spaces can be challenging. That’s why I use a flexible, USB-powered inspection camera, like the Depstech Endoscope. It helps me inspect hidden areas — such as spray arms and drain traps — for scale buildup or obstructions. This visual insight quickens diagnostics and reduces guesswork, ultimately saving time and unnecessary part replacements. For maintenance, a good camera can help you spot issues like clogged filters or damage that might otherwise go unnoticed.
Specialized Software for Diagnostic Codes
While hardware tools are essential, software solutions enhance diagnostic accuracy. Many modern dishwashers emit error codes that pinpoint issues. I recommend using a dedicated diagnostic app compatible with your appliance brand, often linked via Wi-Fi or Bluetooth. These apps interpret error codes and sometimes suggest solutions, turning complex troubleshooting into a manageable task. Check if your dishwasher supports smart diagnostics—many brands now offer this feature as part of their warranty services.
Preventative Maintenance with Smart Sensors
Looking ahead, I believe the future of appliance maintenance lies in smart sensors that monitor component health in real time. These devices can alert you to impending failures—like a developing leak or heating element degradation—before symptoms even appear. For now, periodically testing parts with my multimeter or inspecting with a camera can give valuable insights into the condition of components such as the salt reservoir or door latch.
How do I maintain my dishwasher’s efficiency and avoid breakdowns over time?
The secret to long-term maintenance is regular diagnostics combined with proactive cleaning. Using tools like a multimeter and inspection camera helps me identify potential issues early, while following a scheduled cleaning routine—removing mineral deposits, cleaning filters, and checking seals—keeps everything in prime condition. Incorporating these practices into your routine is crucial, especially if your appliance is still under warranty; proper upkeep can prevent voiding warranty coverage. Want to master diagnostics? Read our extensive guide on understanding appliance diagnostics.
Don’t shy away from experimenting with your tools — a little troubleshooting now can save you a lot of money later. For example, testing your heating element with a multimeter is straightforward and can reveal if it’s likely to fail soon, giving you time to replace it proactively. Start integrating these advanced tips today and witness how they transform your approach to appliance care. Feeling inspired? Try testing your dishwasher’s door switch with a multimeter as your first step toward becoming a DIY diagnostics pro!
Why I Wish I Paid Closer Attention to Early Signs of Damage
One of the most valuable lessons I learned was that ignoring small symptoms—like a slightly off-kilter rack—can lead to major repairs later. Recognizing early warning signs of issues, whether it’s a misaligned adjuster or unusual noises, allowed me to address problems before they worsened. This proactive approach saved me money and extended the lifespan of my dishwasher, proving that paying attention to minor details is crucial for DIY repairs and warranty preservation.
How the Right Tools Transformed My Repair Confidence
Equipping myself with a quality multimeter and inspection camera changed the game. These tools enabled me to diagnose problems accurately without guesswork, reducing the risk of unnecessary part replacements. Reliable tools empower DIY enthusiasts to troubleshoot confidently and efficiently, ensuring repairs are thorough and durable. They also turn frustrating mysteries into manageable tasks, making appliance maintenance something I look forward to rather than fear.
Trusting Systematic Diagnostics Over Guesswork
Jumping straight to replacing parts is tempting but often ineffective. I learned that understanding how to interpret error codes and system responses leads to more precise fixes. Utilizing diagnostic guides and tools helps pinpoint root causes, avoiding wasted effort and expense. This systematic approach aligns with warranty guidelines and protects your investment, especially as appliances become more sophisticated with smart diagnostics. Improved diagnostics mean fewer call-backs and longer-lasting solutions.
Exploring Resources That Handled My Biggest Challenges
Over time, I relied on specialized resources like comprehensive diagnostic guides and affordable testing techniques to inform my repairs. The community forums and professional blogs also provided insights that I couldn’t find elsewhere. These resources helped me evolve from a hesitant DIYer into a confident fixer, equipped with the knowledge to tackle complex issues while safeguarding my warranty rights.
Believe in Your Ability to Take On Repairs
Most importantly, I discovered that with patience, proper tools, and a willingness to learn, anyone can handle basic dishwasher repairs. Tackling these projects not only saves money but also builds a sense of pride and independence. The key is to start small—maybe test a door switch or clean a clogged filter—and gradually take on more challenging tasks like replacing a broken adjuster. You’re capable of more than you think; all it takes is that first step.