

It was one of those mornings when everything seemed to go wrong—my dishwasher door suddenly slammed shut with a loud snap, and I knew immediately what had happened. That familiar, cringe-worthy sound of a spring breaking is enough to ruin your whole day, especially when you’re already running late. At first, I felt a wave of frustration—another repair task that might take hours, a trip to the store, or worse, calling in a pro. But then, I had a feeling that I could tackle this myself, and guess what? I was right.
Don’t Let a Broken Door Spring Ruin Your Day
Replacing a snapped door spring might sound intimidating, but trust me, it’s a lot more manageable than you think. Today, I want to share my experience and show you how you can get your dishwasher door back in action—*fast*. No more waiting around for a technician, no more shelling out extra cash. If you’re tired of your dishwasher’s door sagging or won’t stay shut, you’re in the right place. In the next few minutes, I’ll walk you through how to replace that stubborn spring in just 15 minutes, using simple tools most homeowners already have.
Will Replacing a Spring Save You Money or Just Waste Time?
A common mistake I made early on was underestimating how simple some repairs can be—and overestimating the need to call in a professional. Many folks believe that spring replacements require special skills or tools, but in reality, with a little guidance, it’s a straightforward fix. Plus, DIY repairs help maintain the longevity of your appliance and keep your warranty intact—something I learned from [an expert article](https://applianceoutletpro.com/understanding-appliance-diagnostics-improving-your-warranty-claims). The key is knowing exactly what to do and avoiding common pitfalls.
Throughout this guide, I’ll point out the most important tips and tricks so you can avoid mistakes like installing the spring incorrectly or damaging other parts. My goal is for you to feel confident—because if I can do it, you definitely can. Ready to get that door working perfectly again? Let’s dive in and get your appliance back to full swing.
Secure the Dishwasher and Remove the Door
Before starting, unplug your dishwasher or switch off the circuit breaker to ensure safety. Open the door fully and locate the screws securing the inner panel—these are usually found along the perimeter. Use a screwdriver to carefully remove these screws and detach the inner panel, exposing the spring mechanism. As I did during my morning repair, take your time to prevent damaging clips or wires. Once the panel is off, gently support the door to avoid it falling unexpectedly.
Identify and Remove the Broken Spring
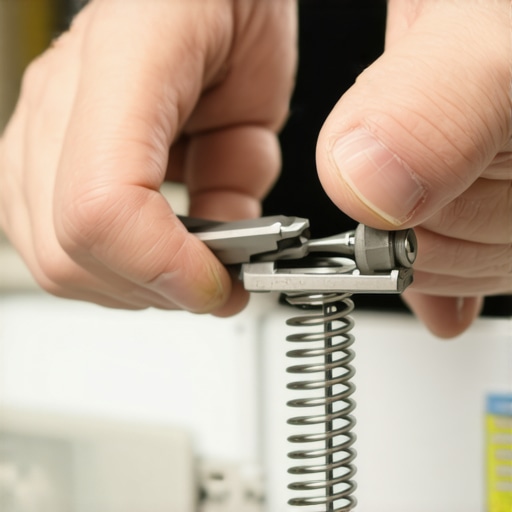
Carefully examine the spring assembly—look for signs of breakage or corrosion. My spring was snapped in half, dangling uselessly. Using pliers, detach the spring from its mounting hooks, noting how the tensioned spring interacts with the door arm and frame. This step is crucial because incorrect removal may place the spring under tension that can cause injury if mishandled. To avoid surprises, wear gloves, and work slowly. This process is comparable to releasing a stretched rubber band—do it gradually and safely.
Optionally, Clean and Inspect Related Parts
While the panel is removed, take the chance to inspect other components such as the door gasket, hinges, and the other spring. Clean any debris or mineral deposits that might hinder movement—destination for the next cleaning hack.
Install the New Spring Correctly
Attach the new spring to the same hooks you removed the old one from, ensuring it is positioned correctly—tensioned and seated properly. During my repair, I used a bungee cord as a makeshift spring stretcher, akin to using a clamp to hold a picture frame level. Carefully stretch the spring to hook it onto the opposite side, verifying that the tension feels balanced and the door operates smoothly. Misaligned springs can cause uneven wear or door sagging, so double-check your work.
Test the Door Functionality
Reattach the inner panel, restoring screws and clips carefully. Before restoring power, manually verify that the door opens and closes smoothly without sticking or losing alignment. Plug the dishwasher back in or turn on the breaker, then run a short cycle to confirm correct operation. Witnessing my dishwasher operate like new after replacing that spring reminded me how a simple fix can preserve your appliance’s lifespan.
Verify and Prevent Future Issues
Monitor the door’s movement over the next few days. If you notice sagging or difficulty opening, revisit your spring installation. Regularly inspect for signs of corrosion—preventative maintenance is key. Remember, springs are wear components; replacing them proactively can save you from unexpected breakdowns. For complex diagnostics or persistent problems, consult professional services, especially if warranty coverage comes into play—click here to learn more about warranty considerations.
 Many homeowners operate under assumptions about appliance repair that can lead to costly mistakes or missed warranty benefits. For instance, a prevalent myth is that all repairs require professional technicians; however, understanding the nuances of diagnostics and maintenance can empower you to troubleshoot minor issues confidently and even extend your warranty coverage. One common trap is believing that replacing parts arbitrarily will fix problems—this approach can void warranties or cause further damage if diagnostics aren’t correctly performed. Instead, leveraging expert diagnostics, such as through [professional evaluation](https://applianceoutletpro.com/troubleshooting-dishwasher-problems-expert-diagnostics-repair-tips), ensures targeted repairs that save money and time. Another misconception involves the timing of repairs—many think waiting until problems worsen is better, but early intervention, supported by proper diagnostics, can prevent escalation and preserve warranty benefits discussed at [how diagnostics can safeguard your warranty](https://applianceoutletpro.com/how-appliance-diagnostics-can-save-your-warranty-benefits). Additionally, there’s an often-overlooked detail: not all warranty claims are straightforward, and understanding the fine print—like what constitutes misuse or neglect—can be critical. For example, some believe that warranty coverage automatically includes all repairs, but [pre-existing conditions](https://applianceoutletpro.com/why-your-service-tech-claims-your-detergent-voids-the-warranty) can disqualify claims if not properly documented. Errors in diagnosing appliance issues frequently stem from relying solely on error codes without comprehensive testing, as highlighted in studies on diagnostic accuracy and its impact on warranty claims. This emphasizes the value of expert evaluation and proper troubleshooting techniques. Remember, many faults are due to preventable causes—regular maintenance and understanding what common misconceptions might lead your troubleshooting astray are vital. Don’t let myths or overlooked nuances cost you time, money, or void your warranty. If you want to dive deeper into accuracy in diagnostics and claiming warranties, explore the detailed guides on [professional diagnostics](https://applianceoutletpro.com/understanding-appliance-diagnostics-improving-your-warranty-claims). Have you ever fallen into this trap? Let me know in the comments.
Prioritize Quality Tools for Reliable Repairs
When it comes to appliance maintenance, investing in the right tools makes all the difference. I personally rely on a high-quality multimeter, specifically the Fluke 115, because it offers precise readings and durability, essential for diagnosing electrical issues safely. Additionally, a set of precision screwdrivers—like the Wiha Insulated Screwdriver Set—helps prevent accidental shocks and allows for detailed work on tight spaces. For spring replacements, I use heavy-duty needle-nose pliers with rubberized grips to handle springs without slipping or causing damage. These tools have stood up to multiple repairs and ensure my fixes are both safe and effective.
Establish Routine Maintenance to Extend Appliance Life
Regular checks are key to preventing costly breakdowns. I recommend inspecting the door gasket monthly—clean it gently with a soft cloth and mild detergent to prevent mold and leaks. Also, schedule periodic cleaning of the spray arms—removing and clearing any clogged holes using a toothpick or a small brush. Doing this maintains optimal water flow and cleaning performance. Moreover, test the water inlet pressure yearly; a simple way is using a water pressure gauge attached to the inlet hose. Proper maintenance not only keeps your dishwasher running smoothly but also maximizes warranty benefits—learn how diagnostics can protect your warranty.
Tools and Methods for Diagnosing Long-Term Issues
Diagnosing persistent problems goes beyond basic troubleshooting. I utilize a digital inspection camera to look inside inaccessible areas—this helps uncover hidden blockages or corrosion without disassembly. For electrical components, I prefer a multimeter with a continuity tester function to check switches, relays, and resistors accurately. Additionally, an ultrasonic leak detector can identify silent leaks that cause water damage over time. Implementing these diagnostic tools early on saves time and preserves the appliance’s lifespan, especially if you want to avoid unnecessary warranty claims or premature replacements.
How do I maintain dishwasher performance over time?
Consistent maintenance, such as cleaning filters, inspecting hoses, and testing components periodically, is crucial. Keep an eye on error codes and understand that some issues, like a failing circulation pump, can be diagnosed with specialized tools—this guide on using a multimeter for pump diagnostics is invaluable. In fact, learning to use a multimeter effectively is a game-changer; I recommend practicing on known good circuits first, then applying that skill to diagnose subtle issues before they become major problems. For the ambitious DIYer, try calibrating your multimeter to test the heating element using a steady ice water bath, confirming proper resistance—this simple step can prevent warm-up failures and extend your dishwasher’s life. Taking these proactive steps today will ensure your appliance continues to serve you reliably in the years to come.
Lessons from the Trenches: What I Wish I Knew About Dishwasher Springs
One of the most valuable lessons I learned is that a calm, patient approach beats rushing through repairs. I once tried to force a spring into place without proper tools, only to damage the frame—an expensive mistake I could have avoided. Now, I always remember that understanding the tension and proper placement saves time and money.
Another insight is recognizing when to seek professional help. While DIY is empowering, some issues—like persistent leaks or electrical faults—are better left to experts. Knowing the limits of your skills helps prevent further damage and preserves your warranty, especially when diagnostic accuracy matters.
Lastly, I found that keeping a well-stocked toolkit, including a multimeter and quality pliers, transforms repairs from daunting to manageable. Investing in tools I trust has made all the difference in diagnosing problems early and performing reliable fixes that stand the test of time.
Tools and Wisdom That Keep My Dishwasher Running Smoothly
My go-to resource for DIY repairs is the comprehensive guide on professional diagnostics and repair tips. It offers step-by-step instructions and troubleshooting techniques that go beyond basic YouTube videos. For tools, I rely on the Fluke 115 multimeter for electrical testing, and high-quality insulated screwdrivers from Wiha—these are indispensable for safe, precise work. Additionally, a good set of needle-nose pliers and a spring stretcher aid in handling stubborn parts, ensuring my repairs are both safe and lasting.
Beyond tools, I also follow detailed maintenance routines from trusted sources to catch issues early. Regularly inspecting the door gasket, cleaning spray arms, and monitoring water pressure prevent many problems before they escalate. This proactive approach extends my dishwasher’s life and maintains warranty coverage, especially when diagnostics catch issues early, as discussed here.
Embrace the Future of DIY Dishwasher Care
Taking ownership of your appliance repairs is empowering and cost-effective. With the right knowledge, tools, and mindset, you can troubleshoot common issues like broken springs and prevent larger breakdowns. Remember, each successful repair boosts your confidence and prolongs your dishwasher’s lifespan. If you’re ready to start, leverage the rich resources available and stay vigilant with routine maintenance. Your dishwasher—and your wallet—will thank you for it.
What’s the trickiest repair step you’ve ever tackled? Share your stories below and let’s learn together!