

Ever stood in front of your dishwasher, scratching your head as it flashes an inscrutable code on the digital display? I remember the first time this happened to me—my machine started beeping loudly, and all I could do was stare at that mysterious message, feeling completely useless. It was one of those frustrating moments where you genuinely wonder if some secret language has taken over your appliance. That’s when I realized: behind those blinking numbers and symbols lies a wealth of information—if you know how to read it.
Decoding the Digital Mystery: Why Your Dishwasher’s Error Log Matters
Knowing how to interpret the hidden error log on your dishwasher can save you from costly repairs and unnecessary calls to the technician. Instead of guessing or blindly replacing parts, you can identify the actual problem—sometimes with just a simple reset or a component check. This knowledge turns you from a mere user into a DIY troubleshooting hero. And trust me, understanding these diagnostics is more accessible than you might think. Want to avoid that sinking feeling of waiting for a repair appointment while your dishes pile up? Then, mastering your appliance’s diagnostic signals is the way to go.
Is Diagnosing Your Dishwasher Worth the Effort?
For many, the idea of reading error codes feels intimidating—like decoding ancient runes. I used to think it was only for trained technicians, and I almost overlooked the importance of this skill early on. The truth is, I made the mistake of ignoring those flashing codes, which led to expensive repairs that could have been avoided. After some trial and error, I discovered that a little patience and the right know-how can go a long way. If you’re skeptical about whether reading these logs is worth your time, ask yourself: would you rather pay a service fee or fix the problem yourself? The answer is often clearer than you think. Plus, tools and resources are just a click away; for example, detailed troubleshooting tips are available in places like this comprehensive guide.
In the sections ahead, I’ll walk you through exactly how to interpret those cryptic error messages and what steps to take next. It’s simpler than it sounds—and, honestly, a skill that can save you time, money, and frustration. So, if you’ve ever faced that blinking display and wondered if it’s the end of your dishwasher’s life, stay tuned. We’re about to turn that mystery into clarity, one code at a time.
Accessing Your Dishwasher’s Error Information
Start by unplugging your dishwasher for safety, then locate the control panel. For many models, pressing and holding specific buttons—such as “Cancel” and “Drain” simultaneously—activates the diagnostic mode, revealing error codes. Remember, these sequences vary by manufacturer; consult your user manual or
this troubleshooting guide for specifics. I once faced a stuck error code that wouldn’t clear; by entering the diagnostic mode correctly, I retrieved the code and diagnosed a faulty door latch, avoiding unnecessary costs.
Deciphering the Error Codes
Each code corresponds to a specific problem. For example, a flashing light pattern or a combination of beeps indicates issues like a clogged drain or a water inlet problem. Visualize these codes as the dishwasher’s Morse code, communicating what’s wrong internally. To interpret these codes, write down the blinking patterns or beeps, then cross-reference with your model’s manual or professional diagnostics resources. I once deciphered a code indicating a heater malfunction, which led me to a simple thermistor replacement rather than calling a tech.
Locating and Testing Components
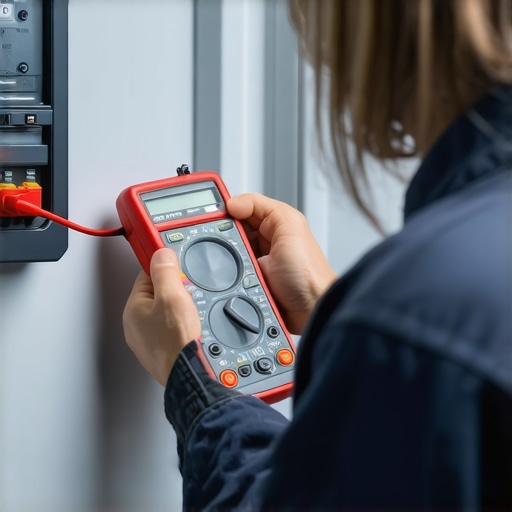
Once you identify the faulty component from the code, locate it within your dishwasher. Use a multimeter to test electrical continuity or resistance—think of the multimeter as a stethoscope for your appliance. For example, testing a heating element involves removing it and measuring resistance; a broken element shows no continuity. Remember, testing safety devices like float switches or door latches is crucial—failure of these parts can mimic more serious issues. During my first DIY repair, testing the float switch with a multimeter uncovered a stuck component causing false overflow alerts; fixing it saved me an expensive service call.
Performing Basic Repairs or Resetting
If your diagnostics point to a simple fix—like a clogged filter or a jammed spray arm—clear these obstructions. Sometimes, clearing debris or realigning parts restores normal function. For electronic components, resetting your dishwasher can clear minor glitches: unplug it for about five minutes, then plug it back in. I once reset a stubborn error code after cleaning the filter and reconnecting loose wires, which resolved the problem without further intervention. This straightforward step often fixes minor issues and prolongs your appliance’s lifespan.
Know When to Call in Help
If diagnostics suggest complex issues—such as a failed control board or motor—it’s wise to seek professional assistance. Remember, misdiagnosing or improperly repairing electronics can lead to more damage or safety hazards. Use diagnostic insights to determine whether your problem exceeds your skill level. During my experience, recognizing my limits saved me from electrical hazards and potentially damaging my dishwasher further. When in doubt, contacting a qualified technician ensures safe and lasting repairs.
By understanding how to access, interpret, and test your dishwasher’s diagnostic codes, you empower yourself to troubleshoot effectively and save money. From mapping blinking lights to testing critical components, each step brings you closer to a quick fix and prevents unnecessary replacements. Keep this guide handy next time your dishwasher throws a code—your appliance will thank you for it.
Many homeowners hold misconceptions about appliance diagnostics and warranties, often leading to costly mistakes. One widespread myth is that all repair issues are covered by standard warranties; in reality, many warranties exclude specific parts or types of damage, so it’s crucial to read the fine print or consult trusted sources like this guide to understand your coverage fully.
Another misconception is that DIY repairs always void warranties. While some warranties may specify prohibitions against unauthorized repairs, many manufacturers recognize basic troubleshooting and component testing, especially when following recommended procedures. Knowing the subtle distinctions can help you avoid unintentionally voiding your coverage or missing out on warranty benefits.
Here’s a common trap: assuming that error codes are always accurate indicators of the faulty part. In my experience, error codes are sometimes false alarms caused by sensor misreadings or electrical glitches. For instance, an error related to a water inlet valve might only be signaling a wiring issue or a clogged filter, rather than a defective valve itself—highlighting the importance of comprehensive diagnostics rather than jumping straight to part replacement.
Advanced repair enthusiasts often overlook the importance of understanding the diagnostic process’s nuances. For example, improving your diagnostic literacy can significantly impact warranty claims. Accurate interpretation of error codes, component testing, and proper reset procedures can be the difference between a covered repair and an out-of-pocket expense.
Furthermore, many users are unaware of the pitfalls of using cheap replacement parts. Low-cost, inferior components might seem tempting initially but can cause long-term failures or even damage to your appliance. Research indicates that investing in authentic, quality parts reduces the likelihood of repeated breakdowns, saving you money in the long run.
On a broader note, misunderstandings about appliance diagnostics often lead to unnecessary service calls. For instance, attempting to reset a dishwasher without understanding the underlying issue can result in further damage. Instead, leveraging detailed troubleshooting resources like professional diagnostics tips can help you determine when DIY is appropriate and when to call a pro.
Being aware of these nuanced aspects can bolster your confidence and efficiency in managing appliance repairs. Do you fall prey to any of these misconceptions? Let me know in the comments! Remember, mastering the subtle points in diagnostics and warranty policies can make a substantial difference in your repair outcomes.
Keeping Your Dishwasher Running Smoothly: My Recommended Tools and Techniques
Maintaining the longevity and optimal performance of your dishwasher requires more than just occasional cleaning. Over the years, I’ve found that investing in specific tools and adopting disciplined routines can save you money and prevent frustrating breakdowns. One indispensable item I rely on is a non-contact voltage tester. It allows me to safely verify electrical components without risking a shock, which is crucial when diagnosing issues with control boards or wiring. Additionally, a multimeter has become my go-to device for testing resistances of heaters and sensors, ensuring they operate within manufacturer specifications. To manage water flow and detect leaks early, I utilize a simple pennies and paperclips trick to check the integrity of float switches and drainage systems. This inexpensive method quickly pinpoints faulty parts before they cause bigger problems.
When it comes to cleaning, I swear by a compressed air canister to blow out spray nozzles and filters—removing debris and mineral buildup that tackle performance head-on. This proactive approach mitigates risks of clogs that could lead to leaks or poor cleaning results. For routine maintenance, I recommend setting up a weekly inspection schedule where you visually check door seals, filters, and hoses. Regularly vacuuming debris from the sump area can prevent formation of mold and scale, which reduces wear and tear over time.
One technique I’ve recently adopted is to keep a detailed diagnostic log. By recording error codes, repair dates, and parts replaced, I’ve identified patterns that predict upcoming failures. This habit enables me to plan repairs before catastrophic breakdowns occur, extending the lifespan of my appliance. Looking ahead, I believe the future of appliance maintenance will lean heavily on smart diagnostics integrated into machines, providing real-time alerts and troubleshooting assistance. Embracing these innovations now positions you at the forefront of DIY repair trends.
How do I maintain my dishwasher over the long haul?
Simple routines make all the difference: periodically checking and cleaning the spray arms and filters, inspecting hoses for wear, and resetting the control board after cleaning filters are all effective strategies. I also recommend using high-quality, manufacturer-approved replacement parts when repairs become necessary, as inferior components often fail prematurely and may void your warranty. Remember, preventative maintenance often costs less than emergency repairs and keeps your dishwasher functioning reliably for years.
If you’re interested in mastering advanced diagnostics, I suggest trying the float switch testing technique, which is a quick, effective way to catch issues early. A small investment in these tools not only protects your appliance but empowers you to handle most problems without calling a technician. Ready to elevate your maintenance game? Start incorporating these habits today and experience the benefits of a long-lasting, trouble-free dishwasher.
3 Lessons Learned the Hard Way About Appliance Diagnostics and Warranties
- Not all error codes are created equal. I used to trust every blinking light as an outright failure, but often they’re just signals for minor issues like clogged filters or loose wires. Recognizing this saved me from unnecessary replacements and big bills.
- Your warranty isn’t a magic shield. Reading the fine print revealed that many warranties exclude basic repairs or DIY fixes. This realization motivated me to become more knowledgeable and handle small issues myself, maintaining my coverage and saving money.
- Tools are your best friends. Investing in a quality multimeter and non-contact voltage tester transformed my approach. Now, I diagnose electrical problems confidently, rather than relying on guesswork or costly guesswork from technicians.
- Patience beats panic. Rushing into parts replacement without thorough diagnostics can cause more harm than good. Taking the time to interpret codes and test components often reveals simple fixes, like cleaning a clogged drain or resetting a control board, that restore operation at minimal cost.
Tools and Guides That Changed My Approach to Dishwasher Repairs
- The float switch testing technique: Simple, effective, and prevents unnecessary part replacements.
- Professional diagnostics tips: A comprehensive guide that demystifies error codes and testing procedures, empowering DIY enthusiasts.
- Understanding diagnostics to protect your warranty: Learning how to provide accurate info can help you avoid costly service calls and keep your coverage intact.
- High-quality replacement parts from trusted sources: They last longer and reduce the risk of repeat breakdowns, ultimately saving you money and stress.
Your Shot at Smarter Repairs Starts Now
Mastering dishwasher diagnostics isn’t just about saving money—it’s about gaining confidence and control over your home appliances. Don’t let error codes intimidate you; instead, see them as a language waiting to be understood. With patience, the right tools, and proven resources, you can troubleshoot confidently and extend the life of your dishwasher—saving time, money, and frustration. Ready to make your appliance work for you? Dive in, learn, and transform your approach to home maintenance today.
What’s the first error code you plan to decode? Share your experiences or questions below—I’d love to hear your story!
,