

I remember the moment vividly. There I was, unloading my dishwasher after a busy week, and I noticed something unsettling—my once shiny dishwasher rack was riddled with rust spots, making me cringe every time I opened the appliance. It hit me hard: this wasn’t just about appearance; rust can lead to weakened structural integrity and rust particles might even contaminate my dishes. Like many homeowners, I felt a mix of frustration and helplessness, thinking I’d need to replace the entire rack and spend a fortune. But then, an idea sparked—could I patch it myself, without calling in the pros or replacing the whole thing? That lightbulb moment led me down a path to find a practical, food-safe solution that could save my rack and my budget.
Your Rusted Dishwasher Rack Might Be Fixable Without Replacing It
Will Food-Grade Sealant Really Save the Day?
When I first considered sealing my rusted rack, skepticism was my initial friend. Surely, a sealant wouldn’t last or might even cause more problems? But after some research and personal trial, I discovered that using food-grade sealant can provide a durable, safe patch—if applied correctly. The key is selecting the right product and avoiding rookie mistakes. I made sure to choose a sealant specifically designed for food contact surfaces, which ensures that no harmful chemicals leach into your dishes. My biggest warning? Don’t skip the cleaning step before sealing—that’s where many folks, including myself early on, stumble. Proper prep sets the foundation for a lasting fix.
Have You Faced This Rust Woes?
If you’re reading this and thinking, “Could my rusted dishwasher rack be salvaged instead of replaced?” then you’re not alone. Rust is so common in older or hard-water areas and can be tricky to deal with. But I promise, with the right approach, you can extend the life of your racks without breaking the bank. Curious about how I managed to stop rust from spreading and keep my dishes safe? Stay tuned, because what I learned might just surprise you. And remember, many mistakes happen early on—like neglecting proper cleaning—that can ruin your repair effort. For more insights, check out why warranties don’t last forever. Now, let’s dive into the step-by-step process of patching that rusty shame with a simple, food-safe sealant that actually works.
Prepare Your Workspace and Materials
Begin by gathering all necessary supplies: a food-grade sealant suitable for metal and plastic, a clean cloth, a wire brush or steel wool, isopropyl alcohol for cleaning, and disposable gloves. Clear a work area with good lighting to ensure safety and precision. Having everything at hand prevents interruptions midway through the repair process.
Assess and Clean the Rusted Area
Inspect the rust spots carefully. Use the wire brush or steel wool to scrub off loose rust flakes, aiming to remove as much rust as possible without damaging the underlying material. This step is crucial; residual rust can compromise the sealant’s adhesion. Wipe the area thoroughly with a damp cloth to remove dust and debris, then wipe again with isopropyl alcohol to eliminate grease or oils that could hinder bonding. I learned this the hard way when skipping it caused the sealant to peel off within weeks.
Apply the Food-Grade Sealant Correctly
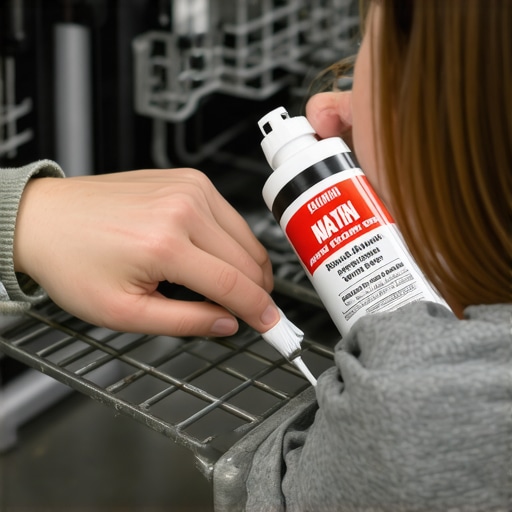
Follow the manufacturer’s instructions carefully. Usually, you’ll need to apply a thin, even layer over the cleaned rusted patches using a disposable applicator or gloved finger. It’s best to build up gradients gradually, avoiding thick blobs that can crack or peel. Pay special attention to edges and corners where water and rust tend to accumulate. During my last fix, I used an old credit card to smooth out the sealant, which helped create a uniform layer.
Allow Proper Curing Time
Let the sealant cure undisturbed for the recommended duration, often 24-48 hours. Keep the rack in a dry, well-ventilated space—do not expose it to water or humidity during this period. I once hurried the process, and the patch failed after just a week, illustrating the importance of patience. Proper curing ensures the sealant creates a durable barrier against moisture and rust progression.
Reassemble and Test the Repair
Once cured, reassemble your dishwasher rack and install it back into the dishwasher. Run a short cycle with no dishes to observe if water flows properly and if the patch holds without peeling. Check the repaired spots for integrity after the cycle. If the sealant shows signs of wear, repeat the cleaning and sealing steps for a more robust fix. Remember, a professional diagnosis might be necessary if rust has penetrated deeply or if the repair persists to fail — you can learn more about troubleshooting dishwasher problems.
Prevent Future Rust Formation
To keep rust at bay, consider applying a thin coat of silicone-based lubricant to vulnerable areas periodically, especially if you live in a hard-water region. Also, regularly inspect for early signs of rust or corrosion and address them promptly. A proactive approach extends the life of your appliances and saves you money in costly replacements. If you’re unsure about whether your dishwasher is still under warranty or if repair costs are justified, check out when to rely on a warranty.
 Many homeowners believe that running basic diagnostics or following simple troubleshooting steps guarantees their appliances’ longevity and warranty coverage. However, in my experience, there’s a nuanced landscape of pitfalls and misconceptions that can lead to costly mistakes. For instance, a common myth is that all warranties cover every repair issue—that’s far from reality. Most warranties have specific exclusions, especially if irregular diagnostics are attempted or procedures are improperly followed, which can void your coverage. Moreover, many overlook the importance of detailed diagnostics; skipping thorough testing can result in misdiagnosing problems, leading to unnecessary part replacements or prolonged downtime. This is supported by experts who emphasize that proper diagnostic procedures are critical to extending warranty benefits and avoiding premature failures (see https://applianceoutletpro.com/how-appliance-diagnostics-can-save-your-warranty-benefits). An advanced mistake homeowners often make involves ignoring the role of subtle signals—like unusual noises or delayed responses—that indicate deeper issues. Rushing into repairs without understanding these nuances can worsen appliance health. Also, many are unaware that attempting DIY fixes on complex systems without proper tools or knowledge can void warranties, especially if manufacturers specify that only certified technicians should perform certain interventions. To avoid these pitfalls, it’s vital to comprehend the appliance’s diagnostic signals and warranty stipulations thoroughly. I recommend consulting professional diagnostics when in doubt—this not only protects your warranty but also enhances repair accuracy. For example, knowing when to rely on expert assessments rather than guesswork saves time and money and preserves your coverage (more tips are available at https://applianceoutletpro.com/understanding-appliance-diagnostics-improving-your-warranty-claims). Always keep detailed records of diagnostics and repairs, including timestamps and procedures, to substantiate warranty claims if needed. Remember, the goal isn’t just fixing an appliance but doing so in a way that preserves warranty protections and prevents future issues. Have you ever fallen into this trap? Let me know in the comments.
Essential Tools for Reliable Appliance Diagnostics
Maintaining your dishwasher and other appliances requires precise tools to diagnose issues effectively. I swear by a high-quality digital multimeter because it allows me to quickly test electrical components like heating elements, motor windings, and switches. Investing in a clamp meter simplifies checking current draw without disconnecting wires—a real time-saver during troubleshooting. A digital temperature gun, or infrared thermometer, helps monitor the temperature of components such as heating coils, ensuring they operate within optimal ranges. These tools have become part of my routine for long-term appliance care, reducing guesswork and preventing unnecessary repairs.
Adopting a Preventive Maintenance Mindset
Regular inspection and cleaning are crucial for anything from filters to spray arms. For example, using a dedicated brush or a small hose attachment to clear clogs in the drain or spray arms keeps water flowing freely. Applying a food-safe lubricant like silicone spray to door seals periodically can prevent leaks and maintain energy efficiency. Monitoring water hardness and installing a water softener, if needed, greatly extends the lifespan of heating elements and prevents lime scale buildup. For comprehensive diagnostics and periodic checks, I rely on detailed testing, which not only saves money but also safeguards your warranty, as highlighted here.
Mistakes to Avoid for Long-Term Results
Many users neglect the importance of keeping a detailed repair log. Saving receipts, noting parts replaced, and recording diagnostics can be invaluable if you face warranty claims or future repairs. Ignoring early warning signs like subtle noises or inconsistent performance can lead to more expensive failures down the line. Additionally, attempting complex repairs without proper tools or knowledge often voids warranty coverage; always verify warranty conditions here. Consider investing in a diagnostic testing kit tailored for appliances, which helps you identify potential issues before they escalate, ensuring your dishwasher stays reliable.
Strategies for Scaling Repair Capabilities
If you’re interested in expanding your repair skills, start with learning to interpret multimeter readings accurately. Practicing with real-world scenarios—such as testing the continuity of wiring harnesses or measuring resistance of heating elements—builds confidence and competence. Joining online forums or local DIY repair groups provides support and shared knowledge. As technology advances, tools like smart diagnostic apps are emerging, promising even more precise troubleshooting in the future. Embracing these innovations now can prepare you for maintaining increasingly complex appliances, which is vital for both personal satisfaction and cost savings.
How do I maintain my appliance diagnostics over time?
Regularly update your knowledge base by reviewing service manuals and staying informed about new diagnostic tools. Keep your multimeter calibrated—most models have a calibration period specified in the user manual. Develop a routine inspection schedule to catch issues early, and document all maintenance activities for future reference. This proactive approach ensures you catch minor problems before they become major breakdowns, prolonging your appliances’ lifespan and preserving warranty protections. Remember, well-maintained tools and detailed records make troubleshooting more accurate and efficient.
Feeling inspired? Next time you perform routine checks, try using a digital thermocouple—it’s an advanced tip that can reveal hidden issues in heating elements or water temperature regulation. This small investment can dramatically improve diagnostic accuracy, saving you both money and frustration.
For more detailed advice, explore our expert-guided troubleshooting resources or reach out via contact us for personalized support.
What I Didn’t Expect About Rust and Repairs
One of the most eye-opening lessons I learned was how fragile the line can be between a quick fix and a costly mistake. I initially believed that sealing rust spots was a simple patch-up, but I soon realized that improper cleaning or application could doom the repair from the start. That lightbulb moment pushed me to learn more about the nuances of food-safe sealants and surface prep. Moreover, I discovered that rust often signals underlying issues, like mineral buildup or water leaks, which, if overlooked, could lead to recurring problems despite initial fixes. This process taught me patience and attention to detail, transforming what seemed like a minor issue into a meaningful learning experience about appliance longevity.
Tools and Resources That Elevated My DIY Approach
Over time, I curated a toolkit that truly changed how I handle appliance diagnostics. A reliable digital multimeter became my go-to for electrical testing, revealing hidden faults that aren’t obvious to the naked eye. I also rely on an infrared thermometer, which helps identify uneven heating or cooling issues—crucial in preventing rust caused by temperature fluctuations. For comprehensive repair guidance, I regularly consult resources like this site, which offers expert insights into diagnostics and warranty preservation. Investing in these tools and trusted information sources has empowered me to troubleshoot effectively and avoid unnecessary replacements.
Embracing Confidence and Moving Forward
Repairing a rusted dishwasher rack might seem daunting at first, but with the right knowledge and tools, you can extend your appliance’s life and save money. Each repair adds to your confidence, turning what once felt like a risky DIY project into a rewarding experience. Remember, every issue you tackle deepens your understanding of how your appliances work, making future maintenance easier and more efficient. The key is to start small, learn from each attempt, and stay curious. Don’t let fear hold you back—taking that first step can not only restore your dishwasher but also boost your self-reliance. Your journey into appliance diagnostics is just beginning, and I’m excited to see where it leads you next!