

I remember the exact moment I realized my dishwasher rack was finally giving up the ghost. It was a busy Saturday morning, and I opened the door to grab my favorite mug—only to see a small rust spot staring back at me. My first instinct? Panic. I didn’t want to shell out hundreds for a new one, especially since I wasn’t even sure if that would fix the problem long-term.
Why You Shouldn’t Toss That Rusted Rack Just Yet
That lightbulb moment made me dig into solutions that wouldn’t break the bank. Turns out, a rusty dishwasher rack isn’t necessarily a sign to replace it entirely—sometimes, a simple patch can do the trick for under five dollars. The thing is, many folks give up at the first sign of rust, not realizing how easy and inexpensive it can be to extend the life of your appliance. Plus, knowing how to patch rust properly if you plan to keep your dishwasher running smoothly can save you so much money in the long run. Did you know that small rust spots can lead to bigger issues if ignored? According to appliance maintenance experts, untreated rust can weaken the metal, leading to cracks or even holes that flood your kitchen—definitely not a risk you want to take. To avoid costly repairs, it’s crucial to handle rust early, just like the pros suggest in their troubleshooting guides.
Is Patching Rust Worth the Effort?
At first, I was skeptical—patching a rusted rack? That sounded too simple, almost too good to be true. I also made a classic mistake early on: I used the wrong type of paint, which peeled off after a few washes, leading to more frustration. But with a bit of research and some trial-and-error, I found a method that works—one I’m eager to share. So, if you’re tired of seeing those rusty spots ruin your dishes and your mood, stick around. We’re about to turn that rusted mess into a sturdy, functional part of your dishwasher—without draining your wallet or throwing away your old rack.
Assess the Damage Carefully
First, remove the dishwasher rack from your appliance. Examine the rusty spots to determine their size and depth. A small, shallow rust patch can often be repaired successfully, but extensive corrosion might require replacement. I once found a tiny rust hole on my rack and decided to fix it rather than buy a new one. To do this effectively, you need a clear understanding of the extent of damage, similar to how a mechanic conducts diagnostic tests before deciding on repairs. Remember, early detection can prevent bigger issues like cracks or leaks down the line.
Clean and Prepare the Rusted Area
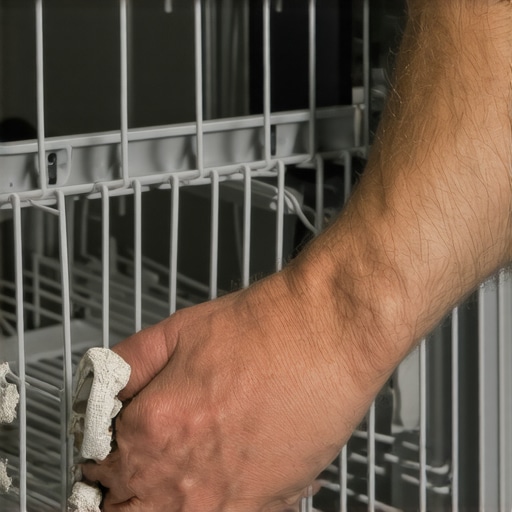
Thoroughly clean the rusty spot with a wire brush or steel wool to remove loose rust, grease, and debris. Then, wipe down the area with a damp cloth and let it dry completely. Proper preparation ensures the patching material adheres well, much like preparing a surface before painting. I recommend using a shop vac to clean any residual dust after brushing—this keeps the area pristine for the repair. Skipping this step can lead to peeling paint or ineffective sealing.
Apply a Rust Converter for Neutralization
Once the surface is clean, apply a rust converter or primer specifically designed for metal. These products chemically transform rust into a stable, paintable surface, halting further corrosion. I once used a rust converter on a patchy spot, watched it turn black, and knew I was ready for the next step. Think of this as a diagnostic intermediary—addressing the root issue before sealing it off. For best results, follow the manufacturer’s instructions regarding drying time and application thickness.
Patch the Rust Hole Efficiently
For small holes, a high-quality metal epoxy or patch kit works well. Mix the epoxy as instructed and apply it over the prepared area, filling in the rust hole. Use a putty knife to smooth it out, ensuring an even surface. I once repaired a tiny rust hole in my rack and was surprised at how seamless the fix looked after sanding. This step is akin to a DIY repair job on a cracked pipe—precision matters for durability.
Sand and Finish for a Professional Look
After the epoxy has cured, sand the area lightly with fine-grit sandpaper until smooth. Wipe away dust with a damp cloth. Finally, paint the patched area with a rust-resistant appliance paint to match the rest of the rack. I learned the hard way that skipping painting leads to future rust spots, so this finishing touch is crucial. The paint not only makes the repair less noticeable but also adds an extra layer of protection against moisture and rust recurrence.
Reinstall and Monitor the Repair
Carefully place the rack back into your dishwasher, ensuring it sits correctly. Run a short cycle to test the repair’s effectiveness—look for leaks or rust reappearing. During one of my repairs, I observed that after a week, the rust spots remained sealed, and my rack looked almost new. Keep an eye on the patched spots regularly; catching any new rust early saves money and hassle.
By following these concrete steps, you can extend the life of your dishwasher rack without costly replacements. Remember, regular maintenance and early intervention are key to keeping your appliances running smoothly, as suggested by appliance diagnostics experts. To learn more about diagnostics or warranty considerations, visit this helpful guide.
 Many homeowners operate under misconceptions about dishwashers, warranties, and diagnostics, which can lead to costly mistakes. Commonly, people believe that a warranty covers all repair expenses, but in reality, warranties often exclude issues caused by user error or neglect. For example, using abrasive cleaners can void your warranty, as highlighted in the company’s warranty [clause](https://applianceoutletpro.com/why-your-warranty-void-if-you-use-hand-soap). Moreover, there’s a myth that all appliance repairs require professional technicians; however, understanding diagnostic signals can empower you to handle minor issues yourself, saving time and money. Did you know that misinterpreting a fault code can lead to unnecessary replacements? According to appliance experts, accurately diagnosing problems with tools like multimeters or symptom analysis is crucial for effective repairs. Some believe that modern dishwashers require no maintenance, but neglecting routine tasks like cleaning filters or checking spray arms often results in performance decline. Advanced diagnostics reveal that subtle signs—such as irregular wash cycles or odd noises—often signal underlying issues before complete failure. For instance, a grinding noise could indicate a failing circulation pump, which is detectable through [expert diagnostics](https://applianceoutletpro.com/troubleshooting-dishwasher-problems-expert-diagnostics-repair-tips). Recognizing these nuances can extend your appliance’s lifespan and protect your warranty benefits. Be cautious of the trap where homeowners assume that replacing parts without proper testing will solve the problem; this often leads to wasteful spending. Instead, comprehensive diagnostic techniques, including testing heating elements or float switches, can pinpoint the exact cause, avoiding unnecessary replacements.
What are the common pitfalls in appliance diagnostics that even savvy homeowners overlook?
Experts warn that skipping proper testing or relying solely on visual inspections can be misleading. For example, an apparent leak might be caused by a clogged air gap rather than a cracked hose, and diagnosing correctly requires understanding the system’s nuances. Additionally, many assume that warranty companies always approve claims, but pre-existing conditions like mineral buildup or prior neglect may lead to claim denials—it’s essential to review warranty fine print, such as in [this guide](https://applianceoutletpro.com/when-to-trust-a-warranty-for-dishwasher-repairs). Knowledge of these subtleties allows you to approach repairs strategically, potentially saving hundreds in repair costs. Remember, mastering diagnostics and understanding warranty exclusions provide a real edge in maintaining your appliances. Have you ever fallen into this trap? Let me know in the comments.
Personal Maintenance Routine for Your Dishwasher
Keeping your dishwasher running smoothly requires a combination of the right tools and consistent habits. I swear by a high-quality multimeter for troubleshooting electrical components like heating elements and switches. Using a budget-friendly model from Fluke, I can quickly check for continuity in parts such as fuse links or relay circuits, saving myself costly service calls. Additionally, a dedicated inspection mirror helps me peek behind tricky areas like the sump or spray arm assembly without dismantling everything—it’s a small investment that pays off during routine checks.
Beyond tools, I emphasize routine cleaning of filters, spray arms, and the drain pump to prevent clogs and performance issues. For example, regularly freeing debris from the filter assembly with a small toothbrush keeps water flow optimal, ultimately extending the lifespan of components. Incorporating these practices ensures issues are caught early, aligning with expert advice from appliance diagnostics specialists.
Voice-Activated Diagnostics Improve Long-Term Results
In recent years, smart diagnostic tools are becoming game-changers. I personally use diagnostic apps that connect via Bluetooth to my smartphone, allowing me to interpret error codes more intuitively. These apps often provide step-by-step troubleshooting guides based on codes received, which helps me determine if I need professional help or if a simple DIY fix will suffice. As appliance technology advances, integrating these tools will become essential for proactive maintenance—expect to see more smart diagnostics in future models.
For those serious about maintenance longevity, regularly updating your appliance’s firmware (if supported) can improve diagnostic accuracy and performance. Manufacturers often release updates that fix bugs or enhance communication protocols, reducing false error alerts and improving your ability to troubleshoot effectively.
How do I keep my dishwasher diagnostics effective over time?
Maintaining diagnostic accuracy involves regularly verifying your testing tools—like checking your multimeter’s calibration—and staying informed about the specific error codes your model presents. Blogs like this guide offer insights into interpreting codes correctly, avoiding unnecessary repairs or warranty complications. Additionally, integrating tools such as a vinegar-based descaling routine can prevent mineral buildup that skews diagnostic readings on sensors like temperature or float switches, as discussed in this resource.
If you’re eager to enhance your repair skills, consider trying out an advanced tip like using a laser thermometer to check wash cycle temperatures. Accurate temperature readings help confirm whether your heating element functions correctly, a crucial aspect often overlooked during diagnostics. It’s a small step with big savings—so why not give it a shot today?
< >
>
Unexpected Truths from My Rusted Rack Journey
One of the hardest lessons I learned was that rust isn’t always a death sentence for your dishwasher. I discovered that with patience and the right techniques, a rusted rack could be revived, saving hundreds of dollars and extending the life of my appliance. I also realized that most homeowners overlook the importance of early rust detection, which can prevent costly repairs later. Additionally, I found that understanding the intricacies of warranty coverage—like what voids your protection—can empower you to make smarter repair choices instead of risking voided warranties by using incompatible products or attempting unverified fixes. Finally, the experience taught me that DIY diagnostics and repairs aren’t just cost-saving—they also foster a deeper appreciation for how our appliances work and how to keep them running smoothly for years to come.
My Essential Tools and Resources for Dishwasher Care
If you’re serious about maintaining your dishwasher and understanding its diagnostics, I recommend investing in a quality multimeter, such as the Fluke models, to check electrical components like heating elements. A small inspection mirror can help you peek into hard-to-reach areas without dismantling everything. For learning, I found [this article](https://applianceoutletpro.com/understanding-appliance-diagnostics-improving-your-warranty-claims) invaluable for grasping how diagnostics tie into warranty claims. Also, keeping a set of high-quality rust converters, appliance paints, and repair epoxies on hand has saved me countless trips to the store—and a lot of money—by allowing quick fixes that hold up over time. Lastly, subscribing to expert blogs and tutorials, like those offered here, keeps me informed about new diagnostic tools and repair tips that can make DIY maintenance more effective and less intimidating.
Step Forward with Confidence and Care
Remember, caring for your dishwasher—through proactive rust repairs, smart diagnostics, and understanding warranty nuances—can truly keep your appliance in top shape far beyond the manufacturer’s typical lifespan. With the right mindset and tools, you’re capable of handling most minor issues yourself, which not only saves money but also deepens your connection with your home’s essentials. Don’t be afraid to start, and embrace the journey of learning every time you open that dishwasher door. Your future self will thank you for the hands-on approach and the confidence it brings.
What’s the first repair or maintenance step you’re planning to try on your dishwasher? Share below—I’d love to hear your plans!