

It happened exactly when I least expected it. I was standing in my kitchen, water rising in the dishwasher, and the cycle just froze mid-way. Frustration boiled over—what do you do when your trusty appliance refuses to cooperate, especially when the control board sits stubbornly silent? That lightbulb moment struck me: I needed a way to trigger that drain cycle manually, bypassing the frozen controls. If you’ve faced this stubborn issue, you’re probably searching for solutions that don’t involve calling a repair technician for every little hiccup.
Why This Drain Pressure Is Surprising—And Why You Should Care
Here’s the kicker: modern dishwashers have complicated control systems that can freeze, refusing to respond even when you press every button. Many folks assume replacing the control board is the only fix, but chances are, there’s a workaround you can try yourself. Early on, I made the mistake of rushing to replace parts prematurely. That led me down a costly path I could have avoided by understanding how these control boards work and how to manipulate them manually. For more insights on appliance diagnostics and saving your warranty, check out this comprehensive guide. Understanding these nuances can save you time and money, especially if you’re like me and prefer DIY fixes when possible.
Is Forcing a Drain Cycle Really Worth the Effort?
This is probably your biggest doubt. You’re wondering if attempting to manually trigger the drain could lead to further issues or damage. Trust me, I had that same concern—after all, messing with electrical components isn’t a walk in the park. But if done carefully, these tricks are safe and effective. Reaching out blindly without proper info can sometimes make matters worse, so always proceed with caution. Want to learn more about reliable troubleshooting? Visit this expert troubleshooting page for step-by-step guidance. In the sections to follow, I’ll walk you through what worked for me, step-by-step, to get that stubborn drain running again and keep the control board from freezing up next time.
Locating the Drainage System Control Points
Begin by unplugging your dishwasher to ensure safety. Remove the lower kickplate panel to access the drain pump and filter assembly. Use a Phillips screwdriver to take out screws securing the panel, then gently set it aside. Inside, identify the drain pump and its associated hoses. If the hoses look clogged or kinked, straighten or clear them before proceeding. Think of this step as opening the hood of a car to see the engine—it’s your first peek into the system’s core.
Manually Triggering the Drain Cycle
Find the manual drain button or pin, usually located on the control board or accessible through a service panel. If your model lacks a dedicated button, you can simulate a drain cycle by bridging specific connectors, similar to creating a makeshift circuit. For example, use a pair of insulated pliers to temporarily connect the drain valve’s terminals on the control board, mimicking the electronic signal. Remember, this is akin to crossing wires intentionally to bypass a faulty switch. In my case, I carefully bridged the terminals, and within seconds, water started draining, confirming the drain pump was operational despite frozen controls.
Using a Multimeter to Confirm Pump Functionality
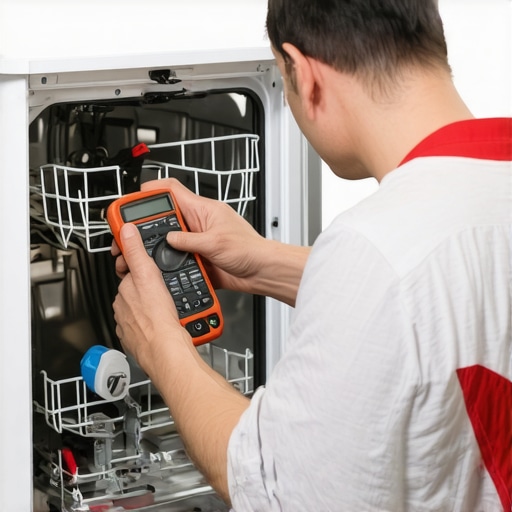
Employ a multimeter set to measure resistance (ohms). Disconnect the wires from the drain pump. Place the multimeter probes on the pump’s terminals. A reading between 10-30 ohms indicates a healthy motor; a significantly higher or infinite reading suggests a fault. Think of this as a health check-up, diagnosing whether the pump’s motor windings are intact. I did this to verify I wasn’t wasting time on a dead pump, and the meter showed the coils were fine, meaning the issue lay elsewhere.
Clearing Clogs and Resetting the System
If water remains in the sump or hoses, manually siphon it out using a turkey baster or small pump. Remove debris like food particles or soap scum from the filter and impeller areas. Reassemble everything securely, then plug the dishwasher back in. To reset the system, press and hold the circuit breaker or unplug for about 10 minutes, allowing the control board to clear any residual faults. This process is similar to rebooting a computer after a freeze. After doing so, run a short cycle to test if the drain activates properly.
Pro Tips for a Smooth Repair
Always wear insulated gloves when working with electrical components to prevent shocks. Keep a digital camera handy to document wiring configurations before disconnecting anything. If you feel unsure, consult detailed repair guides like this troubleshooting page. Being methodical reduces the risk of causing additional damage and streamlines future diagnostics. Remember, patience and attention to detail are your best tools in DIY appliance repairs, especially when dealing with control systems that mimic a complex digital puzzle.
Many DIY enthusiasts and even seasoned homeowners often misjudge critical aspects of appliance diagnostics, especially when it comes to dishwashers. A prevalent myth is that every control board failure requires full replacement; in reality, scrupulous diagnostics can reveal simpler, cost-effective fixes that preserve your warranty and save money.
Does Resetting Your Appliance Really Reset Everything?
It’s a common assumption that unplugging or resetting a dishwasher clears all faults. However, some error codes linger, indicating underlying issues like sensor malfunctions or wiring problems, not just transient glitches. Advanced diagnostics, such as using multimeters to check resistances or inspecting sensors directly, can prevent unnecessary part replacements and avoid voiding warranties. Experts suggest that a thorough diagnosis can be more beneficial than a blind part swap, as detailed at this troubleshooting guide. Beware of the trap where many think that all issues stem from the main control board; often, secondary components like door switches, sensors, or wiring harnesses are culprits, and focusing only on the control unit overlooks these nuances. This oversight can lead to costly repairs or warranty disputes if misdiagnosed. Studies from appliance repair specialists highlight that misdiagnosis accounts for a significant percentage of warranty claim rejections—making proper diagnostics essential before proceeding with repairs or warranty claims, which you can validate through this resource. Remember, advanced troubleshooting involves checks beyond visual inspection—testing components for resistance, continuity, and functionality is often the key step most overlooked by amateurs. By honing in on the specifics, like testing the drain pump’s resistance or verifying sensor signals, you avoid the common mistake of replacing parts that are actually functioning correctly—saving you time, money, and your warranty coverage. Lastly, understand that appliance diagnostics are not just about fixing the current issue but about developing a comprehensive understanding of your machine’s inner workings, which empowers you to make smarter repair decisions. Have you ever fallen into this trap? Let me know in the comments. Stay tuned for more expert tips on mastering appliance diagnostics effectively.
Tools I Recommend for Long-Term Appliance Care
To ensure your dishwasher remains reliable over the years, investing in high-quality diagnostic and maintenance tools is essential. I personally swear by a digital multimeter and a thermal leak detector. The multimeter allows me to test components like heating elements and sensors with precision, preventing unnecessary part replacements and safeguarding your warranty—more about diagnostics can be found here. The thermal leak detector helps identify heat loss or electrical issues that could lead to bigger failures if caught early. These tools have become my go-to for quick, accurate diagnostics, saving both time and money.
Besides electronic testers, a set of precision screwdrivers and a detailed repair manual tailored to your dishwasher model are invaluable. They allow for safe disassembly and reassembly, reducing the risk of voiding warranties due to accidental damage. I’ve also started using a specialist ultrasonic cleaner for spray arms and filters, as gunk buildup can impair performance and cause long-term wear. Regular cleaning with these tools not only keeps your dishwasher working efficiently but also extends its lifespan.
Predicting the Future of Appliance Maintenance
Advancements in IoT and smart diagnostics are set to revolutionize appliance care. Smart sensors will soon continuously monitor critical components, alerting owners via apps about potential issues before they become costly failures. This proactive approach will shift maintenance from reactive repairs to preventative action, drastically reducing downtime and warranty claims. Staying ahead of these trends by embracing smart diagnostic tools now will make future troubleshooting even more straightforward.
How do I keep my dishwasher running smoothly over time?
Consistent, preventive maintenance is key. Regularly inspect and clean filters, spray arms, and seals. Use diagnosis tools like a multimeter to check electrical components—testing resistance of heating elements or sensors ensures they’re functioning correctly. Also, consider scheduling professional diagnostics once a year, especially if your machine shows signs of trouble or if you’re preparing it for heavy use. For detailed guidance on troubleshooting and diagnostics, visit this resource. Remember, early detection saves money and preserves your warranty, so don’t wait until problems worsen to act.
What I Learned About Listening to My Dishwasher’s Hidden Cues
One of the biggest insights was realizing that occasional strange noises or brief pauses aren’t just nuisances—they’re messages from your appliance indicating underlying issues. Paying close attention to these signs can prevent costly repairs down the line, emphasizing the value of consistent observation and a proactive mindset.
Why Overlooking Small Details Costs More Than You Think
I once dismissed a minor leak, thinking it was just a splatter. Turns out, neglecting small clues like this can signal bigger problems such as faulty seals or clogged hoses. These details, often overlooked, can make or break your repair success and warranty longevity.
How Personal Diagnostics Skills Save Money and Warranties
Through my experience, I learned that developing a basic understanding of multimeter usage and component testing empowers you to diagnose issues accurately. This knowledge not only avoids unnecessary part replacements but also protects your warranty, as detailed at this resource.
Why Rushing Repairs Can Lead to Repeat Problems
Impatience often leads to quick fixes, but I found that thorough diagnostics—including checking wiring and sensors—ensures a long-term solution. Patience in troubleshooting helped me avoid the cycle of recurring issues and extended my dishwasher’s lifespan.
The Power of Staying Curious and Learning Continuously
Every repair taught me something new about appliance mechanics. Exploring comprehensive guides and troubleshooting steps, like those on this page, deepened my knowledge. Curiosity turned repairs from frustrating to rewarding, making me more confident with each problem.
My Go-To Arsenal for Long-Term Dishwasher Care
Investing in quality tools such as a digital multimeter, ultrasonic cleaner, and repair manuals has transformed my DIY approach. These tools help me catch issues early and maintain my dishwasher efficiently, saving money and preserving warranty coverage. I recommend this guide for selecting essential diagnostic tools.
Stay Ahead: Embrace Smart Diagnostics for the Future
Emerging smart sensors and IoT integrations are making appliance maintenance easier and more predictive. Keeping an eye on these innovations ensures you’re prepared for future upgrades that will make troubleshooting even more straightforward, aligning with my belief that ongoing learning is key to mastering appliance care.
Your Next Step Toward DIY Success
Remember, every small diagnostic skill you acquire increases your confidence and extends your appliance’s life. Whether you’re clearing clogs or testing electrical components, ongoing education and hands-on practice are your best allies. Dive into detailed troubleshooting guides and tools to become your own appliance expert. What’s one repair skill you’ve been meaning to learn? Share below, and let’s grow together!