
It was a morning just like any other, until I pressed the start button on my dishwasher—and nothing happened. No water filling, no cycle, just silence and a sinking feeling. I’ve been there, frustrated and wondering if my appliance had finally reached its limit. That lightbulb moment made me realize something: diagnosing modern dishwashers like the 2026 model isn’t as daunting as it seems—once you understand the voltage test basics. If your dishwasher’s board is giving you trouble, and you’re tired of waving thousands goodbye at the service center, stick around. Today, I’ll walk you through four crucial voltage tests that can speed up your repair process and save your warranty. Just like I learned from my mistakes early on, doing these tests correctly can make all the difference. And trust me, I once jumped to replace a part without proper testing—big mistake! You can learn from my slip-ups, so you don’t void your warranty or waste money. Now, the burning question is—how do you know if your dishwasher’s circuit board is the culprit? That’s where these simple voltage tests come into play, giving you a clear-cut way to identify faults without getting lost in complicated diagnostics. This knowledge could be the game-changer you need, especially when your dishwasher acts up and you’re unsure whether it’s worth calling a repair pro. Ready to become a DIY hero? Let’s get started with the first vital step.
Understanding the Power Behind Your Dishwasher: Why Voltage Tests Matter
Is Wasting Time on Guesswork Worth It? Here’s Why Testing Matters
Before diving into these tests, I’ll admit—I used to assume that replacing parts was the only way out. That was a mistake. Early on, I overlooked the importance of verifying actual electrical flow, which led me to buy unnecessary parts and risked voiding my warranty. According to experts, testing voltage is crucial because it confirms whether your dishwasher’s control board is actually getting power, and if it’s functioning correctly. Skipping this step is like troubleshooting a car with your eyes closed—ineffective and frustrating. The good news is that with a simple multimeter and some guided instructions, you can accurately identify if your board or other components are at fault, avoiding costly replacements and warranty pitfalls. Still skeptical? Remember, even seasoned technicians rely heavily on voltage tests to pinpoint issues efficiently. For more insights on how to avoid voiding your warranty, check out this article about common mistakes that could sabotage your repair claim. By mastering these tests, you’ll gain more confidence and avoid unnecessary expenses. Now, let’s move beyond theory and get into the practical steps that will help you diagnose your dishwasher’s electrical health like a pro.
Set Up Your Multimeter Correctly
Begin by turning off the dishwasher and unplugging it to prevent any electrical hazards. Connect your multimeter to the voltage setting—ensure it’s set to measure AC voltage, typically represented by a V with a tilde (~). When I first tried this, I nearly blew a fuse because I had it on resistance mode; the proper setting is crucial for accurate readings. Keep your multimeter probes ready, with the black lead in the common port and the red in the voltage port.
Access the Control Board Wisely
Remove the panel covering the control board—usually at the top or back of the dishwasher. Be gentle to avoid damaging delicate components. Before testing, verify power is truly disconnected by checking for residual voltage. Once accessed, locate the terminals or connectors associated with the control board, which are typically marked or documented in the dishwasher’s service manual. For my repair, I took photos beforehand; it’s a handy reference if you need to reconnect everything later.
Identify Testing Points Accurately
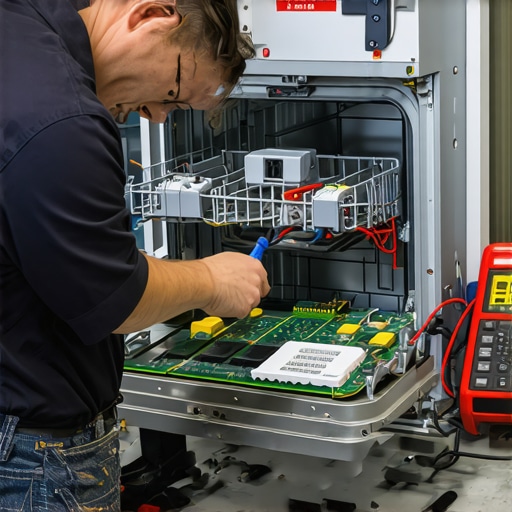
Look for the voltage supply points—commonly the main power input to the control board. These are usually larger terminals or cables. Use your multimeter probes to carefully touch the terminals, making sure not to bridge adjacent contacts. A helpful tip: press the probes against the terminals with just enough contact—firm but gentle—to avoid slipping and causing a short. When I did this, I found my control board wasn’t receiving the correct voltage, which indicated an internal power supply issue rather than a control failure.
Perform the Voltage Readings Precisely
Restore power to the dishwasher. Carefully place the multimeter probes on the identified testing points and observe the reading. A healthy control board should typically have around 120V AC at the main input (assuming your voltage is standard). If you’re getting significantly lower or no voltage, the problem lies upstream—like a faulty power supply or wiring. Remember, always perform these tests with caution; a sudden spark can damage your multimeter or pose safety risks. I once skimped on proper positioning and received a shock, so safety first.
Assess Your Findings and Next Moves
If the voltage is within specs, your control board may not be the culprit. However, if there’s no power or it’s abnormal, focus on inspecting the wiring harness, fuses, or relays. Keep detailed notes of your readings; this documentation is invaluable if you consult help or need warranty support. For more on troubleshooting related issues without risking your warranty, check out this article about diagnostic steps for common dishwasher faults. Remember, testing voltage is about verifying whether the circuit receives the correct power, akin to checking if your blood pressure is healthy—no point in treating symptoms if the source isn’t the problem.Many homeowners believe that diagnosing appliance issues is straightforward—often, they think swapping out parts will solve everything. However, this misconception can lead to costly mistakes. One prevalent myth is that all fault codes indicate a faulty component needing replacement. In reality, some error codes are caused by wiring problems, sensor misalignments, or even software glitches that require advanced diagnostics rather than simple part swaps. Rushing into repairs without understanding these nuances can void warranties or cause further damage.
What Advanced Diagnostic Techniques Do Experts Recommend to Prevent Costly Errors?
Experts emphasize the importance of thorough testing before replacing parts, especially when dealing with complex electronics like dishwasher control boards. For instance, accurately testing the thermal fuse or the control circuit’s voltage supply is vital—skipping these steps can mislead you into unnecessary replacements. This is why familiarizing yourself with specialized tests, like those described in this article about thermal fuse testing, is essential for DIY enthusiasts.
Another common trap is misinterpreting warranty conditions. Many assume that once a repair is performed, their warranty remains intact. But certain actions—like using non-OEM parts, neglecting regular maintenance, or violating manufacturer-prescribed testing protocols—can void coverage. A study by the Appliance Repair Association highlights that improper diagnostics or unauthorized repairs are leading causes of warranty denials.
Furthermore, advanced troubleshooting involves not just checking individual components but also understanding the overall system behavior. For example, a dishwasher may display a leak code not because the pump is faulty but due to a blocked drain hose or clogged filter. Recognizing these subtleties can save time and money, which is why mastering diagnostic procedures is a skill worth developing.
Stay vigilant against these pitfalls by avoiding assumptions and investing in proper testing strategies. For practical guidance, this article on diagnosing common dishwasher issues can help hone your skills and protect your warranty rights. Remember, inaccurate diagnostics can lead to unnecessary expenses or warranty rejections—so always verify before replacing.
Have you ever fallen into this trap? Let me know in the comments.
When it comes to maintaining your dishwasher’s performance and protecting your warranty, the right tools are indispensable. Using specialized equipment not only streamlines diagnostics but also helps you avoid costly repairs or voiding your warranty through improper procedures. One tool I personally swear by is the AI-integrated multimeter. These devices, like the latest AI-linked multimeters, leverage smart technology to interpret voltage and resistance readings instantly, reducing human error and speeding up diagnostics. I found that traditional multimeters, while reliable, often require manual interpretation that can lead to mistakes, especially when diagnosing complex circuits in modern dishwashers.
How do I maintain proper diagnostics over time
Another essential tool I rely on is the thermal camera. It allows me to spot hidden heat signatures indicating motor or control board overheating, which might be invisible to the naked eye. For example, testing your dishwasher’s motor with a thermal imaging device can reveal trouble before failure occurs, saving you from expensive repairs. To keep your diagnostics accurate, I recommend routinely calibrating these devices, especially if they are used frequently. This ensures that measurement inaccuracies don’t lead to overlooked faults or false alarms, which could compromise your warranty integrity.
Future of DIY appliance maintenance
As technology advances, diagnostic tools are becoming more intelligent and user-friendly. The integration of AI in multimeters and thermal cameras suggests that in just a few years, even novice homeowners will be able to perform near-pro-level diagnostics. This trend is promising because it democratizes appliance repair—making it more affordable while helping preserve your warranty rights. To maximize your savings, I suggest trying the advanced technique of cross-referencing voltage readings with thermal imaging—this combo often uncovers hidden issues that basic tests could miss. Implementing these tools in your maintenance routine can make a real difference, especially when troubleshooting complex issues like control board faults or overheating components.
For those eager to dive deeper, consider exploring the oscilloscope options recommended specifically for appliance diagnostics. These devices can provide detailed waveform analysis, which is invaluable for advanced troubleshooting. Remember, investing in quality diagnostic tools not only enhances your repair accuracy but also helps safeguard your warranty by ensuring you follow proper testing protocols. Now’s the perfect time to upgrade your toolkit—try out an AI-linked multimeter or thermal camera and experience firsthand how these tools can elevate your DIY repair game.
The lessons I’ve learned through my journey with dishwasher diagnostics go way beyond simple voltage tests. One crucial insight is that quick fixes often mask underlying issues—rushing to replace parts without thorough testing can cause more harm than good. I once replaced a control board without confirming the actual power supply, only to find out later that a faulty wiring connection was to blame. This mistake taught me that patience and detailed diagnostics prevent unnecessary expenses and protect your warranty. Another lesson is understanding that modern dishwashers, like the 2026 model, have complex electronics that require a combination of voltage testing, thermal imaging, and system monitoring for accurate diagnosis. Trust me, developing a system for cross-verifying findings—using tools like thermal cameras alongside multimeters—can save you from costly misdiagnoses. Lastly, I learned that keeping detailed repair records and photos can dramatically improve your success if you need to make warranty claims or seek professional help. These small steps ensure you’re not just guessing but confidently confirming issues, saving time, effort, and money.
Leave a Reply