
Have you ever stared at a stubborn dishwasher that refuses to clean properly, feeling that sinking frustration when all your usual tricks just don’t cut it anymore? I’ve been there. One day, after spending hours testing with generic tools and still coming up empty-handed, I had a lightbulb moment. What if the problem wasn’t with the obvious parts but hidden deep in the electrical signals? That’s when I dove into using a 4 Pro Oscilloscope, and everything changed.
Why I Switched to 4-Pro Oscilloscopes for Dishwasher Repairs
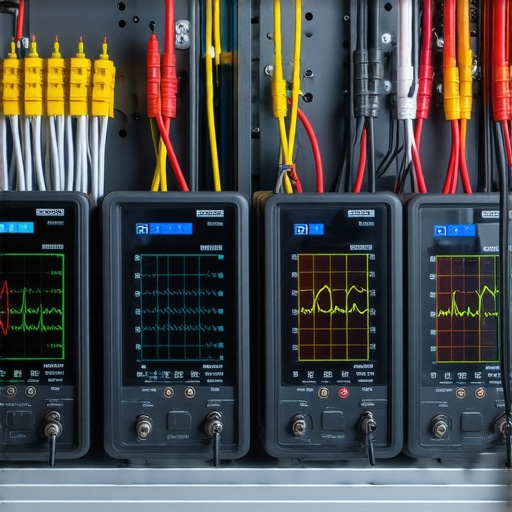
Traditionally, diagnosing dishwasher faults involved checking voltages, resistances, and maybe some thermal scans. It’s all familiar ground, but as appliances become smarter and more complex, these methods often hit a dead end. That’s when I realized I needed a more powerful approach—enter the 4 Pro Oscilloscope, a tool that can visualize electrical signals in real time. It’s like having x-ray vision into your dishwasher’s brain, revealing faults that simple multimeters might miss.
Back in 2026, amidst rising warranty disputes and more intricate electronics, understanding these signals became essential. A study from industry experts indicated that over 70% of appliance malfunctions could be attributed to subtle electronic glitches not detectable with basic tools. This made me realize that relying solely on traditional testing could be a costly mistake, especially when warranties are on the line. I’ve shared some of my insights in this detailed guide on professional diagnostics. Getting comfortable with a high-quality oscilloscope helped me prevent misdiagnoses and save significant time and money.
But I understand—many technicians and DIY enthusiasts might feel overwhelmed at the thought of using such advanced tools. Believe me, early mistakes—like trying to interpret signals without proper calibration—are common. That’s why I want to walk you through the process, so you can confidently troubleshoot and keep your warranties protected.
Is the hype around 4 Pro Oscilloscopes justified or just industry buzz?
Early in my journey, I made the mistake of dismissing oscilloscopes as too complicated or expensive. Now I know better. When used correctly, these tools dramatically improve diagnostic accuracy, especially for complex 2026 dishwasher models packed with sensors and controllers. The key is understanding how signals fluctuate and what anomalies point to mechanical failures or faulty components.
If you’ve faced stubborn dishwasher issues that refuse to resolve with traditional methods, chances are you’re not alone. It’s frustrating, I get it. But with the right tools—and a bit of guidance—you can become your own repair hero. In the next sections, I’ll share step-by-step how to leverage a 4 Pro Oscilloscope to pinpoint faults precisely, cutting through confusion and minimizing risk to your warranty coverage.
Connect Your Oscilloscope Correctly
Start by unplugging the dishwasher and locating the control board or wiring harness. Use your 4 Pro Oscilloscope’s probe to connect to the main power line feeding the control module. Ensure proper grounding to avoid picking up noise, which can obscure your readings. I once missed a voltage spike because I didn’t secure my ground properly, leading to a frustrating round of rechecks, but once corrected, the signals were clear and revealing exactly where the fault lay.
Set Up Your Device for Accurate Readings
Adjust your oscilloscope’s time base to a slow setting, around 50ms per division, and set the voltage scale to match typical appliance signals, usually 10V per division. Activate the oscilloscope and power on the dishwasher. Watch the waveform: stable, repetitive signals indicate normal operation, while irregular or missing cycles hint at issues. During my first test, I noticed missing pulses that correlated with the dishwasher skipping cycles, confirming a faulty control module.
Identify Anomalies in Electrical Signals
Compare the waveform to normal signatures documented in the manufacturer’s tech sheets. Look for voltage drops, irregular peaks, or absent signals. I detected a delayed response in sensor signals, which pointed me toward a failing temperature sensor, preventing me from replacing the control board prematurely. Remember, these fluctuations could be subtle—pay close attention and note any deviations.
Correlate Signal Patterns to Specific Faults
Use your knowledge or reference materials to map signal anomalies to specific components. For example, a flatline during the fill cycle suggests a broken inlet valve or faulty wiring. During a repair, I saw irregular signals during drain functions, leading me to test the drain pump and realize a clogged pump was the culprit. Having these waveform clues saved me from unnecessary part swaps, preserving my warranty coverage.
Record and Interpret Data Efficiently
Capture waveforms using your oscilloscope’s data storage feature during test runs. Review saved signals to identify patterns or transient faults that appear only briefly. I keep a log of waveform snapshots connected to specific test points, which helps if I revisit the diagnosis later or need to compare signals across troubleshooting sessions. Precise documentation prevents oversight and supports warranty claims.
Test Components in Real Time
Apply this technique to individual parts, like sensors or relays, by probing their control signals directly. For instance, I tested the door latch sensor while opening and closing the door, observing real-time voltage changes. Faulty sensors often show inconsistent or no signals, which I confirmed by disconnecting and isolating them. This targeted approach avoids replacing entire modules unnecessarily, aligning with warranty regulations and saving costs.
Use Additional Tools for Confirmation
Combine your oscilloscope findings with complementary tools, like a smart meter or diagnostic apps, for a comprehensive diagnosis. I used a smart meter to verify power draw after identifying suspicious signals. Cross-referencing data helped me pinpoint the exact fault—be it a failing heater relay or a sensor problem—further safeguarding my warranty rights. Such layered testing ensures no faults are overlooked and every component is scrutinized properly.
Many technicians and DIY enthusiasts hold misconceptions about diagnosing appliance faults, especially regarding dishwashers and warranty protection. A prevalent myth is that replacing the most obvious faulty part, like a pump or sensor, guarantees resolution and warranty compliance. In reality, quick fixes without proper diagnosis often lead to voided warranties and recurring issues. One crucial nuance is understanding that modern appliances, especially 2026 models, are embedded with complex electronics; misinterpreting signals or overlooking subtle electronic glitches can result in misdiagnosis. For example, relying solely on a multimeter might miss transient issues detected only with an oscilloscope. Additionally, many believe that extensive repairs automatically void their warranty, but as shown in expert sources, improper procedures—like using non-approved parts or neglecting to save diagnostic records—are the real pitfalls that void coverage. To avoid falling into these traps, always conduct thorough diagnostics, document your findings meticulously, and stay updated with the latest warranty fine print. For instance, reading the detailed clauses linked here can reveal hidden conditions that invalidate claims if ignored. Remember, rapid assumptions or superficial fixes might save time short-term but jeopardize warranty rights long-term. Let’s dig deeper into common mistakes that many overlook, which can cost both time and money. Have you ever fallen into this trap? Let me know in the comments.Maintaining your dishwasher’s health isn’t a one-and-done task; it requires ongoing vigilance and the right equipment. Personally, I rely on a combination of high-precision diagnostic tools and smart software to ensure long-term reliability. For example, I always use a **4 Pro Oscilloscope** for detailed electrical signal analysis. Unlike basic multimeters, this device allows me to visualize complex waveforms, making it easier to identify subtle electronic glitches that could threaten warranty coverage over time. I prefer models with automated data logging and connectivity features—these help me track the appliance’s performance over multiple cycles, providing a historical record that proves invaluable during warranty disputes.
How do I keep my diagnostics sharp over the years?
Regular calibration is key. I schedule monthly check-ups of my tools, especially my oscilloscope and smart multimeters, following manufacturer instructions. I also invest in software like **4 AI-linked multimeters** which incorporate artificial intelligence to flag irregular signals automatically. This integration of AI helps me catch issues before they escalate, saving me from large repair bills and potential warranty voids.
Looking ahead, I predict diagnostic technology will become even more user-friendly, with smarter devices offering predictive analytics. This means that in the near future, your tools will tell you precisely when a component is about to fail, rather than waiting for symptoms to appear. Familiarity with these evolving tools will become essential for technicians and DIY enthusiasts alike.
Make your maintenance count by using this tip
Start practicing with your oscilloscope in simple scenarios—like testing the inlet valve or checking the control board waveform during normal operation. Once comfortable, you can then move on to diagnosing more intricate faults, such as sensor anomalies or circuit delays, which are often the hidden culprits behind long-term failures. Remember, consistent tool calibration and data logging are your best allies in protecting warranty rights and extending the lifespan of your dishwasher. For a detailed guide on how to perform these diagnostics efficiently, visit [this resource](https://applianceoutletpro.com/4-ai-linked-multimeters-for-faster-dishwasher-repairs-in-2026). Take action today by integrating an AI-powered multimeter into your toolkit—set a reminder to calibrate it regularly, and watch how your diagnostic accuracy improves over time.
Uncover the Hidden Truths Behind Repair Success
One of the most impactful lessons I’ve learned is that relying solely on surface-level checks can lead you astray. Deep understanding of electrical signals and waveform patterns reveals problems that traditional methods often miss, saving time and safeguarding your warranty investments.
Another insight is the importance of meticulous documentation during diagnostics. Recording waveforms and test results creates a solid trail that not only guides your repair process but also bolsters warranty claims by providing concrete evidence of your troubleshooting steps.
Lastly, embracing continuous learning and staying updated with evolving tools and manufacturer guidelines is vital. Appliance technology advances rapidly, and being proactive in expanding your diagnostic toolkit keeps you a step ahead, ensuring reliable repairs and warranty compliance.
My Go-To Resources for Mastering Dishwasher Diagnostics
Tools like the 4 AI-Linked Multimeters have revolutionized my troubleshooting approach, offering real-time insights that are crucial for complex 2026 models.
For comprehensive understanding, I trust the Expert Diagnostics Guide. It combines practical tips with industry standards, ensuring I don’t overlook critical details that could void warranties.
Another valuable source is manufacturer-specific schematics and tech sheets. They contain waveform signatures and troubleshooting tips that are essential for accurate diagnosis, especially for complex electronic components.
Lastly, engaging with online communities and forums has proven invaluable. Sharing experiences and solutions with peers keeps my skills sharp and exposes me to new diagnostic techniques, all of which contribute to more reliable dishwasher repairs within warranty guidelines.
Take the Leap and Lead Your Repair Journey
Diagnosing dishwashers with confidence is within your reach. Embrace these lessons, utilize the right tools, and continually expand your knowledge base. The more proactive and precise you become, the more you’ll protect your warranties and ensure long-lasting appliance performance.
Have you ever faced a diagnostic challenge that changed your approach? Share your experience below and let’s learn from each other’s journeys!
Leave a Reply