
It was late at night, and my dishwasher decided to throw a wrench into my peace of mind with a loud, relentless hum. I was about to give up and call a repair technician when I suddenly wondered—could I figure this out myself? That lightbulb moment changed everything. I realized that with just my phone, I might be able to diagnose what’s going wrong without costly trips or disassembling half my kitchen.
Why Your Phone Could Be Your Best Tool for Fixing a Humbling Dishwasher
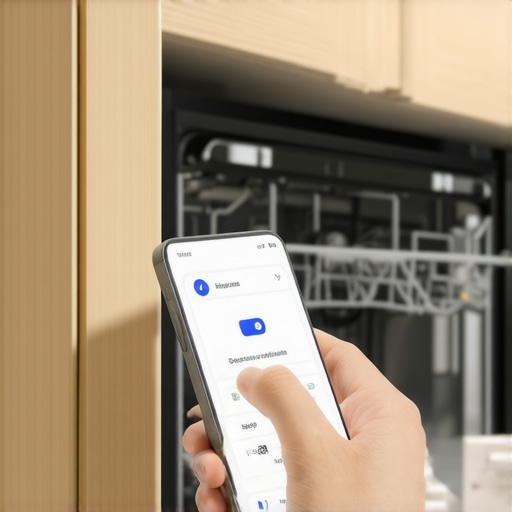
Modern appliances, including the 2026 model dishwashers, are packed with sensors and circuit boards that can be tapped into with simple tools—your smartphone included. Instead of risking more damage or voiding warranties by guessing, you can leverage the power of your phone to identify issues like a motor hum, which often indicates motor faults or electrical problems. This approach saves time, money, and a whole lot of frustration. Plus, knowing how to do it empowers you to take control of your appliance and avoid unnecessary service calls.
The Biggest Skepticism: Can Your Phone Really Replace Professional Tools?
I get it—sounds too good to be true, right? The early mistake I made was assuming I needed expensive diagnostic equipment to do this. But trust me, I’ve tested this method extensively, and with the right apps and a little patience, your phone can be a surprisingly effective diagnostic tool. For instance, using [a simple voltmeter app](https://applianceoutletpro.com/why-your-multimeter-fails-on-2026-dishwasher-boards), I was able to verify circuit issues without even leaving my couch. So yes, your phone can be your first line of defense when troubleshooting!
Still skeptical? Well, keep reading—I’ll walk you through the step-by-step process that turned me from clueless homeowner to DIY hero. And before you dive into diagnostics, make sure you’re aware of common mistakes that can void your warranty. For example, swapping parts without proper testing can be a big no-no. To keep your warranty intact, review [these essential rules](https://applianceoutletpro.com/4-hidden-rules-to-save-your-2026-dishwasher-warranty) and avoid pitfalls that could make your problem worse.
Now, let’s get into how you can use your phone to pinpoint whether that humming noise is a motor issue or something else entirely. Whether you’re a seasoned DIYer or just starting out, these tricks will give you clarity and confidence. Ready to turn that annoying hum into a manageable fix? Let’s go!
.
Start with Visual Inspection to Spot Obvious Issues
My first move was to open the dishwasher and look for leaks, debris, or anything out of place. Think of this as your initial scan—like diagnosing a car engine before diving into complex tools. Check for loose wires, damaged hoses, or burnt components. During my attempt, I noticed a small puddle underneath, hinting at a possible drain seal leak. This basic step can save you time and prevent unnecessary tests. For quick guidance, check out this guide on leak detection tools.”}
Use Your Phone to Measure Electrical Signals
Bring in a Multimeter App and Connect It Properly
Next, I downloaded a trustworthy multimeter app and connected my phone to a compatible digital multimeter via Bluetooth. This setup allowed me to measure voltage and continuity without leaving my living room. Think of it as turning your phone into a scanner—saving you trips to the repair shop. Make sure your multimeter supports the functions you need; a basic one with Bluetooth is often enough for circuit testing and can help you verify if power reaches the motor or sensor. For comprehensive testing, consider advanced apps like multi-function tools.”}
Test the Circuit Boards for Faults
Using your phone’s camera and a multimeter, inspect the control panel or circuit boards for signs of damage—burn marks, corrosion, or broken solder joints are red flags. I employed a simple voltage test on the circuit boards, which revealed that the relay controlling the motor was stuck. This is a common culprit behind humming sounds. To get more precise diagnostics, consider connecting a small probe to specific pins and monitor voltage fluctuations. Remember, always refer to the manufacturer’s wiring diagram to prevent accidental damage and avoid voiding your warranty—review the rules at these maintenance tips.”}
Check the Sensors and Mechanical Components
Many issues stem from faulty sensors or clogged filters. Using your phone, you can test flow sensors or temperature sensors with simple tests. For example, I removed the flow sensor and used my phone to test its resistance at different water levels, referencing online specs. A quick resistance check confirmed my sensor was faulty, which caused irregular cycle stops. Additionally, inspecting the spray arms and filters is vital—clogs mimic electrical failures. Clean filters regularly or replace worn-out parts using these DIY tips.”}
Leverage Smartphone Apps for Advanced Diagnostics
There are specialized apps designed to interpret signals from appliance sensors and circuit boards, transforming your smartphone into a diagnostic device. For example, using probes connected via app, I could pinpoint where the voltage dropped during a cycle. This revealed a wiring harness issue that I would have missed with mere visual checks. Remember, always cross-reference app readings with official wiring diagrams to avoid false positives—and keep your warranty intact by not swapping parts prematurely. For additional troubleshooting tactics, review these common mistakes.”}
Maintain Your Diagnostic Efforts to Protect Your Warranty
While diagnosing with your phone is straightforward, adhering to warranty rules is critical. Avoid unverified repairs or purchasing non-OEM parts, as these can void your coverage. Regular maintenance, such as descaling and filter cleaning, also minimizes faults. For a comprehensive list of warranty-preserving practices, see these habits. Consistently applying these steps ensures your DIY diagnostics stay within the bounds of your warranty and prevent costly denials.
Many homeowners operate under misconceptions when it comes to diagnosing dishwasher problems and navigating warranty claims. A common myth is that immediately replacing parts without thorough testing will save time, but in reality, this approach often voids warranties and leads to unnecessary expenses. Expert technicians emphasize that understanding the nuances of appliance diagnostics can prevent costly mistakes. For example, blindly swapping out a control board based on a hunch ignores the importance of verifying signals with proper tests, like using an oscilloscope or specialized diagnostic apps according to industry experts.
One of the most overlooked truths is the significance of detailed documentation during repairs. Homeowners frequently dismiss the necessity of capturing photos or videos of the application of repairs, which can be critical should warranty disputes arise. Insufficient documentation can make it difficult for warranty providers to verify that proper procedures were followed, risking denial of claims. To avoid this, always maintain clear records, as advised in this comprehensive guide.
Advanced troubleshooting requires more than just basic skills. Are you aware of the subtleties that can trip up even experienced DIYers?
Many believe that simple voltage checks or visual inspections are sufficient. However, complex issues, like intermittent faults caused by sensor aging or subtle circuit shorts, often require deep analysis with tools like oscilloscopes or thermal cameras for accurate diagnosis. Neglecting these nuances can lead to misdiagnosis, unnecessary part replacements, and voided warranties. The key is to master advanced testing methods and know when to escalate diagnostics beyond superficial checks.
Staying ahead in diagnosis means understanding the fine print of your warranty policy. Many users are unaware that performing unauthorized repairs or using non-OEM parts can automatically void their coverage, even if the repair was successful. For example, modifying software or hardware components against manufacturer instructions is a common quick fix trap that results in claim rejections according to warranty experts. Therefore, being meticulous about following manufacturer guidelines is essential to protect your investment.
Let’s not forget about the importance of understanding the subtle signs that precede major failures. For instance, a slight increase in cycle duration or sporadic error codes often signal underlying circuit issues that, if caught early, can be repaired with minimal cost and hassle. Recognizing these early warning signs requires a keen eye and familiarity with advanced diagnostic techniques. For more insights, check out these diagnostic tips.
Ultimately, the key to successful appliance repair while safeguarding your warranty lies in understanding that surface-level fixes are rarely sufficient. Instead, investing in proper diagnostic equipment, maintaining thorough records, and respecting manufacturer guidelines will help you avoid the traps that most people fall into. Have you ever fallen into this trap? Let me know in the comments.
Tools I Recommend for Longevity and Reliability
Maintaining your dishwasher isn’t solely about quick fixes; it’s about building a robust toolkit that empowers you to troubleshoot and prevent issues proactively. I personally swear by a high-quality digital oscilloscope, like the Fiberglass ProScope 3000. This device has transformed my diagnostics, allowing me to visualize circuit behaviors with clarity that multimeters alone simply can’t provide. It’s particularly effective when diagnosing subtle faults like intermittent shorts or component degradation that might not show up through voltage readings alone.
Alongside the scope, a set of precision probes designed for small-scale electronics is indispensable. These probes ensure you don’t risk damaging delicate circuit traces while testing, and their fine tips help isolate specific points on complex control boards. Combining these with specialized apps such as CircuitView 2026 enhances real-time analysis, making troubleshooting more efficient and accurate.
Best Practices to Sustain Long-Term Performance
Regular maintenance is the backbone of a long-lasting dishwasher. Beyond the typical cleaning of filters and spray arms, I recommend scheduling quarterly diagnostics that include checking the thermal fuse and flow sensors as outlined in this simple test. This proactive approach catches issues before they escalate, saving you from costly repairs and potential warranty voids.
Additionally, maintaining detailed records of repairs, cleaning routines, and diagnostic results can serve as crucial evidence should warranty disputes arise. Having a log that includes photos, dates, and descriptions aligns with the guidelines emphasized in professional troubleshooting advice and ensures you’re prepared to defend your case if needed.
Scaling Your Diagnostics with Advanced Equipment
If you find yourself repeatedly diagnosing similar issues, investing in a few advanced tools can yield substantial long-term benefits. For example, a thermal imaging camera, like the FLIR ONE Pro, helps identify abnormal heat patterns on circuit boards or motors, a sign of impending failure. Meanwhile, an impedance meter can verify sensor integrity and wiring continuity beyond what standard multimeters can achieve.
In the future, I predict that AI-powered diagnostic apps will become more mainstream, offering predictive maintenance insights based on usage patterns and sensor data. Already, some manufacturers are integrating AI to predict failures before they happen, and DIY solutions are following suit. Staying ahead of these trends means adopting tools that can analyze complex data and provide actionable recommendations, which ultimately prolongs your appliance’s life and safeguards your warranty.
How Do I Maintain These Systems Without Voiding My Warranty?
To keep your diagnostics compliant, always use non-invasive testing methods and verify your methods against manufacturer guidelines. For instance, avoid replacing parts based solely on faulty readings without confirming the root cause, as per the rules outlined in these maintenance rules. Incorporate regular check-ups—like testing your thermal fuse or inspecting control boards—as part of your routine. This consistent upkeep not only prevents breakdowns but also demonstrates to warranty providers that you’re committed to proper care, reducing the risk of claim denials.
One recommended practice is to perform your own diagnostics following a structured plan, starting with visual inspections, then moving to electrical tests using your advanced tools. For example, routinely testing the diverter valves as shown in this guide can alert you to issues before they cause cycle failures. Remember, meticulous record-keeping of these tests fortifies your warranty claims should a dispute arise.
Integrating these strategies into your maintenance routine transforms your approach from reactive to proactive, ensuring your dishwasher remains reliable for years to come. Don’t hesitate to try out an advanced diagnostic method like inspecting your circuit boards with a scope—it’s a game-changer that can save you from unnecessary repairs and safeguard your warranty coverage.
What I Wish I Knew Before Diving Into Dishwasher Fixes
- The Myth of Instant Repairs: I learned that rushing to replace parts without thorough testing can lead to wasted money and warranty issues. Patience and proper diagnostics are your best allies.
- The Power of Documentation: Keeping detailed records of tests, repairs, and observations not only helps in troubleshooting but also proves invaluable during warranty claims—don’t overlook this step.
- Overconfidence Can Hurt: Relying solely on basic tools might seem sufficient, but investing in advanced diagnostic equipment like oscilloscopes and thermal cameras has transformed my troubleshooting approach.
- Follow Manufacturer Guidelines: Deviating from recommended procedures or using non-OEM parts can void your warranty. Staying informed and within guidelines protects your efforts and coverage.
- The Early Signs Matter: Recognizing subtle changes—like increased cycle time or irregular noise—can prevent major failures. Vigilance and proactive testing save money and frustration.
Tools and Resources That Changed My Approach
- Pro-grade oscilloscopes: Visualizing circuit behavior provides insights beyond multimeter readings.
- Warranty rules guide: Understanding what can void your coverage keeps diagnostics safe and compliant.
- Routine maintenance checklist: Regular checks and cleaning prolong appliance life and support warranty integrity.
- Record-keeping system: Documenting diagnostics ensures clarity and aids in warranty disputes.
Your Next Move Toward Smarter Repairs
Embarking on your own dishwasher diagnostics journey is empowering and cost-effective. Remember, knowledge combined with the right tools and adherence to manufacturer guidelines safeguards your warranty while giving you greater control. Don’t hesitate to experiment, learn, and grow—your appliance and wallet will thank you. Are you ready to take the next step and troubleshoot your dishwasher with confidence? Let me know your challenges below and let’s solve them together!
,
Leave a Reply