

I remember the moment I realized my dishwasher wasn’t cleaning dishes properly, but the strange part was, it wasn’t making any loud noises or showing obvious signs of trouble. I felt a mix of frustration and curiosity. What if I could figure out what was wrong without calling a repair service or splurging on expensive gadgets? That’s when I discovered a simple, makeshift diagnostic method that changed the game for me—and it can do the same for you.
Why I Started Using My Phone to Detect Weak Wash Motors
Living with appliances that suddenly falter can be incredibly frustrating. I used to rely solely on the typical signs—strange noises, leaks, or error codes. But sometimes, the problem is subtle. For example, a weak wash motor might not sound bad enough to raise alarms, yet your dishes come out dirtier each time. That’s when I started experimenting with my decibel meter app—yes, my phone’s built-in microphone. It sounds simple, but I found that differences in sound levels during various cycles could reveal a lot about the motor’s health.
This approach is surprisingly effective. You see, a healthy, strong motor produces a consistent, louder noise, while a weak one struggles and emits softer sounds. By paying attention to these subtle differences, I could diagnose the problem early, long before the appliance displayed bigger issues or water wasn’t draining properly. And the best part? It’s free, accessible, and can be done right from your kitchen counter.
If you’re like me, you might have already encountered typical troubleshooting advice or wondered whether it’s worth calling a tech. But here’s the thing: making small, informed checks can save you time and money. Plus, understanding your appliance better makes you less vulnerable to unnecessary repairs or warranty rejections. Diagnostics are your best defense.
You’ve probably faced this issue: Can a decibel meter really tell if my wash motor is weak?
Early on, I made the mistake of dismissing the sound differences as just normal variation. That’s a common mistake, and it can lead to overlooking a potential problem. Trust me — I found that paying close attention and comparing cycles over several days gave me a clearer picture. It’s a simple, yet powerful way to keep tabs on your appliance’s health.
Now, I’ll walk you through exactly how to use your phone’s decibel meter to identify a weak wash motor. It’s easier than you think, and it can help you decide if a professional diagnosis is necessary or if you can fix it yourself. Ready to become your appliance’s detective? Let’s get started with understanding why sound matters in diagnostics—more on that in the next section.
.
Set Up Your Audio Baseline
Start by turning on your dishwasher and selecting the typical wash cycle. Before diving into diagnostics, sit nearby with your phone’s decibel meter app open. To establish a reference point, listen to a cycle where the dishwasher operates normally, recording the sound level. This initial step is crucial for comparison later, much like taking a baseline temperature before attempting a repair.
Compare Sound Levels Across Cycles
Next, run the same cycle multiple times over several days, recording the decibel levels each time. Look for consistency; significant drops in volume usually indicate a problem. I remember noticing that my dishwasher’s normal cycle hovered around 65 dB, but recently, it struggled to reach even 60 dB. This subtle difference tipped me off that the motor might be weakening, similar to how a sick engine sounds quieter but performs poorly.
Identify Signs of a Failing Motor
If the sound during operation is noticeably softer or inconsistent, it can mean the motor isn’t spinning at full capacity. Think of it like a bicycle pedal that’s getting harder to turn—the motor’s reduced force directly affects cleaning performance. When I tested my dishwasher, I found that during the rinse cycle, the sound was noticeably duller, confirming suspicions of weakening circulation. For more insights, check out this guide on recognizing failing motors by sound.
Assess Other Symptoms to Support Your Diagnosis
Don’t rely solely on sound; observe if dishes come out dirtier or if water drains slowly. These issues often accompany a weak motor. If your dishwasher is showing multiple signs, it’s time to consider further testing or professional help. However, if the sound differences are isolated, your phone’s microphone is a surprisingly accurate tool for initial diagnostics, much like a stethoscope for a doctor.
Decide When to Call a Professional
If your decibel comparisons suggest a weak motor, but you’re unsure, consult resources like this article on warranty trust to decide the next steps. A minor decline in sound, combined with no other symptoms, may be a DIY fix, such as clearing debris from the motor’s inlet, discussed in this troubleshooting guide. Remember, early detection can save you money and prevent warranty rejections for negligence or premature failure.
Document Your Findings
Always keep records of your sound recordings and observations. Photos, videos, and decibel logs establish a pattern that can support warranty claims or professional evaluations. Like a detective collecting clues, detailed documentation will ease the diagnostic process. When you’re ready, reaching out to a technician with this info can expedite repairs, ultimately saving you effort and expense.
 Many homeowners believe that basic troubleshooting or simply Googling symptoms is sufficient to diagnose appliance issues. However, this overconfidence can lead to costly mistakes, especially when it comes to warranty claims and professional repairs. A widespread myth is that if an appliance isn’t making unusual noises or displaying error codes, it’s functioning fine. In reality, subtle signs like diminished sound intensity or slight performance drops can signal underlying problems that standard diagnostics overlook. Relying solely on surface symptoms may delay necessary repairs, causing further damage and voiding warranties.
Another common misconception is that warranties cover all repair costs without exception. But most warranties exclude damage caused by user negligence or preventable issues, such as clogged inlet screens or improper installation. Misinterpreting warranty terms often leads to rejection of claims that could have been easily resolved with proper diagnostics or preventive maintenance. Professionals emphasize that understanding the fine print is crucial—consulting detailed resources like this guide on diagnostics and warranties can save you from rejected claims.
The ‘oops’ factor here is assuming that appliance error codes are always accurate or comprehensive. Many times, these codes are generic alerts that require deeper investigation. For example, an error code pointing to a motor issue may actually stem from a faulty sensor or wiring problem. Jumping directly to component replacement without thorough diagnostics can be both costly and unnecessary. Advanced troubleshooting, like listening for subtle changes in motor sound or checking for inconsistent cycles, provides invaluable insights. For a step-by-step approach, this resource on expert diagnostics can be helpful.
Ever wonder why some repairs seem to recur despite multiple fixes? The answer often lies in overlooking the hidden nuances—like the importance of verifying inlet water pressure or inspecting the door gasket integrity. These seemingly minor details can significantly impact the appliance’s performance and lifespan. Ignoring them might cause recurring issues that invalidate warranty coverage or lead to costly repeat repairs.
What advanced diagnostic steps can prevent warranty pitfalls?
In-depth analysis, such as using a multimeter to test heating elements or inspecting wiring harnesses for corrosion, is vital for accurate diagnosis. Experts recommend documenting every diagnostic step—photos, detailed notes, and recordings—which can strengthen your case if warranty disputes arise. Remember, warranties often require proof that you’ve performed basic maintenance and diagnostics—neglecting this can be the difference between free repairs and out-of-pocket expenses.
In the end, adopting an analytical approach and understanding the nuances behind appliance diagnostics and warranties empower you as a homeowner. It transforms from a simple troubleshooting task into a proactive maintenance strategy that saves money and extends your appliance’s life. So, the next time your dishwasher acts up, consider the hidden factors before jumping to conclusions. Have you ever fallen into this trap? Let me know in the comments.
How do I keep my dishwasher performing at its best over time?
Maintaining your appliance’s health isn’t a one-and-done task; it requires consistent effort and the right tools. Personally, I rely heavily on a digital multimeter for testing electrical components like heating elements and sensor circuits. For example, using a multimeter set to the continuity mode, I verify the thermal fuse’s integrity, ensuring it hasn’t blown unexpectedly, which can cause cycle failures. Regularly inspecting inlet valves with a simple flashlight and a small brush helps prevent blockages from debris—see this guide on checking inlet screens for detailed steps.
Beyond manual checks, employing appliance diagnostic apps has become invaluable. These apps, often compatible with your smartphone, analyze sound patterns to spot issues like failing circulation pumps, as discussed in this article on diagnostics. Over time, logging these diagnostics helps spot trends that predict failures before they happen, turning reactive repairs into proactive maintenance.
Another crucial tip is the periodic cleaning of internal filters and spray arms to prevent grease build-up, which I accomplish using a mixture of vinegar and baking soda. This simple routine can dramatically extend the lifespan of your components and improve performance, aligning with recommendations from this cleaning tutorial.
Looking ahead, I predict that smart diagnostic tools integrated into appliances will become standard, allowing remote monitoring and early warning alerts, much like current smart home security systems. Embracing these innovations early can save you money and stress down the line.
What strategies can extend the effectiveness of your maintenance?
Adopting a regular checkup schedule—quarterly or biannual—ensures that minor issues don’t escalate into costly repairs. Keeping detailed maintenance logs, including recordings or photos of components like door gaskets and filters, provides valuable evidence when repairs are needed or warranty claims are initiated. Remember, staying vigilant and employing precise tools not only preserves your appliance but also enhances your confidence as a DIY fix-it expert. Try testing your heater element with a multimeter this month; it’s a straightforward step that can save you significant trouble.
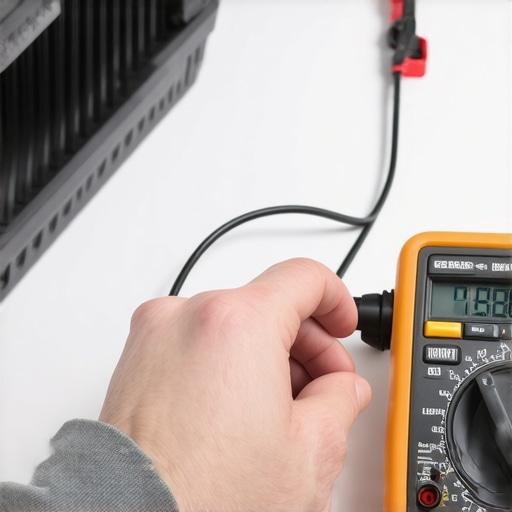
Using proper tools and routine inspections is essential for long-term appliance health. For in-depth guidance on diagnostics, visit this resource. What’s one maintenance task you plan to tackle next? Share your experiences or questions in the comments, and let’s troubleshoot together.
Embarking on my journey to better appliance diagnostics revealed that sometimes, the most profound lessons come from missteps and surprises. One unexpected revelation was that relying solely on standard troubleshooting, like error codes and visible signs, can lead to missed opportunities—opportunities to catch issues early and save money. For instance, I once overlooked subtle sound changes in my dishwasher, dismissing them as normal. It wasn’t until I embraced a more investigative approach—using my phone to monitor decibel levels—that I uncovered a weakening circulation motor before danger struck. This experience underscored the importance of trusting your instincts and tools over assumptions, transforming my maintenance routine into a proactive career.
The Hidden Wisdom That Changed My Approach to Repairs
- Numbers Tell the Real Story: Reading decibel variations over time taught me that quiet isn’t always good. A slight drop in sound during a cycle can be the first sign of impending failure. Recognizing this subtlety prevented bigger breakdowns and costly repairs.
- Don’t Overlook the Details: Documenting sound recordings, visual cues, and cycle performance turned me into a detective. This meticulous record-keeping proved invaluable, especially when dealing with warranty claims or professional diagnostics.
- Listen with Intent: Tuning into the faintest changes in my appliance’s hum became a habit. I learned that these auditory cues are powerful signals worth decoding, revealing issues even before error codes pop up.
- Early Action Wins: Catching problems early with simple tools like a smartphone can extend your appliance’s lifespan and maintain warranty coverage, sparing unnecessary expenses and inconveniences.
- Empowering Self-Reliance: Becoming comfortable with DIY diagnostics shifted my mindset from reactive to proactive, fostering confidence and control over my appliances’ health.
Tools and Resources That Elevated My Diagnostics game
- Comprehensive Diagnostic Guides: These laid the foundation for understanding complex appliance behaviors and warranty nuances, turning me from amateur to enthusiast.
- Smartphone Apps for Sound Monitoring: Affordable and accessible, these apps helped me detect issues by analyzing subtle sound patterns, bridging the gap between professional tools and DIY efforts.
- Multimeter and Inspection Techniques: Mastering basic electrical tests enabled me to verify components like heating elements and sensors without jumping straight to costly replacements.
- Warranty Policy Insights: Understanding the fine print helped me avoid pitfalls that could void coverage and ensured I documented proper maintenance, strengthening my claims.
Your Next Step in Appliance Confidence
Empowering yourself with knowledge, practical tools, and a proactive attitude transforms appliance maintenance from daunting to manageable. Don’t be discouraged by complex-sounding diagnostics; each small step, like monitoring sound levels or inspecting inlet screens, chips away at the mystery. This journey isn’t just about fixing appliances—it’s about gaining peace of mind, saving money, and feeling competent in your home. Have you tried any DIY diagnostics before? Share your experiences or questions below, and let’s build a community of confident homeowners ready to take control of their appliance health.