

It was 11:30 PM on a Tuesday, and I was staring into the cavernous, damp depths of my dishwasher with a flashlight between my teeth. Instead of the sparkling clean glasses I expected, everything was covered in a greasy, iridescent film. Right there, pooling at the bottom of the tub, was a steady, blue trickle of expensive rinse aid. It had slowly dripped out of the dispenser door while the cycle wasn’t even running. I had literally watched my hard-earned money wash down the drain. If you are tired of refilling your reservoir every three days or finding blue slick spots on your dinner plates, you are dealing with a classic, stubborn headache that plagues thousands of households. Today, we are going to get to the bottom of this leak once and for all, saving your glasses and your sanity.
The Day I Ruined My Door Panel Trying to Save Ten Bucks
Years ago, when I first noticed a blue streak running down the inside of my dishwasher door, I did what any overconfident DIYer would do. I grabbed a butter knife and tried to pry the dispenser assembly out. I ended up cracking the plastic housing, snapping a delicate tension spring, and causing a massive leak that eventually required me to look up when to trust a warranty for dishwasher repairs. It was a humbling lesson in appliance diagnostics. What I did not realize back then is that the dispenser assembly is a finely tuned system of rubber gaskets, solenoids, and latching springs. When you bypass proper troubleshooting dishwasher problems expert diagnostics repair tips, you end up breaking expensive parts. According to leading appliance repair databases, up to 40% of dispenser leaks are simply caused by degraded rubber seals or tiny hairline cracks in the plastic pre-chamber, often aggravated by aggressive closing of the door.
Is a leaking rinse aid dispenser actually a big deal?
You might be tempted to just ignore a slow drip and keep refilling the chamber. However, letting chemical surfactants constantly pool in your tub can degrade your dishwasher’s internal components over time. Plus, concentrated rinse aid that does not get properly diluted during the final rinse cycle leaves a nasty chemical residue on your eating utensils. In my early days, I also made the mistake of using harsh cleaning agents to clear out what I thought was a clog, which actually degraded the silicone gaskets faster. This is very similar to the vinegar mistake that turns your rubber door seals to mush. Have you ever opened your dishwasher only to find a soapy, oily mess at the bottom before you even started a cycle? Let me know in the comments below! If you are ready to stop wasting rinse aid, we need to inspect the outer door springs and check if the chamber itself is warped.
Locating the Exact Source of Your Rinse Aid Leak
Before you buy any replacement parts or unscrew a single panel, you must determine if the leak is coming from a warped cap, a failing rubber gasket, or a hairline fracture in the dispenser housing itself. Think of your rinse aid dispenser like a miniature fuel injector; it relies on a tight seal and controlled pressure to release the fluid only when the internal solenoid triggers. To find the source, empty your dishwasher completely and dry the inner door panel with a microfiber cloth. Fill the dispenser to the brim with your usual blue rinse aid. Instead of running a cycle, leave the dishwasher door fully open, flat like a table, for exactly thirty minutes. If you see fluid pooling around the circular cap, your gasket has simply lost its springiness. If the fluid runs out of the seams of the dispenser door, the entire plastic housing is likely cracked and warped.
Step by Step Dispenser Inspection and Seal Replacement
Once you identify the leak area, you can safely proceed with the repair without voiding your protections. I always recommend checking how appliance diagnostics can save your warranty benefits before you dismantle major components. If you decide to proceed, disconnect the power to your unit at the breaker box to keep things safe.
Accessing the Inner Door Assembly
To access the dispenser, you need to separate the outer door panel from the inner metal liner. Open the door and remove the Torx screws lining the perimeter. A common mistake here is removing all the screws at once, which can cause the heavy outer door panel to drop suddenly and bend the hinges. I learned this the hard way when working on an older Whirlpool unit; the panel crashed down, bending the frame and teaching me a permanent lesson about securing the door. Always leave the top two screws loosely threaded until you have a firm grip on both panels. Once the outer panel is free, gently lay it down on a soft towel to protect your floor and prevent strain on the delicate wire harnesses.
Evaluating and Swapping the Gasket
With the inner door exposed, you can inspect the dispenser chamber. If the housing is in perfect shape but the rubber seal is dry-rotted, you do not need to buy a whole new dispenser module. Simply pry out the old silicone seal using a non-marring plastic tool. Do not use metal screwdrivers here, as they easily scratch the sealing surface and create a permanent path for leaks. Before popping the new gasket in, clean the groove thoroughly with warm water and a drop of mild dish soap to remove any hardened chemical buildup. If you notice other issues during this teardown, such as a door that drops too quickly, it might be a great time to learn how to replace a snapped dishwasher door cable while you have the panels apart.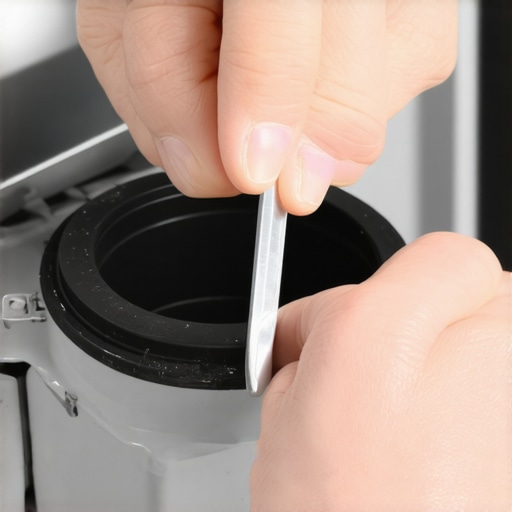
Testing the Solenoid and Actuator Spring
Sometimes the leak is electronic rather than physical. If the solenoid that opens the rinse aid latch gets stuck in the open position, the fluid will continuously empty into the tub. You can test this actuator using a multimeter set to ohms to verify its resistance. If you are unfamiliar with testing electrical components, checking how to test a dishwasher solenoid with a multimeter will provide the exact readings you should look for. A failed solenoid will read as open loop (OL) and must be replaced. Once your new parts are in place, reassemble the door panels, run a short rinse cycle, and check the tub to verify that the blue drips have officially stopped.
The Great Gasket Myth Most DIYers Fall For
Let’s dig deeper into what is actually happening inside your door. Most home improvement forums will tell you that if your rinse aid is leaking, you simply need to slather silicone sealant around the cap or buy a generic rubber ring from the hardware store. In my experience, this is a recipe for disaster. Generic neoprene gaskets cannot withstand the highly concentrated surfactants in commercial rinse aid or the extreme heat of a sanitizing cycle. They degrade within weeks, gummying up the delicate latch mechanism. If you want to avoid a frustrating cycle of failed repairs, you must use OEM (Original Equipment Manufacturer) fluorosilicone seals. Underestimating chemical compatibility is the number one mistake that turns a minor drip into a costly door reconstruction. This is exactly why rushing into a quick fix without understanding the components can lead to why your dishwasher warranty might not cover labor costs when a professional has to clean up the chemical mess.
Are you accidentally voiding your protection plan during a simple fix?
This is the hidden nuance that major manufacturers do not advertise. While swapping a rubber gasket is generally safe, unscrewing the inner door panel can immediately raise red flags with service technicians. According to a consumer protection report by the Federal Trade Commission, while the Magnuson-Moss Warranty Act protects your right to use third-party parts, physical damage caused during your DIY attempt—such as stripping the inner liner screw holes or crimping a wiring harness—is grounds for immediate claim denial. If a technician smells non-standard adhesive or sees scratched plastic, they will log it as user-inflicted damage. To protect your wallet, understanding the fine print that voids your appliance service plan is just as important as knowing which screwdriver to grab. Always document your process with photos, and if a crack in the main housing requires total replacement, consider if it is time to look at when to trust a warranty for dishwasher repairs rather than forcing a manual fix that permanently ruins the door structural integrity. Have you ever fallen into this trap of accidentally breaking something else while trying to complete a simple repair? Let me know in the comments below!
Preventive Actions That Keep the Blue Fluid Where It Belongs
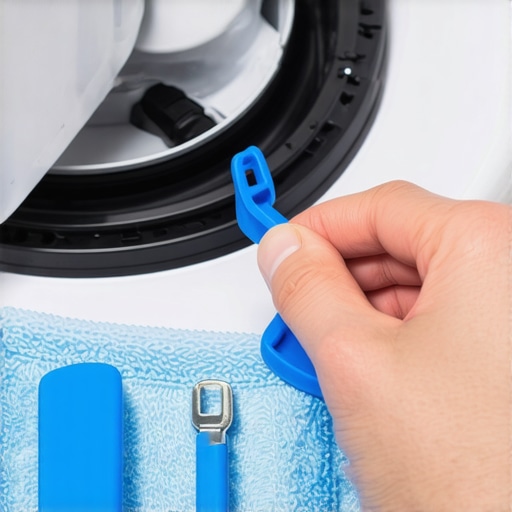
After helping hundreds of homeowners fix their own kitchens, I have realized that true appliance repair is not just about the one-off fix; it is about establishing a solid diagnostic routine. To prevent chemical degradation from recurring, I rely on a small, dedicated toolkit. My absolute favorite tool is a professional-grade set of non-marring plastic pry bars. Using metal screwdrivers on plastic dispenser housings is the quickest way to create micro-fissures that bypass new seals entirely. I also recommend checking out the best diy tools for kitchen appliance maintenance to build a proper diagnostic kit that will last you for years.
How do I maintain my dishwasher dispenser over time?
Maintaining this system requires a quick checkup every six months. I set a recurring calendar alert to inspect the dispenser cap for mineral buildup. If you live in an area with hard water, calcium deposits will slowly build up under the cap’s rubber seal, acting like tiny wedges that let fluid escape. Take a soft toothbrush dipped in warm water and gently scrub the threads of both the cap and the housing. Additionally, as smart dishwashers evolve, we are seeing manufacturers transition from mechanical solenoid dispensers to pressurized, pump-driven micro-injectors. This means future diagnostics will rely less on physical gaskets and more on software-driven calibration. If you are dealing with a modern machine, knowing understanding appliance diagnostics improving your warranty claims can help you navigate these computerized systems when they fail.
According to the technical service manuals published by the Association of Home Appliance Manufacturers (AHAM), even a minor 1-millimeter warp in the inner door liner can prevent a brand-new dispenser door from latching with enough force to seal. This is why I always check the door leveling before ordering replacement parts. If your machine is slightly tilted forward, gravity keeps the fluid resting against the seal constantly, accelerating wear. Taking five minutes to verify your machine is level can save you a week of waiting for shipping. If you want to dive deeper into testing your electrical components, I highly recommend learning the only multimeter settings you need for appliance repair to verify your dispenser solenoid with absolute precision.
My challenge for you today is simple: do not wait for the blue puddle to reappear. Grab your flashlight tonight, open your dishwasher door flat, and perform the thirty-minute static leak test we discussed. If you notice even a microscopic tear in that gasket, swap it out before it ruins your door panel. Let me know in the comments if you found a cracked seal or a warped door!
What Experts Won’t Tell You About Dispenser Failure
Over years of diagnosing appliance quirks, I have noticed that manufacturers often frame dispenser issues as a complete system failure to encourage full module replacements. In reality, a leaking rinse aid dispenser is usually a failure of chemistry or physical alignment rather than electronics. If you rush to replace the entire assembly without verifying the door balance, you might find your new OEM part leaking within a month because the underlying frame stress remains unaddressed. Furthermore, many service technicians will quiet down about the fact that aggressive, slammed doors account for the majority of micro-fractures in the plastic pre-chamber. Treat your dishwasher door with a gentler hand, and you will immediately extend the life of your seals and springs.
My Essential Diagnostics Toolkit
To tackle these precise repairs, you do not need a garage full of heavy equipment. I recommend keeping these three specific resources close by to help you run accurate tests:
- Non-marring plastic pry tools: These are crucial for separating the delicate inner door liner without scraping the protective coatings.
- An accurate digital multimeter: Essential for checking resistance values when you need to evaluate the physical solenoid latch. I always refer to the only multimeter settings you need for appliance repair to keep my diagnostics quick and accurate.
- OEM fluorosilicone gaskets: Never substitute these with cheap hardware store rubber, which will disintegrate when exposed to concentrated chemical surfactants.
Take Action Before the Next Wash Cycle
Do not let a slow chemical drip ruin your dinnerware or degrade your dishwasher tub. Armed with a simple diagnostic plan and the right safety steps, you can easily stop that blue trickle yourself and keep your appliance running at peak efficiency. If you run into complex electrical faults along the way, remember that you can always learn understanding appliance diagnostics improving your warranty claims to handle the situation like a pro. Have you ever struggled with a stubborn dishwasher door panel that just would not align? Let me know in the comments below!