

It was a Tuesday night, and the last thing I wanted was a swamp in my kitchen. I’d just hit ‘Start’ on the dishwasher, expecting clean plates for the morning. Instead, I heard a gurgle that sounded like a sinking ship. Ten minutes later, I was standing in a puddle because my sink decided to vomit gray water everywhere. If you’ve ever felt that cold, greasy water seep into your socks, you know the panic. I almost called a professional, thinking my whole drainage system had collapsed. I didn’t realize that the tiny silver cylinder on my counter—the air gap—was the real culprit. [image-placeholder-1]
Stop Paying for Plumbers When You Just Need a Straw
Most of the time, when we see water pooling in the sink during a wash cycle, our first instinct is to assume the worst. We think the motor is shot or the pipes are rusted through. But honestly, you might not need a Vancouver plumber for your kitchen sink backup at all. I learned this the hard way after spending a Saturday morning tearing apart my U-bend, only to realize the blockage was much higher up. That little chrome dome sitting next to your faucet is a safety valve. It’s designed to keep dirty sink water from siphoning back into your clean dishwasher. When it gets gunked up with a stray piece of kale or a bit of grease, the water has nowhere to go but out. I’ve found that the secret to unclogging a dishwasher air gap with a straw is often the only tool you actually need. It’s a simple fix that saves your kitchen floors and your sanity.
Is that little silver knob actually doing anything?
A lot of folks think it’s just a decorative piece of hardware or an outdated building code requirement. However, it is a critical component of your home’s health. A properly functioning air gap is the only truly reliable way to prevent cross-contamination between your potable water and waste. It’s a literal gap of air that gravity won’t let sewage jump across. In my early DIY days, I made the mistake of thinking I could just bypass it or tighten it down to stop a leak. Big mistake. All I did was create a vacuum that pulled old food particles back onto my “clean” dishes. If you’re seeing water bubbling out of the top of that cap, it’s not broken; it’s actually doing its job by telling you there is a clog. We’re going to handle those troubleshooting dishwasher problems with expert diagnostics and repair tips that don’t require a degree in mechanical engineering. Have you ever walked into your kitchen and found a surprise lake on the linoleum?
Why the Quick Drain Fix is Your Best Friend
Before you start looking up the quick drain pipe fix that stops your dishwasher from backing up, you need to understand the ‘why.’ Dirt, grease, and those tiny stickers from apples are the enemies here. They love to get lodged right where the dishwasher hose meets the air gap. By identifying the source of the clog early, you can save yourself from the headache of a full kitchen flood. It’s all about the simple physics of drainage. Setting the stage for a clear drain starts with a few basic checks that any homeowner can do in minutes.Pop the chrome cap off first. It’s like opening a tiny pressure cooker. Underneath, you’ll find a plastic nut or just a press-fit cap. Last winter, I ignored a tiny dribble from mine until it became a torrent on my floor. I eventually found a piece of a plastic “organic” sticker from a bell pepper wedged right in the throat. You don’t need a massive toolkit for this—just your fingers and maybe a pair of needle-nose pliers to fish out the debris.
The Straw Technique for Instant Relief
If you don’t see a visible chunk of food, the clog is likely sitting further down in the hose leading toward the sink drain. Grab a thick straw—the kind you get with a milkshake or boba tea. Place it over the smaller hole inside the air gap and blow hard. You are looking to hear a distinct ‘thwack’ or a splash inside the garbage disposal. This manual pressure is often enough to dislodge grease that’s started to solidify. If you find yourself doing this every single week, it’s a clear sign of a deeper issue, and you might need top signs your dishwasher needs professional diagnostics to see if your pump is actually failing or if it’s just bad plumbing geometry. 
Check the Connection to Your Garburator
The most common hidden clog isn’t in the air gap itself, but where the hose connects to your garbage disposal. If you’ve recently installed a new disposal, someone might have forgotten to knock out the ‘slug’—the plastic plug in the disposal’s inlet. I’ve seen homeowners go crazy thinking their machine was broken, only to find that five-cent piece of plastic still in place. While you’re down there, if you notice why your garburator is humming but not spinning and how to safely fix it, address that first, because a backed-up disposal will always push water back toward the dishwasher. It’s like trying to flush a toilet into a full septic tank.
Spotting the Red Flags Before They Flood Your Floor
Take a good look at the drain hose path. It should have a smooth, sweeping curve, not a sharp kink. A kinked hose is like a pinched artery; it forces the pump to work double time, which can lead to your motor burning out way before its time. When you are trying to navigate understanding appliance diagnostics improving your warranty claims, documenting these physical blockages is vital. If a service tech comes out and finds a kinked hose caused by the heavy boxes you keep under the sink, your warranty likely won’t cover the service call. Look for the red flag your service tech looks for in your drain line, which is often that tell-tale oily residue or dark staining around the hose clamps. Knowing how to clear a gravity drain without tearing the kitchen apart can save you hundreds in labor costs while keeping your machine in peak condition.Most people think that once a smart app gives them a code, the diagnostic work is done. That’s a dangerous trap. In my experience, those codes are just the start of the trail, not the finish line. If your app says ‘drain error,’ it might just be a confused sensor, not a dead pump. According to research by the Association of Home Appliance Manufacturers (AHAM), modern sensors are incredibly sensitive to voltage fluctuations, meaning a temporary power dip can trigger a false alarm. If you jump to buying a new pump immediately, you’re throwing money down the drain. This is where how appliance diagnostics can save your warranty benefits comes into play. By documenting the actual physical failure rather than just the code, you prove to the manufacturer that the part failed, not your maintenance routine. 
Why your smart app might be lying to you
Here is the ‘oops’ factor I see all the time: homeowners use the one-minute move to reset your control board to clear a nagging error code, thinking they fixed it. But by clearing that history, you might be erasing the very evidence a technician needs to justify a warranty replacement. If the tech arrives and can’t find a ‘stored’ code, your claim might get rejected on the spot. It’s a classic Catch-22. You want the machine to work, but the machine needs to stay ‘broken’ long enough for the professional to see the digital breadcrumbs.
Can you really talk your way into a free repair?
Sometimes, even when the paperwork says no, there is a way. I’ve found that the hidden loophole that gets your denied claim reversed usually involves showing that you’ve performed all recommended descaling and cleaning. If you can prove you aren’t the cause of the ‘wear and tear,’ manufacturers are often more flexible. However, don’t expect them to budge on aesthetics; why your appliance warranty won’t cover cosmetic scratches is a hard rule across the industry. If you’re past the one-year mark, you need to know how to get a manufacturer to pay for an out-of-warranty repair by citing known part defects or ‘goodwill’ clauses. Knowing when to trust a warranty for dishwasher repairs vs. when to just grab a screwdriver yourself is the hallmark of a savvy homeowner. Have you ever fallen into the ‘reset-loop’ trap or had a claim denied for a silly reason? Let me know in the comments.
Equip your utility drawer for real success
I’ve realized that the difference between a functional kitchen and a flooded one usually comes down to three or four tools you probably already have in your garage. Most people think they need a specialized kit to handle troubleshooting dishwasher problems with expert diagnostics and repair tips, but I’ve found that a simple digital multimeter is my best friend. If your machine refuses to fill, you shouldn’t just guess if the part is broken. I use mine to check for continuity on the water valve; knowing how to test your inlet valve with a simple voltmeter can tell you in thirty seconds if you need a $20 part or a whole new machine. Beyond the electrical side, I keep a pack of wooden toothpicks specifically for the spray arms. It sounds low-tech, but the toothpick method for unclogging spray nozzles is the only way to get those tiny calcium deposits out without scratching the plastic and ruining the water pressure.
Skip the plumber and grab these simple tools instead
According to a technical bulletin from the Plumbing Manufacturers International (PMI), the ‘siphon break’—that high loop in your drain hose—is the most overlooked failure point in modern high-efficiency setups. If that hose sags, you’re going to get backflow. To fix this long-term, I don’t just tape things up; I use heavy-duty zip ties to secure the hose to the underside of the cabinet. While you’re under there, it pays to learn how to clear a gravity drain without tearing the kitchen apart because grease likes to settle in the lowest point of that curve. I’ve started using a small inspection mirror to check the back of the pump housing for leaks that haven’t hit the floor yet. It’s about spotting the drip before it becomes a deluge and understanding the best way to protect your kitchen floors from leaks before you’re dealing with warped wood and mold.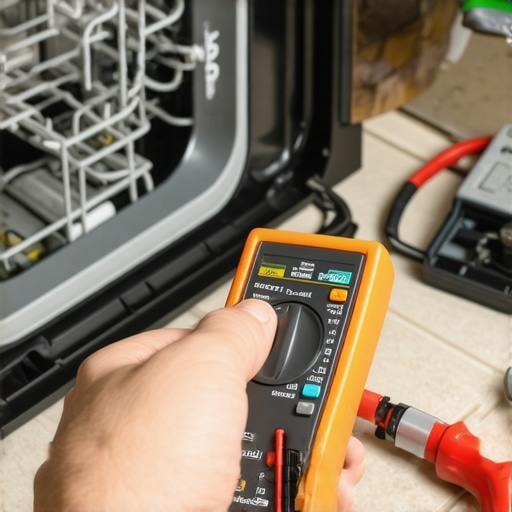
How can I keep my dishwasher running like new for years?
The secret isn’t a magic chemical; it’s consistency. I used to be lazy about it, but now I perform a deep clean every thirty days like clockwork. You have to realize the real cost of skipping your monthly descaling cycle isn’t just a smelly tub; it’s the fact that limescale acts like sandpaper on your pump seals. Once those seals go, the motor is next. I’ve found that how to deep clean a dishwasher sump without pulling the machine is the single most effective way to prevent that ‘grinding’ sound everyone hates. Also, I’ve stopped using cheap detergent. My local tech once told me why your service tech secretly hates pod detergents—they often don’t dissolve fully in eco-modes, leaving a waxy buildup that chokes the filters. Looking forward, I predict we’ll see more AI-driven sensors that will alert us to these clogs before they happen, but for now, your ears and a flashlight are your best diagnostic tools. If you’re feeling brave, go grab a magnet and try testing your float switch right now to ensure your overflow protection is actually armed and ready.
Stop letting your dishwasher play mind games with you
After years of tinkering under my own sink, I’ve realized that most of us treat our appliances with too much mystery and not enough common sense. The biggest ‘aha’ moment for me was discovering that error codes are often just a cry for a simple cleaning, not a death sentence for the machine. I learned the hard way that clearing a digital error without fixing the physical cause—like a gunked-up air gap—just sets you up for a bigger failure later. Another lesson? Don’t assume the manufacturer is your enemy; knowing when to trust a warranty for dishwasher repairs vs. when to pick up a straw can save you hundreds in unnecessary service fees. Lastly, remember that your smart app doesn’t have eyes. It can’t see the kinked hose or the bell pepper sticker blocking the flow, so always trust your flashlight over your phone screen.
Build a toolkit that actually saves you money
You don’t need a professional-grade van to handle most issues, but a few specific items will make you feel like a pro. First, I always keep a digital multimeter handy; learning how to test your inlet valve with a simple voltmeter is a total game-changer for diagnosing ‘no-fill’ issues. Second, I recommend a high-quality set of long-reach needle-nose pliers for those deep-seated clogs in the sump area. I also rely heavily on a simple monthly maintenance schedule to keep the system clear; understanding the real cost of skipping your monthly descaling cycle taught me that five minutes of prevention is worth hours of mopping up gray water. These tools combined with how appliance diagnostics can save your warranty benefits give you the ultimate edge in home maintenance.
You have what it takes to stop the next flood
It is easy to feel overwhelmed when water starts bubbling up where it shouldn’t, but you are more than capable of managing these systems yourself. Every time you successfully clear a drain or reset a sensor, you’re gaining the confidence to handle the next big home hurdle. The secret is simply to stay curious and not be afraid to get your hands a little dirty. By taking the lead on troubleshooting dishwasher problems with expert diagnostics and repair tips, you’re not just saving money—you’re protecting the heart of your home. So, the next time you hear that ominous gurgle, don’t panic. Grab your tools, check the air gap, and take charge. What is the weirdest thing you have ever found clogging your dishwasher drain or air gap? Let me know in the comments below!