

I was on my knees, staring at a swampy mess of gray water and leftover lasagna bits at the bottom of my dishwasher, feeling like a total failure. The motor was emitting this low, angry hum—the kind of sound that screams, ‘I’m about to burn out and cost you four hundred dollars.’ I had already cleaned out the debris trap and poked around with a flashlight, but the pump was locked tight. It’s a helpless feeling, isn’t it? You’re stuck between paying for a pro or hand-washing every plate like it’s 1920. But then I remembered a trick an old tech told me years ago. Today, I’m going to show you how a handful of ice cubes can do what a thousand-dollar toolbox can’t: unstick a seized impeller safely. [image]
Stop Prying with Screwdrivers and Start Freezing Instead
Back when I first started DIYing my home repairs, I made a massive, expensive mistake. I thought I could just ‘force’ a stuck impeller to spin by prying it with a flathead screwdriver. Spoiler alert: plastic impellers are brittle, and I ended up snapping a blade off, turning a minor jam into a full-on pump replacement. You don’t need brute force; you need physics. Whether it is your dishwasher or you are wondering why your garburator is humming but not spinning, the ‘Ice Cube Move’ is the secret weapon for breaking up the calcified gunk and grease that glues these parts in place.
Does this weird ice trick actually work?
It sounds like an urban legend, right? But there’s actual science behind it. When you introduce ice into the chamber, the cold causes rapid, minute contraction of the debris, while the hard edges of the cubes provide just enough mechanical ‘grit’ to knock loose mineral deposits without the risk of shearing the motor shaft. According to technical standards often cited by the Association of Home Appliance Manufacturers, improper maintenance and debris buildup are leading causes of premature pump failure. By using this method, we are performing a low-impact diagnostic and repair that saves the motor’s life. Have you ever been told you needed a whole new unit when it was just a tiny pebble or a bit of glass stopping the show? Tell me about your most frustrating ‘stuck’ moment in the comments below. Let’s get into exactly how to drop those cubes in without making a mess.
Clear the Swamp Before You Start
You can’t perform surgery in a flooded room, and you certainly can’t fix a pump while it’s submerged in greasy dishwater. Your first task is to get as much of that standing water out as possible. Grab a small cup and a bucket. If the machine is totally backed up and won’t budge, check out how to fix a dishwasher that won’t drain in five minutes to clear the bulk of the mess. Once the floor of the dishwasher is mostly dry, remove the filter assembly and the plastic cover protecting the impeller. This is where the physics of the ‘ice trick’ actually happens.
Drop the Ice and Let Physics Do the Heavy Lifting
Take about four or five standard-sized ice cubes—not the giant decorative spheres, just the regular stuff from your freezer tray. Drop them directly into the sump area where the impeller sits. Think of these ice cubes as temporary, sacrificial scrubbing pads. As they sit against the impeller, the cold causes rapid thermal contraction of the hardened grease and calcium deposits. When grease cools rapidly, it loses its ‘stick’ and turns into a brittle solid that can be easily shattered. This is the most effective way to prep a pump impeller that has been glued shut by years of detergent buildup and hard water. I once tried this on an old Whirlpool that had been sitting for a month. I dropped the ice in, waited about three minutes, and the ‘pop’ of the debris releasing was almost audible. 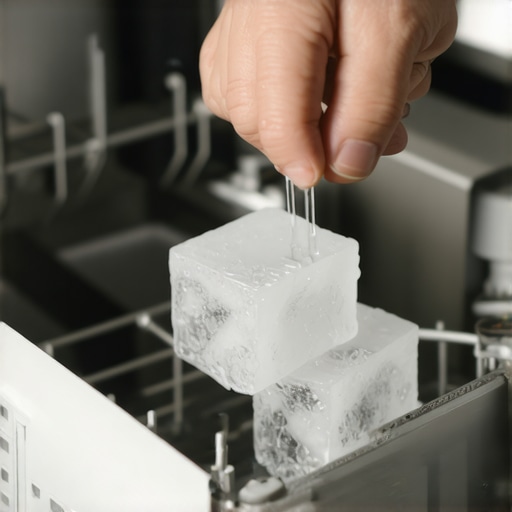
Why a Wooden Spoon is Your Best Friend
You will be incredibly tempted to reach in with your fingers once the ice is in place. Do not do this. Even with the power off, those plastic blades can have sharp edges or trap your skin in a ‘pinch point’ if the motor has residual tension. Instead, take the handle of a wooden spoon and gently try to nudge the impeller clockwise. You aren’t trying to force a full rotation; you are just looking for a quarter-turn of movement. If it budges even slightly, the ice has provided the mechanical leverage needed to ‘crack’ the seal of gunk. If you hear a heavy grinding sound instead of a smooth glide once it starts moving, you might need to perform a the sound check for a dying drain pump to see if the internal bearings have actually given up the ghost.
The Reset That Saves Your Sanity
Once you have felt that satisfying ‘click’ of the impeller spinning freely, it is time to trick the computer into forgetting the error code that likely locked you out. Most modern units have a ‘memory’ of the jam and will refuse to start even if the physical clog is gone. This is where you use the one-minute move to reset your control board. It clears the logic and lets the motor try a fresh start. If you are worried that this DIY fix might affect your coverage, remember to take the photo evidence you need for every warranty claim before you start digging around. It proves that there was no physical damage to the blades before you intervened. I remember one messy Saturday where I skipped the ‘clearing the water’ step and ended up with a kitchen floor covered in gray slush because I tried to drain it while the pump was still jammed. It was a disaster, but seeing that dishwasher finally hum back to life after the ice did its work made the mopping worth it. It is the difference between a five-dollar fix and a five-hundred-dollar invoice.That ice trick works because it addresses the physical reality of a jam, but let’s talk about the mental game of appliance repair. Most homeowners are terrified of their warranty. We’ve been conditioned to think that if we so much as touch a screw, we’ve forfeited our right to a repair. But here is the contrarian truth: staying hands-off can actually make your warranty claims harder to win. When you don’t know the basics of understanding appliance diagnostics, you are at the mercy of whatever narrative the service tech wants to spin. I’ve seen technicians walk into a kitchen, sniff the air, and blame ‘improper maintenance’ just to get out of a labor-intensive job. If you can’t counter that with your own data, you’re paying full price.
Stop Fearing the Void If Removed Sticker
There is a common myth that opening your machine’s access panel voids your protection. In reality, the Magnuson-Moss Warranty Act protects your right to perform basic maintenance and diagnostics. According to a 2023 study by the Public Interest Research Group (PIRG), many manufacturers rely on ‘fear-based’ stickers that aren’t actually legally enforceable for simple parts inspections. Knowing the fine print about normal wear and tear on appliances is your best defense. If you can prove the pump failed due to a factory defect and not because you were poking it with a stick, they have to honor the contract. This is why you need to learn how to get professional-grade diagnostic codes from your interface before the tech even arrives. When you meet them at the door with a specific error code, the dynamic changes instantly. 
Can the Wrong Soap Actually Kill Your Legal Warranty?
This is the ‘Oops’ factor that trips up even the smartest DIYers. You might think a detergent pod is just a convenient little square of soap, but it’s actually a chemical cocktail that can mess with your machine’s internal sensors. Many modern units use a turbidity sensor to check how dirty the water is. Over-sudsing from high-efficiency pods can coat these sensors in a film, leading to a ‘False Dirty’ reading. This is a massive trap because many service techs deny warranty claims for soap choice if they see excessive residue in the sump. They’ll call it ‘user error’ and hand you a bill for the visit. Always keep your receipts for the manufacturer-recommended detergent; it’s one of the most important things to keep to ensure a smooth repair claim later.
The Hidden Nuance of Diagnostic Logic
Most people think an error code is a final verdict. It’s not. It’s just a starting point. A ‘Drain Error’ doesn’t always mean the pump is dead; it could mean the control board is failing to send the signal, or a check valve is stuck. If you jump to replacing the most expensive part first, you’re falling for the ‘parts cannon’ trap. This is why how appliance diagnostics can save your warranty benefits by preventing you from making unnecessary, non-reimbursable repairs. Have you ever fallen into this trap where you replaced a part only to find out it wasn’t the problem? Let me know in the comments. Let’s stop letting the big brands intimidate us into overpaying for simple fixes.I stopped guessing and started measuring once I realized that a $50 multimeter could save me from a $1,000 mistake. While the ice trick handles the physical gunk, electrical gremlins require a different approach. I personally swear by a digital multimeter for any job beyond a simple clog; you don’t need a professional-grade unit to learn how to use a multimeter to find a shorted wire in your harness. When you can pinpoint the exact multimeter reading for a healthy thermal fuse, you stop being a parts changer and start being a technician. This is the difference between blindly ordering a new board and realizing a five-dollar fuse was the only thing standing between you and clean plates.
How can I keep my pump from jamming again next month?
The secret isn’t just cleaning; it’s managing the chemistry of your water. If you live in an area with hard water, you are essentially running liquid rock through your machine. I’ve seen enough mineral-choked pumps to know that the real cost of skipping your monthly descaling cycle is a shortened lifespan for every rubber seal in the unit. Beyond that, stop babying your machine with Eco settings every time. Experts at the Association of Home Appliance Manufacturers (AHAM) have noted in their performance standards that high-efficiency cycles sometimes fail to reach temperatures high enough to fully dissolve modern fats. That is why the heavy cycle is actually better for your machines health because it acts as a thermal purge for the internal plumbing and the impeller housing. 
Why Your Kitchen Appliances Are Getting Too Smart for Their Own Good
Looking ahead, the repair or replace debate is shifting significantly. We’re moving toward a world of predictive maintenance where your dishwasher will likely send a push notification to your phone with a diagnostic report before it even stops draining. But until your machine has that level of self-awareness, you need to be the brain behind the operation. Don’t just settle for surface-level fixes; take the time to learn how to test the continuity of a heating element yourself. It takes five minutes and gives you total certainty that you aren’t wasting money on the wrong parts. I challenge you: next time your machine acts up, don’t just search for the symptoms on a forum. Find the service manual hidden inside the cabinet and read the technician’s hidden diagnostic section to see what the machine is really thinking.
The Biggest Mistakes I Made So You Don’t Have To
Over the years, I have realized that the largest barrier to a working appliance is not a broken part; it is a lack of confidence. I spent hundreds on unnecessary service calls before I discovered how to find a service manual hidden inside the unit, which is often tucked behind the kickplate in a small plastic bag or taped to the frame. That manual is the Rosetta Stone of your machine. Another lightbulb moment came when I realized that most ‘failures’ are just safety sensors doing their job. If you can identify the top signs your dishwasher needs professional diagnostics, you can stop small issues from snowballing into a full replacement. Finally, remember that your leverage as a consumer is highest when you are informed; never let a technician brush you off without a clear explanation of the specific fault code they found.
Tools That Actually Pay for Themselves
I do not expect you to become an engineer overnight, but having the right references makes a world of difference. I always keep a digital copy of the guide on troubleshooting dishwasher problems on my phone for quick reference when a light starts blinking at midnight. For those navigating the legal side of repairs, it is vital to know why your warranty terms change after the first year, as many components lose labor coverage while only the ‘major’ parts like the tub or motor remain protected. I also highly recommend investing in a basic toolkit: a set of Torx drivers, a non-contact voltage tester, and a reliable multimeter. These are not just tools; they are your ticket to independence from overpriced service contracts and planned obsolescence.
Your New Life as a Master of Maintenance
There is a specific kind of pride that comes from hearing your dishwasher hum back to life because of a five-cent ice cube rather than a five-hundred-dollar check. This journey into appliance repair is not just about saving money—it is about refusing to be a victim of a throwaway culture. You now have the tools, the logic, and the right to fix the things you own. Do not be afraid to get your hands a little dirty to keep your home running smoothly. Did the ice trick finally clear your stubborn drain pump, or did you find a different surprise lurking in the sump? Share your ‘victory’ story in the comments below!