

I was standing there, damp rag in hand, admiring the streak-free shine on my dishwasher’s stainless steel front. I’d just finished a deep clean, and the kitchen looked like a showroom. But when I went to press "Normal Cycle," the button didn’t click. Neither did "Start." Total silence. My heart sank as I realized my attempt at being a "good homeowner" might have just cost me a few hundred bucks. If you’re staring at a dead control panel after a vigorous scrubbing session, believe me, I’ve been in those exact soggy shoes.
The Moment My Kitchen Pride Turned Into a Nightmare
There is a cruel irony in breaking something by trying to take care of it. I used to think that as long as the outside was sparkling, the machine was happy. I learned the hard way that modern control panels are about as sensitive as a smartphone screen—and way more prone to moisture issues than the old mechanical dials we used to have. This happens more often than you’d think, especially when we get a bit too enthusiastic with the spray bottle. Today, we’re going to walk through exactly why those buttons are ghosting you and how to figure out if it’s a simple "dry it out" fix or if you need to start understanding appliance diagnostics to save your sanity. We’ll look at the moisture traps, the delicate ribbon cables, and the real reason your dishwasher won’t start even though you know the power is on.
Is my control board actually fried forever?
That’s the fear, isn’t it? That one stray squirt of glass cleaner found its way into the seams and short-circuited the "brain" of the machine. It’s a valid concern. According to repair data from Consumer Reports, control board failures are among the most common (and expensive) repairs for modern appliances. But here’s a secret: most of the time, it’s just trapped moisture or a temporary glitch that hasn’t turned into a permanent hardware death yet. I made the massive mistake early on of trying to pry the buttons up with a butter knife when they felt "sticky" after I used a heavy degreaser. Spoiler alert: don’t do that. You’ll just tear the membrane. Instead, you need to focus on troubleshooting dishwasher problems with a bit more finesse. Have you ever felt that sinking feeling when the "Start" button just refuses to acknowledge your existence after a cleaning? Before you call a pro, you can often identify a faulty control board without a technician by looking for specific blinking patterns or checking for physical residue under the interface. We’re going to dive into the triage process right now.
Get the Moisture Out Before It Corrodes Your Wallet
The very first thing you must do—and I mean right now—is kill the power at the circuit breaker. Electronic control boards and water are like fire and gasoline; they don’t play nice. If you’ve just sprayed the front of your machine and the buttons are acting possessed, you’re likely dealing with a short in the tactile switches or the ribbon cable. I learned this the hard way with my old KitchenAid. I thought a hairdryer on high heat would speed things up. Instead, I warped the plastic fascia so badly the ‘Normal’ button was permanently jammed down. If you use a dryer, keep it on the ‘cool’ setting and keep it moving.
The 24-Hour Wait Rule That Actually Works
Sometimes the best tool in your kit is patience. If the moisture is trapped behind the plastic membrane, it needs time to evaporate. Open the dishwasher door fully to let gravity pull any stray droplets away from the control board. You can also use a small fan directed at the buttons for a full day. This low-tech approach often resolves the issue before you even need to start troubleshooting dishwasher problems with tools. If you’re lucky, the moisture hasn’t reached the copper traces on the board yet, and a simple dry-out will restore full function.
Digging Into the Console Without Snapping Plastic
If a day of drying doesn’t work, you have to go inside. Most modern dishwashers require you to remove a series of Torx screws from the inner door panel. Once those are out, the outer console usually lifts off. Be careful here—there’s almost always a delicate ribbon cable connecting the buttons to the main brain. Think of this cable like a bridge made of wet paper; if you yank it, it’s over. 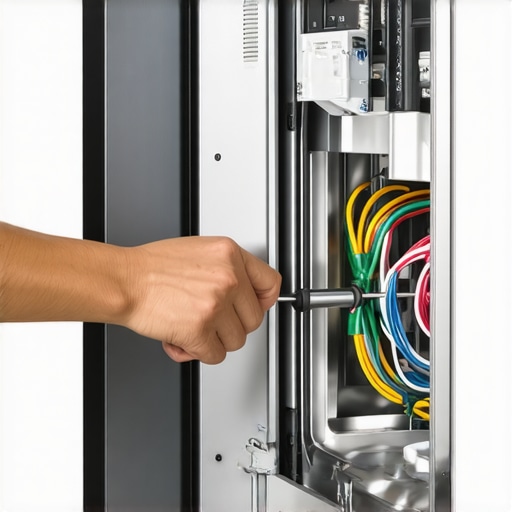
When Drying Out Isn’t Enough for the Buttons to Click
If the buttons are still dead after the area is bone-dry, you need to look for signs of ‘creeping corrosion.’ This looks like a white or green crusty residue on the metal connectors. You can gently clean this off with a Q-tip dipped in 90% isopropyl alcohol. While you’re in there, you might want to check other components that could be sending a ‘kill’ signal to the board. For instance, if your machine is totally unresponsive, you should learn the exact multimeter reading for a healthy thermal fuse to ensure that a simple fuse hasn’t blown during the cleaning mishap.
Pull the Secret Codes Hidden Under Your Toekick
Did you know your dishwasher has a ‘cheat sheet’ hidden inside it? If you remove the bottom kickplate, you’ll often find a folded piece of paper—the technician’s manual. This guide will show you how to enter a button-press sequence to run a self-test. You can use these steps to get professional-grade diagnostic codes from your interface without calling a pro. I once spent two hours guessing what was wrong only to find the manual taped to the right-side insulation, which told me exactly which button circuit had failed. It’s much more efficient than blindly replacing parts.
Check the Ribbon Cable for Micro-Fractures
Sometimes the cleaning spray doesn’t fry the board, but it causes the ribbon cable to swell and lose contact in its socket. Unplug the ribbon cable, wipe the gold-plated ‘teeth’ with a clean microfiber cloth, and reseat it firmly. If you suspect a deeper electrical issue, you may need to use a multimeter to find a shorted wire within the harness. This is the difference between a $150 repair and a $15 fix. If you can see a visible break in the plastic ribbon, you’ll likely need a new user interface, but always try the cleaning and reseating method first. It saved me from a massive bill on a three-year-old Bosch that I thought was a total loss.
You’ve dried out the console, checked the ribbon cables, and even reseated the connectors, but if those buttons still aren’t responding, we need to talk about the ‘hidden’ side of appliance repair. Most homeowners think a warranty or a service plan is a safety net that catches everything. In reality, modern diagnostics is a game of evidence and technicality. If you go into a repair situation without the right mindset, you might end up paying more for a ‘free’ repair than you would for a DIY part replacement.
The Expensive Trap of the ‘No Failure Found’ Visit
One of the biggest myths in the appliance world is that calling for a warranty repair is always free. This is where most people get burned. If a technician comes to your house because the ‘Start’ button is ghosting you, and the machine works perfectly while they are standing there, you will likely be hit with a ‘No Failure Found’ fee. It’s a bitter pill to swallow, but manufacturers won’t pay the tech if there is no hardware to replace. This is precisely why your warranty provider might deny a no-failure-found claim and leave you with a $150 bill for fifteen minutes of ‘observation.’ Before you call, make sure the failure is consistent and that you’ve documented it on video.
Can your choice of detergent actually void the manufacturer warranty?
It sounds like an urban legend, but it’s 100% true. I’ve seen techs walk into a kitchen, look at the counter, and immediately write up a claim denial. Why? Because using high-sudsing dish soap (like the kind you use in the sink) instead of dedicated HE detergent causes ‘suds-lock’ in the sensors, which can mimic a control board failure. There are specific why service techs deny warranty claims for soap choice rules buried in the fine print of your manual. If the tech sees a bottle of Dawn sitting too close to the dishwasher, they’ll suspect user error immediately. Always keep these three receipts to ensure a smooth repair claim, proving you’ve been buying the recommended supplies for your machine.
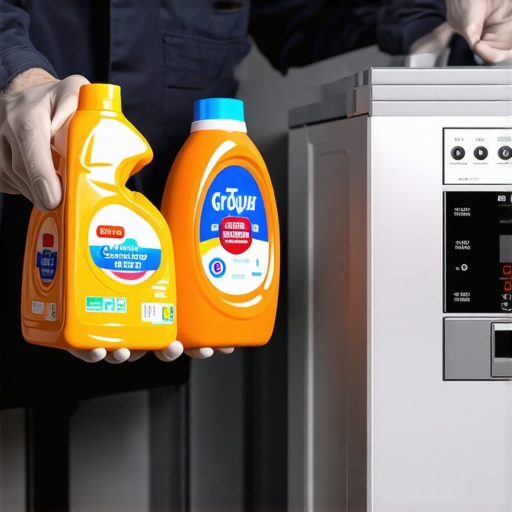
Why Your Tech Cares More About Your Soap Than the Sump
When a pro arrives, they aren’t just looking for broken plastic; they are looking for ‘witness marks’ of how you use the machine. According to the JD Power Appliance Satisfaction Study, a significant number of service calls for ‘electronic failure’ are actually rooted in environmental factors or user habits. For instance, if you pre-wash your dishes until they are spotless, your turbidity sensors won’t see any soil, which can lead the ‘brain’ to shorten cycles or lower water temps, eventually causing grease buildup on the very buttons you’re trying to use. This is one of the top signs your dishwasher needs professional diagnostics—when the machine starts acting ‘smart’ in ways that make it feel broken.
If you’re still staring at those dead buttons, it’s time to be honest about the cleaning agents you’ve used. Harsh chemicals can delaminate the touch-sensitive layers of a modern interface. This is why your service technician wants to see your detergent box before they even touch a screwdriver. They are checking for abrasive ingredients that might have migrated into the electronics. Have you ever fallen into this trap and had a ‘simple’ cleaning lead to a major repair bill? Let me know in the comments below, because your story might just save someone else from the same expensive mistake.
I’ve realized that the distance between a working kitchen and a sink full of dirty dishes is often just a single millivolt. If you’re serious about DIY, you need to stop poking at plastic and start using a multimeter. It’s the only way to know if your cleaning spree actually shorted a circuit or if a component just timed out. I personally use a Fluke 117 because it handles ‘ghost voltages’ that cheap testers miss. When I’m troubleshooting dishwasher problems, I always start by checking the exact multimeter reading for a healthy thermal fuse. If you see a ‘0’ or ‘OL’ on that screen, you’ve found your smoking gun. It’s about how to use a multimeter to find a shorted wire rather than just replacing the whole board on an expensive hunch.
How can I keep my dishwasher buttons alive for another decade?
The secret isn’t a special chemical; it’s actually the lack of them. I’ve switched to a microfiber cloth that is barely damp—never dripping. If you must use a cleaner, spray it onto the cloth, not the machine. Over time, I’ve found that cleaning a stainless steel interior without harsh store-bought chemicals is the safest bet for the electronics too. You should also make it a habit to check the debris trap most owners miss during monthly cleaning because internal clogs create humidity that can rise into the console area and corrode those sensitive traces.
Why a Thermal Camera is No Longer Overkill
Seeing why your service technician carries a thermal camera convinced me to get one for my own toolbox. In my shop, I use a compact FLIR attachment for my phone to spot ‘hot spots’ on the control board. If a tactile switch is failing due to moisture, it often generates a tiny amount of heat before it fully dies. This is where I see the industry heading—why your smart app says the filter is dirty when it is not is just the beginning. Soon, our machines will use AI-driven diagnostics to tell us a button is failing before it even sticks. According to technical documentation from the Association of Home Appliance Manufacturers (AHAM), moisture ingress remains the leading cause of premature electronic failure in modern kitchens, making these preventative tools essential. #IMAGE_PLACE_HOLDER_D#
The most important thing you can do right now is learn how to get professional-grade diagnostic codes from your interface. If you can force the machine into its ‘Service Mode,’ you bypass the physical buttons and talk directly to the brain. I want you to try this tonight: find your model’s service manual—often hidden inside the unit—and run a component test. It’s the quickest way to see how appliance diagnostics can save your warranty benefits because you’ll have hard data to give the dispatcher when you finally call for help.
Why I Stopped Cleaning with a Spray Bottle
The most expensive lesson I ever learned in the kitchen was that ‘clean’ doesn’t always mean ‘functional.’ After years of fixing my own mistakes, I’ve realized that modern appliance electronics are incredibly delicate. First, always assume moisture is the enemy even if you can’t see it. I now keep a dedicated set of photo evidence you need for every warranty claim just in case a simple cleaning leads to a component failure. Second, don’t rush the process; giving the board 24 hours to dry is better than spending $300 on a technician. Lastly, if you do end up calling for help, knowing how to negotiate a repair credit from your manufacturer can turn a frustrating situation into a financial win. It’s about being an advocate for your own machine rather than just a victim of its digital quirks.
The Survival Kit for Modern Kitchen Electronics
I don’t believe in buying every gadget on the shelf, but there are three things I never troubleshoot without. A high-quality multimeter is non-negotiable for checking continuity on things like thermal fuses or heating elements. I also keep a bottle of 90% isopropyl alcohol for cleaning ribbon cable contacts—it evaporates instantly and leaves no residue. Finally, I highly suggest learning the difference between a service plan and a manufacturer warranty before your next purchase. Trusting the right coverage can save you from the ‘No Failure Found’ trap. These tools and tips haven’t just saved me money; they’ve given me the confidence to handle any error code that flashes on my screen.
Stop Fearing the Beeps and Start Troubleshooting
It is easy to feel defeated when your expensive dishwasher refuses to start just because you wanted it to look nice. But remember, most of these issues are solvable with a bit of patience and the right diagnostic approach. By troubleshooting dishwasher problems yourself, you’re not just fixing a machine; you’re gaining the skills to maintain your entire home more efficiently. Don’t let a dead control panel intimidate you. You have the tools, the manuals, and the step-by-step guides to get that ‘Start’ button clicking again. Have you ever accidentally ‘killed’ an appliance by being a little too enthusiastic with the cleaning spray? Let me know your story in the comments below.