

It was late evening, and I was ready to finally sit down after a long day. I loaded my dishwasher, pressed start, and then watched the timer—well, more like a countdown—tick away. Three hours. Yep, three hours for a dishwasher cycle. I couldn’t believe my eyes. Frustration crept in. Why on earth would it take so long?
The Love-Hate Relationship with Long Dishwasher Cycles
I remember thinking, “Is this normal? Or am I doing something wrong?” Turns out, many modern dishwashers are designed to run longer cycles, often stretching up to three hours or more. Why? It’s a mix of energy efficiency, better cleaning, and environmental considerations. But for most of us, waiting that long feels like an eternity, especially when you’re eager to get to bed.
What I hope to do today is help you understand exactly why your dishwasher is taking so long and, more importantly, how to make sure it’s working efficiently. After all, a long cycle isn’t always a bad sign, but it can be if your dishwasher is running longer than it should or not cleaning properly.
Have you experienced this silent marathon in your kitchen? If so, you’re not alone, and I’m here to share what I learned from my own mishaps and how you can troubleshoot effectively.
Skeptical? Think it’s Just a Tech Gimmick?
I used to believe my dishwasher’s long cycles were just a way for manufacturers to sell more features. But I learned early on that rushing to fix things myself without proper diagnostics often made things worse. One mistake I made was ignoring the importance of understanding appliance diagnostics—trust me, it’s a game changer. For deeper insights, check out [this guide](https://applianceoutletpro.com/how-appliance-diagnostics-improving-your-warranty-claims), which explains how proper diagnostics can actually save your warranty benefits.
As we go forward, I’ll walk you through the real reasons behind those lengthy wash times and how to identify if your dishwasher needs a tune-up or if it’s functioning as designed. Ready to demystify the three-hour cycle mystery?
Perform a Quick Reset to Reset Your Dishwasher’s Settings
When my dishwasher started taking unusually long, I first tried a simple reset, which often clears temporary glitches. To do this, disconnect the machine from power for about 5 minutes, then plug it back in. This resets the control board and can fix cycle timing issues. Remember, always unplug your appliance before any troubleshooting to avoid electrical hazards.
Check and Clean the Filters for Proper Water Flow
Clogged filters can cause the dishwasher to prolong cycles as the machine struggles to drain or circulate water effectively. Remove the filter assembly, typically located at the bottom of the tub, and clean off debris or soap scum. A clean filter ensures optimal water flow, leading to shorter, more efficient cycles. For a detailed guide, visit this troubleshooting page.
Test the Water Inlet Valve Using a Multimeter
The water inlet valve controls water entry into the dishwasher. A faulty valve may cause delays. To test it, disconnect the power and water supply. Remove the inlet valve and set your multimeter to measure continuity. Place probes on the terminals; if there’s no continuity, replace the valve. This step requires caution—consult this guide to perform the test safely.
Ensure Proper Drainage to Prevent Cycle Delays
Standing water or clogged drain hoses can extend cycle times due to sensors detecting incomplete cleaning. Use a borescope, if necessary, to inspect the drain hose for obstructions. Clear any debris or buildup. Confirm that the drain pump functions correctly by listening for abnormal noises during the drain phase. For stubborn clogs, check out this method.
Evaluate the Door Lock and Switch
Some dishwashers run longer if the door isn’t securely latched. Use a jumper wire to test the door switch—disconnect the wiring harness and connect the wire across the switch terminals. If the cycle completes normally, replace the switch. Remember, an insecure door may also cause leaks or safety risks, so verify the latch mechanism regularly. For detailed tests, see this tutorial.
Monitor and Adjust Cycle Selection
Sometimes, the selected cycle is inherently long for thorough cleaning or energy efficiency. Make sure you’re choosing the appropriate cycle for your load and soil level. Use shorter cycles when possible, and avoid selecting heavy-duty options unnecessarily. Familiarize yourself with your dishwasher’s manual for optimal cycle choices to prevent excessive run times.
Many homeowners often believe that appliance repair is straightforward—just call a technician, get it fixed, and move on. However, this oversimplification can lead to costly mistakes and missed opportunities, especially when it comes to understanding diagnostics and warranties. One prevalent myth is that all repairs are covered equally under warranty, but in reality, many warranties exclude specific parts or issues caused by user neglect. For example, improper use of cleaning chemicals or ignoring maintenance schedules can void warranty coverage, leading to unnecessary expenses. Additionally, a common trap is relying solely on surface-level diagnostics, such as resetting the machine or cleaning filters, without delving deeper into underlying causes like failed sensors or control boards, which require expert assessment. This oversight often results in repeated repairs or even premature replacement. To truly benefit from your warranty and avoid costly misdiagnoses, investing in professional diagnostics can be a game changer—see how this guide explains this process in detail.
Another misconception is assuming that appliance parts are always counterfeit if they are inexpensive online. In fact, many high-quality, OEM-compatible parts are available at lower prices, but it’s crucial to verify authenticity through reputable sources to ensure longevity and safety. Also, addressing small issues promptly, such as a leaking dishwasher or unusual noises, can prevent extensive damage that voids warranty coverage or leads to costly repairs later. Remember, documenting every repair with photos and maintaining records aligns with the best practices for warranty claims.
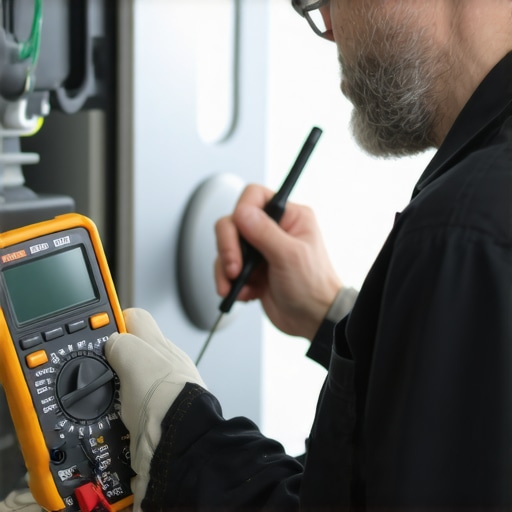
Finally, many believe that warranty coverage is always worth the effort, but some plans have fine print that limits coverage or requires additional service fees. Always review your plan details carefully, and don’t hesitate to know when to trust your warranty or when to negotiate a repair credit directly with the manufacturer. It’s essential to stay informed and proactive to maximize your benefits.Maintaining your dishwasher for reliable performance requires the right tools and a strategic approach. I personally rely on a high-quality digital multimeter, such as the Fluke 115, which provides precise voltage and continuity readings essential for diagnosing electrical issues like faulty control boards or burned-out heating elements. Additionally, a small, flexible borescope allows me to inspect internal components—like the drain pump or spray arms—without disassembly, helping to identify hidden clogs or corrosion that could prolong cycles or cause leaks.
When it comes to software, I use diagnostic apps compatible with smart dishwashers, which can read error codes directly from the appliance’s interface. This immediacy accelerates troubleshooting and ensures I don’t waste time replacing parts that are still functional. For example, understanding specific error codes through official manufacturer documentation can save you significant effort and protect your warranty benefits. Check out this resource for detailed diagnostic insights.
Regular maintenance involves cleaning filters, inspecting door seals, and checking spray arms—tasks simplified with a long, slender wrench or nut driver. I also keep a spray bottle of de-scaling solution on hand—ideally a natural product like vinegar-based solutions—to prevent mineral buildup, especially in areas with hard water. This simple step extends the lifespan of internal components and preserves cleaning efficiency.
Innovative trends suggest that future appliance diagnostics will increasingly integrate IoT sensors and AI-driven analysis, providing real-time alerts for potential failures before cycles are affected. This evolution promises to make maintaining your dishwasher even more straightforward, reducing downtime and repair costs.
**How do I maintain long-term dishwasher health?** Focus on periodic inspections of critical components like the water inlet valve, drain pump, and control board. Using the right tools, such as a multimeter and borescope, combined with understanding error codes, empowers you to troubleshoot effectively and avoid costly repairs.
The Hardest Lesson I Learned About appliance repair, diagnostics, dishwasher, warranty
One of the toughest truths I uncovered was that not all long dishwasher cycles indicate a malfunction; sometimes, they’re a sign of a well-maintained, energy-efficient machine. Recognizing this helped me avoid unnecessary repairs and focus on genuine issues.
3 Myths About appliance repair, diagnostics, dishwasher, warranty That Held Me Back
Believing that all repairs are covered by warranty or that expensive parts are always counterfeit led me astray. The reality is that understanding the nuances of warranty coverage and quality parts can save you significant money.
What Experts Won’t Tell You About appliance repair, diagnostics, dishwasher, warranty
Most technicians won’t emphasize the power of proper diagnostics or the importance of maintaining your dishwasher regularly. Being proactive with diagnostics and maintenance empowers you to solve problems before they become costly.
Curated Resources to Elevate Your Dishwasher Knowledge
My go-to tools include a high-quality multimeter like the Fluke 115, which provides precise electrical readings crucial for troubleshooting. The detailed guides on this site have transformed my approach to diagnostics, ensuring I don’t overlook hidden issues. Additionally, a long, flexible borescope helps inspect internal components without disassembly, saving time and preventing damage. Lastly, I trust the official manufacturer manuals for accurate cycle and part specifications—always my first reference when tackling repairs.
The Journey Continues—Take Action Today
Remember, mastering appliance diagnostics and maintenance isn’t just about fixing what’s broken—it’s about cultivating confidence to troubleshoot and extend the life of your dishwasher. Small consistent efforts can prevent big headaches down the road, making your kitchen routines smoother and more satisfying.
What’s the most surprising thing you’ve discovered about your dishwasher’s cycle times? Share your experiences below and let’s learn together.