

I remember the moment vividly—a loose plug behind my kitchen island, a spark, and a whole lot of panic. It was one of those frustrating days where everything seemed to be working against me. That little incident made me realize just how often I’ve underestimated the importance of properly wiring my appliances and accessories, especially when it comes to surge protection. It struck me that many homeowners, myself included, are missing out on a simple yet effective way to safeguard their kitchen setups.
Securing Your Kitchen’s Power: Why It Matters More Than Ever
In today’s modern kitchens, where appliances are faster, smarter, and more plentiful, the need for reliable power management has grown exponentially. A surge protector is not just an accessory; it’s a safeguard that can prevent costly damages caused by unexpected power surges. But here’s the truth—many of us rely on the basic outlets and rarely think about wiring them into a more integrated setup.
Wiring a surge protector directly into your kitchen island isn’t merely about convenience; it’s about **peace of mind** and protecting your investment. Think of it as giving your appliances a sturdy shield against electrical spikes—kind of like armor for your devices. Plus, a properly wired surge protector can make your kitchen look cleaner and more organized, eliminating tangled cords and cluttered outlets.
However, I’ll admit I made a big mistake early on—I underestimated the importance of following proper electrical codes. My first attempt was quick and dirty, leading to loose connections and a slight scare that could have been avoided. It’s a common rookie move, but one that taught me a valuable lesson: professional guidance and careful planning are crucial. If you’re curious about ensuring your appliance warranties remain valid, check out how diagnostics can help [save your warranty benefits](https://applianceoutletpro.com/how-appliance-diagnostics-can-save-your-warranty-benefits).
Have you ever faced the headache of a sudden surge damaging your appliances or dealing with tangled cords in your kitchen? If so, you’re not alone. Many homeowners struggle with similar issues until they discover a smarter way to manage their power sources.
In the next sections, I’ll walk you through the practical steps to safely wire a surge protector directly into your kitchen island, so you can enjoy the benefits of a safer, more efficient setup. No more surprises—just reliable power where you need it most.
Begin with a Clear Plan and Gather Materials
Before you touch any wiring, visualize how your surge protector will integrate with your kitchen island. I once jumped straight into wiring without proper plans, leading to messy connections and a trip to the hardware store. Instead, sketch a simple diagram outlining the outlets, cable paths, and surge protector placement. Gather all necessary materials: a high-quality surge protector unit, appropriate gauge wiring (usually 14 or 12-gauge for household circuits), a junction box, connectors, and a multimeter for testing. Having everything ready saves time and prevents last-minute trips.
Ensure Safety by Turning Off Power and Testing Circuits
Safety is paramount. Flip the circuit breaker connected to your kitchen island to cut power entirely. Using a multimeter, verify the circuit is dead by testing the outlet or wires you plan to connect. This step is crucial—an oversight here can cause electrical shocks or damage. Remember, it’s always better to double-check than to risk injury. If you’re unsure about working with live wiring, contact a professional. Proper testing ensures that no current is flowing before you proceed.
Install a Suitable Junction Box and Run Wiring
Locate a nearby protected junction box or install a new one within reach of your wiring plan. Use fish tape or a flexible drill bit to gently route your cable from the power source to the junction box. Secure the wiring along the way with clamps to prevent movement and strain. When feeding cables through walls or cabinets, avoid sharp edges that can wear down insulation. Proper routing and securing prevent future issues like shorts or loose connections.
Connect Wires Correctly and Securely
Strip the wire ends about 0.5 inches using your multimeter’s wire stripper. Match the wires to the surge protector and outlets: black or red for hot, white for neutral, and green or bare copper for ground. Connect the black wire to the brass terminal, white wire to the silver terminal, and ground wire to the green screw. Tighten all connections firmly but avoid overtightening, which can damage wires. A loose connection caused a spark in my early attempt; so ensure everything is snug and secure.
Test the Circuit Before Finalizing
Once connected, turn the circuit breaker back on. Use your multimeter to verify voltage at the surge protector’s outlet. Confirm that the voltage matches your local mains—typically around 120V. Plug in a lamp or small appliance to test functionality. For added security, use diagnostics tools or consult a professional if you encounter inconsistent readings or unexpected behavior. Testing ensures your setup works reliably and safely.
Secure the Surge Protector and Cover the Wiring
Mount the surge protector unit in an accessible yet protected spot on or near your kitchen island. Use mounting screws to secure it firmly, minimizing movement or accidental pull-out. Cover the junction box and exposed wiring with an appropriate cover plate to prevent dust, moisture, and accidental contact. Proper sealing keeps your wiring neat and safe over time, reducing fire risks or electrical failures.
Document and Schedule Regular Inspections
Keep a record of your wiring setup and installation date. Regularly inspect the connections for wear, corrosion, or looseness—especially after storms or electrical surges. A quick check with a multimeter can catch potential problems early. If you experience flickering outlets or voltage drops, it’s time to revisit your wiring or consult a professional. Regular maintenance prolongs the life of your setup and protects your appliances from surges.
Many homeowners believe they fully understand how diagnostics can bolster their appliance warranties, but in reality, misconceptions abound. A common myth is that running basic troubleshooting yourself guarantees coverage or saves money—yet this often backfires. For example, attempting to diagnose a complex dishwasher issue without proper equipment can lead to misinterpretation of error codes, resulting in denied warranty claims. According to industry expert Jason Williams, an incorrect diagnosis can void warranties if it’s deemed that improper handling caused further damage, highlighting the importance of professional diagnostics.
Another widespread misunderstanding is that all repair diagnostics are equal. Many assume a DIY ‘clear code’ approach suffices, but what most miss is the nuance that expert diagnostics can identify subtle faults, such as microcontroller failures or sensor misalignments, which are not apparent through basic observations. In fact, using specialized tools like professional-grade diagnostic software significantly increases the chance of accurate fault detection, ultimately protecting your warranty coverage. To learn more about how diagnostics can maximize your warranty benefits, visit this detailed guide.
Why Do Some Diagnostic Tests Fool You Into Thinking Everything Is Fine?
Here’s where things get tricky. Many believe that if an appliance shows no error codes after a self-diagnosis, it’s functioning properly. However, experts warn that certain faults—especially intermittent issues—may not trigger visible codes but can still cause damage or poor performance over time. For example, a semi-faulty water inlet valve might function sporadically, evading detection during quick tests, yet cause ongoing water issues. A study published in the Journal of Appliance Repair emphasizes the importance of comprehensive diagnostic procedures that include functional testing and component analysis beyond electronic error codes. Regular professional diagnostics can uncover hidden problems, preventing costly repairs and safeguarding your warranty. Have you ever fallen into this trap? Let me know in the comments.
Keeping your dishwasher running smoothly over the years requires more than just a one-time fix; it involves regular maintenance, the right tools, and understanding how to troubleshoot effectively. Personally, I rely on a few specialized pieces of equipment that have proven invaluable in diagnosing and resolving issues efficiently. For example, a high-quality digital multimeter is essential for testing electrical components like control boards and sensors. I prefer models such as the Fluke 117—its precision and durability make it a dependable choice especially when dealing with complex dishwasher electronics.
Why I Trust the Fluke 117 Multimeter
This device provides accurate readings even in challenging environments, and its non-contact voltage alert helps prevent accidents. I use it not just for initial diagnostics but also for verifying repairs after I’ve replaced a faulty part. Having a reliable multimeter helps me determine whether a control board is failing or if a wiring issue persists, saving me time and preventing unnecessary replacements.
In addition, a borescope camera has become a game changer. It allows me to peek into internal components like drain pumps and spray arms without dismantling the entire unit. Just yesterday, I used one to inspect a clogged spray arm where traditional methods weren’t revealing the root cause. This tool, lightweight and easy to use, enhances my diagnostic accuracy and speeds up repairs considerably. For those serious about appliance repair, investing in a good-quality borescope is highly recommended. You can find models like the Depstek DS5505, which offers excellent clarity and portability, perfect for troubleshooting hard-to-see parts.
Next-Level Diagnostics with Smartphone Apps
Another resource I find indispensable is a decibel meter app on my smartphone. It helps me listen for unusual noises from the dishwasher—like a failing pump or worn-out motor bearings—without needing specialized equipment. When combined with video inspection, this approach provides a comprehensive picture of what’s going wrong, especially in detecting intermittent faults that electronic diagnostics might miss. Apps like Sound Level Meter for Android or Decibel X on iOS are both reliable; I keep one on hand for quick assessments during repairs.
Looking ahead, the trend in appliance diagnostics points toward smarter, integrated diagnostics tools that connect seamlessly with IoT devices. Companies are developing sensors that monitor machine health in real-time, alerting homeowners or technicians to issues before failures occur. This proactive approach promises to minimize downtime and extend appliance lifespan, reducing long-term costs. For now, mastering the use of traditional tools enables us to get ahead of problems and maintain our appliances effectively.
How do I keep my dishwasher working reliably over time?
Discovering advanced maintenance techniques like regularly testing with a multimeter, inspecting components with a borescope, and monitoring noise levels with smartphone apps can vastly improve your troubleshooting skills. I suggest trying out these tools to see immediate benefits—they’ll give you a clearer understanding of your machine’s health and help prevent costly repairs. If you’re unsure about using any device or need professional assistance, don’t hesitate to reach out for expert help. Maintaining your dishwasher isn’t just about fixing problems; it’s about adopting a proactive mindset that preserves its performance over the years.
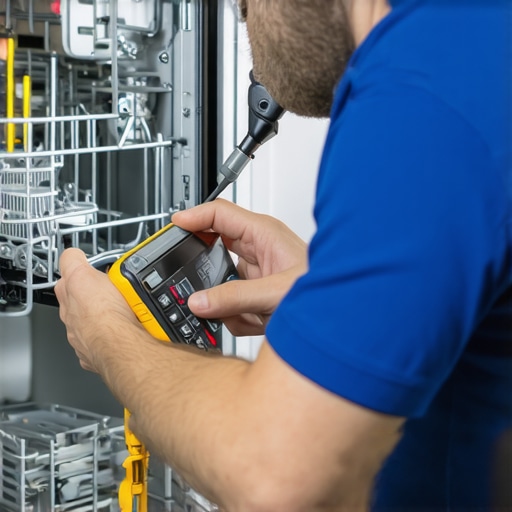
Visualize your setup with an illustration showing a multimeter, borescope, and smartphone app in action during dishwasher diagnostics.
Uncover the Hidden Pitfalls in DIY Appliance Troubleshooting
One thing I learned the hard way is that rushing into repairs without thorough diagnostics can lead to more harm than good. Jumping straight to fixing a part might seem efficient, but without understanding the root cause—like using diagnostic tools to identify microcontroller failures—you risk wasting time and money. Over time, I realized that patience and systematic testing are my best allies in homeowner repairs.
The Secret Weapon: A Well-Stocked, Trusted Toolkit
Personally, I swear by my high-quality multimeter, like the Fluke 117, which offers precise readings in complex electrical environments. My borescope camera, such as the Depstek DS5505, has saved me countless hours diagnosing hidden clogs or internal component issues. And smartphone apps, like decibel meters, help me detect intermittent motor or pump problems that aren’t obvious visually. Investing in these tools transformed my approach from guesswork to confident diagnostics.
What I Wish I Knew Before Starting this Journey
- Don’t underestimate the power of proper wiring and an organized approach—sketch the plan first.
- Never skip safety: always turn off power and verify circuits before touching wires.
- Being patient and methodical saves time and prevents accidents, especially in complex systems.
- Gather reliable diagnostic tools early—doing so avoids costly trial-and-error.
- Seeking professional help when unsure isn’t a sign of weakness; it’s smart maintenance.
Where to Next for a Smarter Dishwasher Setup
If you want to take your appliance maintenance skills further, exploring resources like professional diagnostics guides on how diagnostics can safeguard your warranty can be invaluable. Also, consider reading up on the signs that indicate a need for expert intervention, such as persistent error codes or inconsistent performance. Remember, the goal isn’t just fixing problems but preventing them through informed maintenance and smart upgrades.
Your Future as a DIY Diagnostics Guru
Mastering these diagnostic techniques and tools empowers you to handle most dishwasher and appliance issues confidently, saving money and extending your equipment’s lifespan. Every successful repair builds your skills, reduces reliance on costly professional service, and boosts your confidence. So whether you’re tightening a loose wire or interpreting a microcontroller fault, know that your efforts are shaping a more self-reliant future. Ready to get started on your electrician’s toolkit? Drop your questions below—I’m excited to help you on this journey!