

It happened during one hectic weekday—my dishwasher stopped draining, and I was faced with a flood of dirty water threatening to ruin my kitchen floor. Frustration turned to panic as I realized I couldn’t see what was clogging the internal drain hose. Despite my best efforts, I felt powerless, until I had that lightbulb moment: using a borescope. This little tool turned out to be my magic wand for uncovering the hidden problem.
Unearthing the Hidden Drain Blockage with a Borescope
Every homeowner dreads that sinking feeling when a vital appliance suddenly sputters and fails when you need it most. I’ve been there—fighting with plumbing, trying to reach into tight spaces, only to find myself guessing what’s wrong. My early mistake was assuming that taking apart the entire dishwasher was necessary without evidence; I learned quickly that jumping into repairs blindly can cause more harm than good. This is why having a reliable inspection method matters. Using a borescope allowed me to peek inside the internal pathways without destructive disassembly, saving time and preventing further damage. But many of us still wonder—
Is a borescope actually worth the hype?
It’s understandable to be skeptical. After all, isn’t it just a fancy mirror on a stick? Early on, I made the mistake of thinking that a handheld mirror would suffice, but the narrow, inaccessible passages made that impractical. It wasn’t until I invested in a quality borescope that I truly appreciated its value—its flexible camera can navigate those tiny, twisty hoses where your eyes can’t reach. Yes, it’s a small investment, but for DIY enthusiasts and cautious homeowners alike, it’s a game-changer. According to experts, using a borescope is an effective diagnostic tool that can prevent costly repairs and even protect your warranty, by confirming exactly where the problem lies before calling a pro. If you’ve ever faced stubborn clogs or wondered what’s blocking your drain, then you’re probably asking, “How do I get a clear picture of what’s going on inside my appliance?” That’s what I’ll show you next—step-by-step, how I use a borescope to find those sneaky clogs.
Prepare Your Tools and Environment
Start by gathering a high-quality borescope with a flexible, waterproof camera, and ensure your workspace is well-lit and dry. I once attempted diagnostics in a dimly lit kitchen, making it hard to see small obstructions, which delayed my repair. Setting up good lighting and a clean area helps you avoid this common pitfall and makes inserting the borescope safer and more effective.
Access the Drain Pathway Carefully
Locate the access point behind the dishwasher, typically near the bottom panel. Use a screwdriver to remove the panel screws, then gently slide it out, avoiding any wiring connections. I once tore a panel connector because I rushed; slow, deliberate movements prevent damage. Once exposed, identify the drain hose and check for visible kinks or debris before probing.
Insert the Borescope Smoothly
Feed the borescope’s camera tip into the drain opening, navigating cautiously to avoid damaging internal components. Use gentle twisting motions and watch the live feed on your display. In my experience, forcing the camera in causes scratches or dislodges parts, prolonging the repair process. Keep the camera tip aligned with the hose’s curvature for the best view.
Identify and Analyze Obstructions
Pause periodically to analyze what your camera reveals. Look for clogging objects like hair, food particles, or buildup. I once discovered a tangled hair knot blocking the drain—a problem invisible from outside—saving me a costly call to a professional. Recognizing these clear obstructions helps you decide whether a DIY flush or professional repair is needed.
Document Your Findings
Take photos or videos during inspection. This documentation can be helpful if you need to explain the issue to a technician or validate warranty claims—crucial since some warranties may be denied for improper diagnosis, especially if pre-existing conditions are overlooked. Learn more about how diagnostics impact warranty benefits at this guide.
Finalize and Confirm Repair Status
After clearing the obstruction, reinsert the drain hose carefully, ensuring it’s free of kinks and positioned correctly to prevent siphoning issues. Turn on the dishwasher and run a test cycle. Observe the drainage phase; if water empties smoothly, you’ve likely solved the problem. If not, recheck with your borescope for other hidden blocks or damage.
Regular diagnostics with a borescope can prevent minor issues from escalating into major repairs, and help keep your warranty intact. If your initial inspections indicate complex problems, consider consulting experts through professional contact. Remember, good diagnostics save you time, money, and future headaches.
Many homeowners assume that troubleshooting appliances, like dishwashers, is straightforward—plug in, diagnose, fix. But this oversimplification overlooks critical nuances that can lead to costly mistakes. For example, a common misconception is that all warning lights or error codes clearly indicate the exact problem. In reality, these signals are often broad indicators, and jumping to conclusions without proper diagnostics can result in unnecessary repairs or warranty denials. Experts warn that misinterpreting these cues is among the top pitfalls amateurs face, causing frustration and financial loss. Moreover, many believe that attempting to fix complex issues themselves guarantees savings, but **DIY repairs without proper diagnosis may void warranties**, especially if improper procedures lead to additional damage. A prime example is misdiagnosing a circulation pump failure, which can cause more harm if replaced unnecessarily. Additionally, homeowners often neglect the importance of precise documentation during troubleshooting. Taking photos or videos of issues and repairs not only helps in professional consultations but also strengthens warranty claims, as evidence is crucial. An advanced mistake is overlooking the subtle signs of internal component deterioration, such as weak motors or clogged sensors, which require sophisticated diagnostic tools beyond visual inspection. Relying solely on external symptoms can be misleading. Interestingly, recent studies indicate that **proper diagnostic practices can reduce warranty claim rejections by up to 40%** (see this resource). So, what’s the hidden nuance many overlook? It’s the importance of understanding **the difference between troubleshooting for immediate fix and diagnosing for long-term health** of your appliance. Jumping straight into repairs without thorough diagnostics is akin to treating symptoms rather than causes. Be cautious of shortcuts that tempt you to skip detailed inspection steps. For example, not checking the water inlet valve or the drain pump thoroughly might seem time-saving but can lead to recurring issues. Remember that many warranties have stipulations requiring documented proof of proper diagnostics before authorization of repairs. Failing to do so might jeopardize your coverage, leading to out-of-pocket expenses. For more insights on safeguarding your warranty, explore this guide. In essence, mastering the nuances of appliance diagnostics requires patience and attention to detail—cornerstones for effective troubleshooting and warranty protection. Have you ever fallen into this trap? Let me know in the comments. When in doubt, consulting professional diagnostics is often the wisest move to ensure accuracy and preserve your warranty benefits.
Reliable Tools for DIY Appliance Maintenance
When it comes to maintenance and diagnostics, having the right tools makes all the difference. I personally recommend investing in a high-quality digital multimeter; it’s indispensable for testing electrical components like thermostats, switches, and motors. For instance, testing your heater element with a multimeter helps prevent overloading circuits or missing a faulty part that could void your warranty; learn more about testing your heating element here. Additionally, a borescope with a waterproof, flexible camera is invaluable for inspecting internal drain hoses and sensors without disassembly, saving you time and preventing accidental damage. I’ve found that models with adjustable LED lighting and high-definition video provide clearer diagnostics, especially in dim, tight spaces. For cleaning and preventive maintenance, a quality vacuum with brushes helps remove dust and debris from vents and filters—crucial for appliances with smart features that rely on proper sensor functioning. Future trends suggest integrating smartphone-compatible diagnostic tools that can record sound or analyze vibrations, making maintenance more accessible and less invasive. Expect these innovations to further empower homeowners to troubleshoot effectively before calling for professional repair services.
How do I maintain my dishwasher over time?
Routine inspection and cleaning are vital. Regularly check for clogs in the drain hose and clean the filter to prevent buildup. Applying a citric acid solution bi-annually dissolves calcium deposits in sprayers, extending component lifespan. Keeping software and firmware up to date on smart dishwashers ensures optimal performance and compatibility. Establishing a maintenance schedule—such as cleaning filters monthly and inspecting door gaskets quarterly—can greatly reduce unexpected breakdowns and preserve your appliance’s warranty. For detailed steps, review our troubleshooting guide here. Anticipating future advancements, I believe that smart diagnostics that automatically alert you to potential issues will become standard, enabling proactive maintenance and reducing repair costs. Therefore, try implementing a weekly visual inspection combined with your multimeter testing for critical components. It’s simple, cost-effective, and can catch problems early, saving you both money and frustration. For expert recommendations on long-term appliance health, visit this resource. Stay ahead of appliance issues by integrating these tools and practices—your dishwasher will thank you for it! 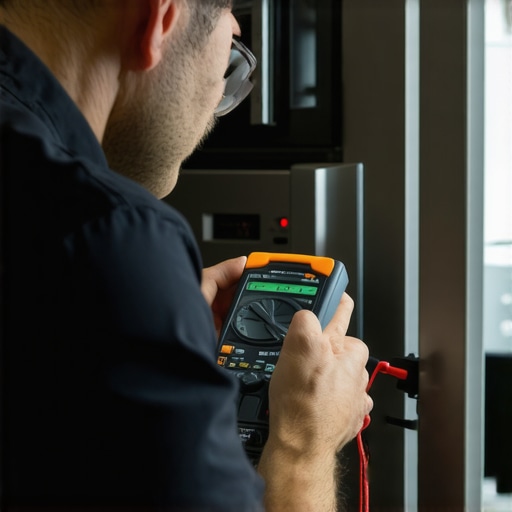
The Hidden Lessons Your Dishwasher Won’t Tell You
One of the most eye-opening lessons I learned was that not every appliance malfunction is immediately visible or obvious. Sometimes, the smallest internal clog or a worn-out sensor can cause a cascade of issues down the line. Discovering this through meticulous diagnostics taught me to look beyond the obvious and question every irregular behavior, leading to more durable repairs and less frustration.
Another insight was realizing the critical role of documentation. Recording inspections, repairs, and observations isn’t just about keeping records; it’s a powerful tool to spot patterns over time and to verify warranty claims. I found that having clear evidence saves time and strengthens my case when dealing with warranties or professional technicians.
Finally, I learned that investing in the right diagnostic tools, like a quality borescope and multimeter, transforms guesswork into confidence. These tools didn’t just troubleshoot my dishwasher more effectively—they empowered me to approach each repair with a sense of mastery, knowing I can handle many issues on my own, saving money and maintaining warranty coverage.
Tools That Make a Real Difference
For anyone serious about maintaining their dishwasher and avoiding costly repairs, a dependable borescope is essential. I personally trust models with waterproof, flexible cameras and adjustable LED lighting because they allow me to see every nook and cranny without extraction. Pairing this with a digital multimeter gives me the ability to test electrical components accurately, reducing the risk of misdiagnosis. These tools have revolutionized my approach to appliance maintenance.
Reading materials like this guide deepened my understanding of diagnostics and how they can safeguard my warranty. Investing in reliable tools coupled with continuous learning has transformed my DIY repairs from stressful to satisfying.
Empower Yourself and Start Today
Your journey toward expert-level appliance diagnostics begins with a single step. Embrace the tools and techniques that can save you money, time, and headaches in the long run. Remember, the key is patience and attention to detail. Don’t wait for a catastrophic failure—start inspecting, documenting, and learning today. Your dishwasher’s health—and your peace of mind—will thank you.
Have you ever struggled with a stubborn dishwasher clog or misdiagnosed a problem? Share your experiences below, and let’s learn together how to master appliance diagnostics for good!