

I remember the exact moment I realized my dishwasher wasn’t cleaning properly anymore. Dirty spots, leftover food, and a frustrating cycle that seemed to last forever. It was only after a bit of digging that I stumbled upon the sneaky culprit: low water pressure. That lightbulb moment changed everything for me, turning a hopeless situation into a manageable repair. If you’ve ever faced similar issues, you know how maddening it can be to suspect your appliance but not quite know why it underperforms.
The Hidden Impact of Water Pressure on Wash Quality
It might sound trivial, but water pressure plays a crucial role in how well your dishwasher cleans. When the water flow isn’t strong enough, detergent can’t reach all your dishes effectively, leaving residue and stains that make you question the cleanliness cycle itself. Over time, low water pressure can even cause your appliance to work harder, wasting energy and increasing wear on its components. I’ve learned from personal experience that ignoring this subtle problem often leads to more significant, costly repairs down the line.
Is Low Water Pressure Actually Worth the Hype?
At first, I dismissed the idea that water flow could be the main issue. I thought maybe I wasn’t running the machine long enough or that my detergent wasn’t effective. However, a simple test with a glass under the spray arms revealed a weak stream that made me realize the pressure was the real enemy. Early troubleshooting often saved me from unnecessary replacement parts, and it can do the same for you. Don’t fall into the trap of thinking that all cycles are created equal; sometimes, the culprit is as simple as inadequate water flow.
Curious if this might be affecting your dishwasher? Check out top signs your dishwasher needs diagnostics to get a clearer picture. And if you’re unsure about where to start, professional diagnostics can eliminate guesswork and help you get the most out of your warranty benefits, as detailed in this guide: how diagnostics save your warranty. So, are you ready to discover whether water pressure is secretly sabotaging your cleaning results? The next steps will help you identify and fix the problem before it gets worse.
Check Your Water Supply First
Begin by verifying that your home’s water supply valve connected to the dishwasher is fully open. Tug gently on the supply hose to ensure it’s not kinked or bent, which can restrict flow. I recall once I found mine partially closed after a recent kitchen remodel — fixing that immediately restored proper water flow. If the valve is fine, move on to inspecting the inlet valve screen for debris.
Clean the Inlet Valve Screen
Locate the inlet valve, usually at the bottom front or side of the dishwasher. Carefully disconnect the water supply line and remove the screen filter, which could be clogged with mineral deposits or debris. Rubbing the screen with a soft brush and rinsing thoroughly can make a noticeable difference. I once spent 15 minutes cleaning a stubborn blockage, and within minutes, the water pressure improved significantly, restoring my dishwasher’s cleaning power.
Test and Inspect the Spray Arms
Blocked spray arms reduce water distribution, mimicking low pressure issues. Take them out and clear any trapped debris or limescale. Use a toothpick or small brush to free any clogs in the jet holes. This simple step often solves the problem without needing professional parts replacement.
Run a Water Pressure Test
Place a clear glass under the spray arm while running a cycle to observe the water flow. A weak or inconsistent stream indicates reduced pressure. Alternatively, use a hose pressure gauge connected at the inlet point to measure incoming pressure. Ideal water pressure for dishwashers is between 20-120 psi. If the pressure reads below, you might have a pressure regulator issue or internal clogging that needs further diagnostics.
Examine Internal Components for Obstructions
Inspect the wash pump and circulating pump for debris or buildup. Loosen any accessible panels and look for mineral deposits or foreign objects blocking water pathways. If you notice damage or corrosion, consider contacting a professional to avoid causing further harm. Remember, internal parts are delicate — a mistake can lead to more costly repairs.
Test the Water Inlet Valve Solenoid
Using a multimeter, check if the solenoid coil in the inlet valve is functioning properly. A reading of near zero ohms indicates a good coil. If the coil is open or shows infinite resistance, replacement is necessary. Replacing this component is straightforward but requires precise part identification, which can be verified by consulting your dishwasher model’s manual or an expert.
Run Diagnostic Cycles and Record Results
Many modern dishwashers have diagnostic modes accessible through button presses. Running these cycles can help pinpoint faults related to water pressure. Review the control panel lights or error codes, then cross-reference with your appliance manual or troubleshooting guides. This process can save time and money by avoiding unnecessary part replacements.
Ensure Proper Installation and Alignment
A misaligned or improperly installed spray arm or door gasket can also affect water flow. Check that all components are seated correctly and sealed tightly to prevent leaks that restrict pressure. For ongoing issues, revisit the [professional diagnostics services](https://applianceoutletpro.com/how-appliance-diagnostics-can-save-your-warranty-benefits) to get expert assistance without risking warranty voidance.
Document and Proceed Carefully
As you test each component, document your findings with notes or photos. This record helps you or a technician identify patterns or recurring problems. If at any point you feel unsure about handling internal parts, contact a professional technician through the contact page. Proper diagnosis ensures your warranty remains valid and prevents further damage, preserving your investment.
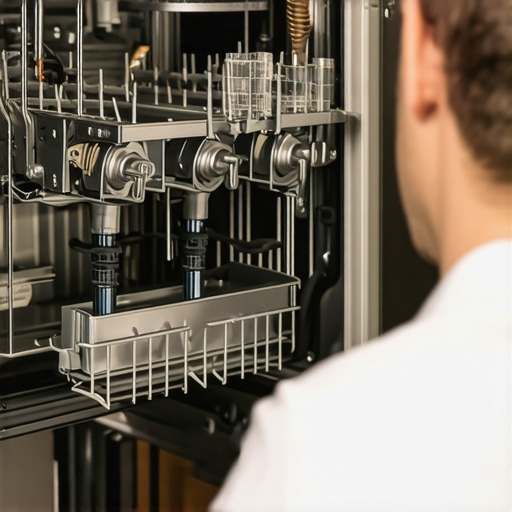 While many believe that troubleshooting a dishwasher is straightforward—like replacing a faulty part and calling it a day—there are nuanced pitfalls that even experienced homeowners often overlook. One prevalent misconception is assuming that all diagnostic codes are universally interpreted, which can lead you down the wrong repair path. Modern dishwashers come equipped with sophisticated sensors and microprocessors; misreading error codes or ignoring diagnostic modes can result in unnecessary parts replacement or voided warranties. According to appliance repair experts, understanding these nuances can save considerable time and money, especially since some issues appear simple but stem from complex internal failures that only professionals can accurately diagnose. Furthermore, many assume that manufacturers’ warranties cover all repair aspects, yet close examination reveals exclusions—particularly for damages caused by neglect or improper use, as discussed in our guide on trusting your warranty. Beware of the trap where homeowners preemptively replace parts based solely on symptoms without proper diagnostics; this often leads to recurrent failures. Have you ever fallen into this trap? Let me know in the comments. Advanced repair scenarios, such as diagnosing circuit board failures or sensor malfunctions, require specialized tools like multimeters and non-contact voltage testers—skills that go beyond basic troubleshooting and are well-covered in our detailed expert tips. Remember, accurate diagnosis is the cornerstone of effective repair and warranty legitimacy. Don’t rely solely on intuition; invest in proper diagnostics to ensure a durable fix and protect your warranty rights.
Tools I Recommend for Reliable Dishwasher Care
Maintaining your dishwasher over time requires precision and the right equipment. Personally, I swear by a high-quality digital multimeter, such as the Fluke 87V, because of its accuracy in testing circuit continuity and voltage—crucial when diagnosing electrical issues like faulty inlet valve solenoids. I also keep a non-contact voltage tester on hand, which allows quick checks of live wires without risking shock, especially when working inside panels. For physical inspection, a compact LED flashlight is indispensable for revealing hairline cracks in tubs or hidden corrosion areas; I recommend the Brinkmann Max Million for its brightness and durability. Regularly utilizing ultrasonic cleaners for spray arms can dissolve stubborn mineral deposits without dismantling, significantly extending their lifespan. These tools form the backbone of my maintenance routine, ensuring potential problems are caught early and repaired efficiently.
Looking ahead, I predict that ultrasonic and infrared diagnostic devices will become more affordable and integrated with smartphone apps, allowing homeowners to perform more advanced diagnostics independently. Embracing such technology could democratize appliance repair, reducing costs and downtime for everyone.
How do I maintain my dishwasher’s performance over time?
The key to long-lasting dishwasher health lies in systematic, proactive maintenance. Regularly inspecting and cleaning the spray arms with a gentle ultrasonic cleaning solution prevents mineral buildup that can impair water distribution. Checking the water inlet valve with a multimeter, especially during routine tune-ups, ensures electrical components are functioning correctly, avoiding unexpected breakdowns. Incorporating diagnostic tools like a non-contact voltage tester into scheduled checks helps catch wiring issues early, which is critical since electrical faults are a common cause of repair delays and warranty claims. Remember, many issues stem from overlooked minor problems; detailed records of maintenance routines and diagnostic results can help both you and professional technicians track wear and plan repairs effectively. For more on how diagnostics can preserve your warranty, visit this comprehensive guide. If you notice inconsistent water pressure or suspect internal component failure, don’t hesitate to reach out to a professional through our contact page. Staying ahead of potential problems ensures your appliance remains in top shape, saving you money and hassle in the long run.
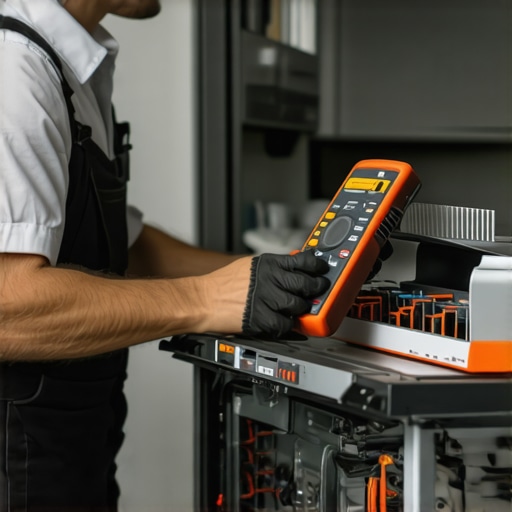
Image prompt: A professional technician using a digital multimeter and ultrasonic cleaner during dishwasher maintenance, with close-up views of the tools and the appliance interior.
The Hardest Lesson I Learned About Dishwasher, Diagnostics, Appliance Repair, Warranty
One of the most eye-opening truths I uncovered was that even seasoned homeowners often overlook the subtle signals their appliances give. For instance, I used to dismiss faint sounds or tiny leaks as trivial, only to realize they were signs of impending failure. Recognizing these early warnings—like a small crack in the tub or a sluggish circulation motor—not only saved me money but also preserved my warranty coverage. Sometimes, the greatest lessons come from mistakes, such as rushing into parts replacement without proper diagnostics, which can void your warranty. Trusting my intuition without proper testing nearly cost me a major repair I could have avoided with a multimeter or a diagnostic mode check. The key is to embrace patience and leverage the right tools, acknowledging that appliance issues are often more nuanced than they seem.
Your Next Steps Could Be Surprisingly Simple
If this journey has shown me anything, it’s that a little knowledge coupled with the right equipment can make all the difference. Basic tools like a non-contact voltage tester and a small mirror can reveal hidden faults that standard inspections miss. These enable you to perform a more accurate diagnosis, preventing unnecessary part changes and safeguarding your warranty. Exploring resources such as how diagnostics protect your warranty will empower you to take control. Remember, the goal isn’t just to fix, but to understand the root cause—ensuring your dishwasher runs reliably for years to come. Always keep in mind that sometimes, calling a professional with advanced diagnostic tools is the smartest move to avoid costly missteps.
Trust Your Gut—But Verify with Precision
I’ve learned that intuition is helpful, yet it must be paired with concrete evidence. When your dishwasher acts up, resist the urge to jump straight to a replacement part. Instead, use diagnostic techniques—test water pressure, inspect spray arms, and check internal components—to confirm the problem. For example, measuring water inlet valve voltage or inspecting for debris in the spray jets can reveal hidden obstructions or electrical faults. This approach not only extends the lifespan of your appliance but also keeps you within warranty guidelines. Embracing technology and thorough testing really is the secret to successful DIY repairs, saving you both time and money. Think of diagnostics as your new best friend—trust it, and let it guide your decisions.
Keep Your Dishwasher Running Like New—With a Little Wisdom
Maintaining optimal water pressure and monitoring internal parts isn’t just about fixing problems—it’s about preventing them. Regularly cleaning spray arms, checking water supply valves, and recording diagnostic results can significantly enhance performance. Remember, many issues are minor and manageable if caught early—like mineral buildup that can be dissolved with citric acid or small leaks that can be sealed before causing damage. Staying proactive with tools, logs, and knowledge ensures your dishwasher remains a reliable part of your home. As I’ve realized, the difference between a minor inconvenience and a costly repair often lies in your ability to recognize and act on these early signs. With patience and the right approach, your appliance will serve you efficiently, saving both money and frustration over time.
What’s the Final Word?
The most valuable insight I can share is that appliance repair isn’t just about fixing broken parts—it’s about understanding your machine’s language. Every squeak, leak, or cycle delay is a message waiting to be decoded. Equip yourself with the right diagnostic tools, trust your instincts, and don’t hesitate to seek professional help when needed. This knowledge not only prolongs your dishwasher’s lifespan but also preserves your warranty rights. Remember, ultimate control over your appliance health starts with informed, deliberate actions—making you the hero of your own repair story.
Are you ready to become more confident in diagnosing your dishwasher’s issues? Have you ever caught a problem early by listening to subtle signs? Share your experiences below and let’s learn together!
,