

Ever had that sinking feeling when you open your bathroom cabinet and see water pooling around your tub? You know the one—your heart sinks as you realize it’s probably a leaky gasket, but the thought of calling in a professional makes you cringe at the expense and hassle. I faced this exact situation last month, and let me tell you, I learned a thing or two about tackling it myself—without any fancy tools or professional experience.
Why Replacing a Leaky Tub Gasket Can Save You Time and Money
For many homeowners, the idea of repairing a leak involves calling a plumber and paying hefty fees. But often, the root cause is a worn-out gasket—an affordable, simple part that seals the space between the tub and its drain or fixtures. Replacing it can be surprisingly straightforward, especially if you know what you’re doing.
Why does this matter? Well, a leaky gasket isn’t just a minor nuisance; it can lead to water damage, mold growth, and higher utility bills. Plus, addressing such issues early can preserve the lifespan of your fixtures and save a ton of money in the long run. Best of all, you don’t need any special tools—just some patience and the right approach.
Big Skepticism: Is This Really That Easy Without Tools?
You might be thinking, “This sounds great, but isn’t replacing a gasket a complicated job that needs fancy tools?” I believed that too initially. My biggest mistake early on was trying to force parts out with whatever was at hand—often making things worse. It’s easy to think that only a professional can do it, but with a few simple tricks, you can handle this repair yourself. Trust me: I’ve been there, and I’ve learned that avoiding unnecessary tools and complications is the way to go.
If you’re tired of wasting money on repairs or just want to learn a useful skill, stay with me. I’ll walk you through the process step-by-step, share tips on avoiding common pitfalls, and help you regain control over your home’s plumbing issues. Ready to get started? Your leak-free shower awaits!
Locate the Gasket and Assess the Damage
The first step is to identify where the gasket is leaking. I vividly remember the moment I peeked behind my tub and saw water seeping from the drain area. Using a flashlight, I carefully inspected the gasket for cracks or deterioration. This visual check is crucial; small hairline cracks can be tricky but can be spotted with good lighting and a steady hand. For more detailed inspection, consider using a magnifying glass or a bright LED flashlight to spot even tiny damages. If you notice any signs of wear or cracking, it’s time to replace the gasket.
Remove the Old Gasket Carefully
Since I wanted to avoid any damage, I gently loosened the surrounding fixtures to give myself room. Using just my hands or a plastic pry tool (if available), I peeled the gasket away from its seat. Be patient; forcing it can cause further damage. I recommend soft prying and working around the gasket’s perimeter, gradually loosening it. Remember, the goal is to dislodge it without scratching the surfaces. If the gasket is stuck due to mineral buildup, a little warm water and gentle pressure can help soften any deposits. Here’s a handy tip: envision it like peeling a stubborn sticker—slow and steady wins the race.
Clean the Surface Before Installing the New Gasket
With the old gasket removed, I cleaned the area thoroughly using a soft cloth and some vinegar solution to remove any residue or mineral deposits, which could prevent a good seal. It’s essential to have a clean, smooth surface before installing the new gasket. I took a moment to inspect the area for any damage or debris. Any leftover grime can cause leaks again. For hard-to-reach spots, a toothbrush is surprisingly effective. This step is like preparing a surface before painting—a clean canvas ensures longevity.
Install the New Gasket with Care
Next, I aligned the new gasket with the seat, making sure it was centered correctly. Without any tools, I pressed it into place using just my fingers, ensuring it fit snugly. No force needed; if it doesn’t seat easily, double-check the alignment. Often, gaskets are designed to snap in with slight pressure—think of it as fitting together puzzle pieces. If the gasket has retention edges, ensure they are securely engaged. Once in place, I slowly reattached the fixtures, tightening gently to avoid warping the gasket. It’s essential not to overtighten, as this can deform the gasket and cause leaks down the line.
Test for Leaks and Ensure a Seal
Finally, I ran some water into the tub to check for leaks. Observing closely, I made sure there was no water escaping around the gasket. If you spot any leaks, re-tighten the fixtures slightly or re-examine the gasket placement. This step is like test-driving a car after repairs—your assurance that everything runs smoothly. Remember, patience is key; a successful gasket replacement is about careful placement and gentle tightening. Following these steps, I managed to stop the leak without calling a plumber or using special tools, saving both time and money. For more tips on DIY appliance repairs, check out [this troubleshooting guide](https://applianceoutletpro.com/troubleshooting-dishwasher-problems-expert-diagnostics-repair-tips) or [learn about diagnostic techniques](https://applianceoutletpro.com/how-appliance-diagnostics-can-save-your-warranty-benefits).
Many homeowners operate under misconceptions when it comes to diagnosing appliance issues or navigating warranty processes. These myths can lead to costly mistakes, delays, and even voided warranties. Let’s dig deeper into some of the most pervasive fallacies, common pitfalls, and the subtle nuances that experts understand but casual users often overlook.
Why More DIY Equals Better Results—Or Does It?
There’s a widespread belief that tinkering with appliances saves money and time. While some basic troubleshooting, like clearing a clogged filter or inspecting visible wires, is harmless and often beneficial, assuming that all diagnostics can be DIY without risking further damage is a mistake. Advanced diagnostics, particularly involving electrical components or system codes, often require specialized tools and expertise. For instance, misinterpreting error codes or testing with a multimeter without proper training can lead to incorrect repairs and potential voiding of warranties. According to experts from appliance diagnostics guides, misdiagnosis can even make your issue worse, leading to more expensive repairs later.
Additionally, many folks don’t realize that attempting quick fixes without documentation or consultation might breach warranty terms. Manufacturers often stipulate that only trained technicians perform certain repairs, especially for critical components. So, before you take matters into your own hands, consider the potential impact on your coverage.
The Oops Factor: Ignoring Diagnostic Data and How to Avoid It
A common trap is ignoring or misinterpreting diagnostic codes from smart appliances or control panels. Many homeowners see blinking lights or error codes and attempt to fix based solely on assumptions, which can be misleading. These codes are designed to guide technicians, who understand the nuances behind each signal. For example, a error code indicating a
How do I maintain my appliances over time?
Consistent maintenance is vital to keep your appliances running smoothly and extend their lifespan. One of the best ways to do this is by investing in quality diagnostic tools like a digital multimeter, which I use regularly to test circuits and electrical components of my dishwasher. This device allows me to quickly identify faulty heating elements or motor issues without calling a technician, saving both time and money. Additionally, a borescope camera can help inspect hard-to-reach parts, such as the inside of a dishwasher’s sump or spray arms, letting you spot corrosion or debris early. Regularly cleaning filters and drain screens also prevents clogs that can cause major malfunctions. Incorporating these tools into your routine ensures minor issues don’t escalate into costly repairs, and it empowers you to troubleshoot confidently.
Looking ahead, I predict that smart diagnostic devices integrated with appliance apps will become more mainstream, providing real-time alerts and step-by-step guidance right on your smartphone. This technology will further simplify maintenance and troubleshooting for homeowners.
Tools I recommend for long-term appliance care
From personal experience, I rely on the Fluke 117 Electrical Multimeter for precise voltage and continuity testing. Its auto-ranging feature and CAT III safety rating make it reliable and easy to use even for beginners. For inspecting internal parts and hidden areas, the Teslong USB Endoscope is invaluable. Its flexible, waterproof camera with adjustable LED lights helps me see inside tight spaces, enabling proactive maintenance. Lastly, I always keep a high-quality cleaning brush set and a vinegar-based descaling solution handy to maintain water inlets and spray arms, preventing buildup that could impair function.
Remember, using these tools properly can make all the difference. For example, testing your thermal fuse with a multimeter can quickly reveal if it’s blown, allowing you to replace it before more severe damage occurs. Want to learn a quick method? Try testing your appliance’s heater element with your multimeter today—it’s a simple step that can save you a service call.
Why regular diagnostics matter for warranty coverage
Staying on top of diagnostics can also safeguard your warranty claims. Many manufacturers specify that only trained technicians or certified DIYers using proper tools should perform repairs. Regularly running diagnostic tests and keeping records of your findings can provide evidence of proactive maintenance, which is often appreciated during warranty reviews. For more insights, check out how diagnostics can protect your warranty. Incorporate routine checks into your home maintenance schedule, and you’ll reduce unexpected breakdowns while ensuring your coverage remains valid.
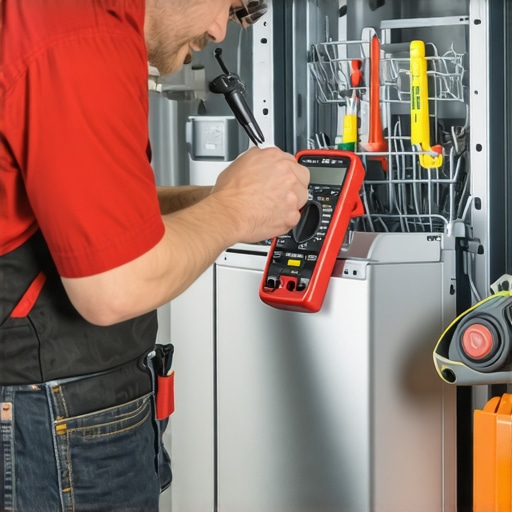
Here’s a tip to get started: regularly test your dishwasher’s heating circuit with a multimeter to catch potential failures early. It’s an affordable, straightforward way to maintain peak performance and avoid costly repairs.
What I Wish Someone Told Me About Appliance Fixes
One of the biggest insights I gained was that patience beats brute force every time. Rushing to pry out a gasket or disconnect parts without a clear plan often made things worse. Slow, deliberate moves, guided by proper inspection, can save you both time and money. Another lesson was the power of research—reading through guides and watching tutorials before diving in can reveal pitfalls that aren’t obvious at first glance. Lastly, embracing a mindset of continuous learning transformed my approach from frustration to curiosity, opening doors to solutions I hadn’t considered before.
Tools and Resources That Made a Difference
My essential toolkit includes the Fluke 117 Multimeter for quick electrical tests, which I trust for its reliability and ease of use. The Teslong USB Endoscope became invaluable for inspecting tight spots inside appliances, revealing wear or damage invisible to the naked eye. For cleaning and maintenance, I rely on vinegar solutions and dedicated brushes, ensuring my appliances stay in top shape. These tools, combined with knowledge from trusted guides, empower me to troubleshoot confidently and prevent future issues.
Embracing the Journey of Appliance Care
Taking charge of your appliance repairs is genuinely empowering. Every leak stopped and every gasket replaced builds confidence, making you less dependent on costly professionals. Remember, the key lies in patience, preparation, and persistent curiosity. Whether it’s diagnosing a subtle leak or understanding your washer’s error codes, your involvement leads to better outcomes and extends your appliances’ lifespan. So, gear up, stay curious, and let this be the start of a rewarding DIY journey that saves money and enhances your home’s resilience.
Have you ever tried a DIY appliance repair that turned out better than expected? Share your story below—I’d love to hear about your successes and lessons learned!