

One evening, I stood in my kitchen, watching my smart dishwasher flash a strange warning light. I had trusted this high-tech marvel to handle my busiest days, yet here it was, behaving like it had a mind of its own. Frustration bubbled up because I couldn’t tell if I was wasting precious data—or just pouring more electricity into a machine that was already working hard. That light made me realize something: I had no real idea whether my dishwasher’s smart features were actually saving me time and money, or if they were just another gadget draining my resources behind my back.
Why You Need to Know What Your Dishwasher Is Really Doing
If you’re like me, you probably assumed that owning a smart appliance automatically meant you’re cutting costs and boosting efficiency. But here’s the truth: many homeowners unknowingly let their gadgets drain more power and data than necessary. It’s easy to get caught up in the latest tech without understanding what’s happening behind the scenes. This can lead to higher energy bills, delayed repairs, or even voided warranties if misdiagnosed. Knowing whether your smart dishwasher is truly a data-saving hero or just a fancy, energy-hungry device is essential for managing your home effectively.
Is Your Smart Dishwasher Actually Worth the Hype?
I’ll admit, early on I made a classic mistake by assuming my dishwasher’s notifications were always accurate. I ignored some signs, like sporadic Wi-Fi disconnections and strange cycle behaviors, thinking it was just a glitch. This oversight delayed me from diagnosing a hidden fault that was quietly wasting electricity and data, potentially damaging my appliance and voiding my warranty. I’ve learned that understanding how to troubleshoot these signs can save you time, money, and frustration. If you’ve noticed your smart dishwasher acting up or your utility bills climbing unexpectedly, it’s time to dig deeper. Want to learn how to spot the real problem? Check out expert diagnostic tips on [Troubleshooting Dishwasher Problems](https://applianceoutletpro.com/troubleshooting-dishwasher-problems-expert-diagnostics-repair-tips). Getting to the bottom of this now can prevent costly repairs later and keep your warranties intact.
Start with Visual Inspection
Before diving into complex tests, perform a thorough visual check of your dishwasher. Look for obvious signs like damaged wires, leaks, or loose connections. Use a flashlight to inspect beneath the unit and inside accessible panels. This familiarizes you with potential issues that might cause your smart features to malfunction, similar to how a mechanic visually assesses a problematic engine part. Remember, fixing minor damages early prevents bigger problems later.
Utilize Your Appliance’s Diagnostic Mode
Many smart dishwashers have built-in diagnostic modes accessible through the control panel. To activate, press specific button combinations listed in your user manual. This mode runs a series of self-tests that highlight errors or faulty components. Think of it as the machine’s health checkup—saving you hours of guessing. If your dishwasher shows error codes, cross-reference them with your model’s manual or check trusted resources like expert diagnostic tips. This step allows you to pinpoint issues like faulty sensors or defective heating elements.
Test Power and Connectivity
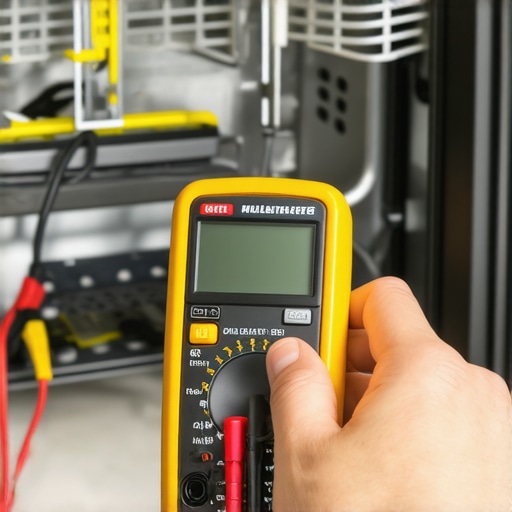
Ensure your dishwasher is receiving proper power. Use a multimeter or a non-contact voltage tester to verify outlet voltage and check the power cord for damage. Also, verify your Wi-Fi connection strength—weak signals often cause communication errors with smart features. To test your Wi-Fi connection, temporarily move your router closer or use a dedicated Wi-Fi extender. Proper power and stable connectivity resemble making sure your car has enough fuel and a clear GPS signal before a long trip; without it, diagnostics are meaningless. For detailed Wi-Fi troubleshooting, see our guide on Wi-Fi issues.
Run Manual System Tests
Many dishwashers let you manually check components like spray arms, sensors, and drain pumps. Remove the front panel by unscrewing accessible screws—make sure to disconnect power first, just like turning off a machine before servicing. Use your multimeter to test electrical continuity across sensors, fuses, and switches, following procedures from thermal fuse testing guide. For solenoids and motors, listen or feel for motor operation during cycle commands. Think of these tests as a mechanic listening to a car engine for weird sounds—helping you identify failing parts before they cause breakdowns.
Inspect and Test Key Components
Focus on critical parts that often fail. Check the door latch switch with a multimeter—if it doesn’t complete the circuit when the door is closed, the dishwasher may not start. Test the circulation pump for motor failure or clogs using multimeter techniques. Examine the heating element for continuity to prevent cycle failures, referring to thermal fuse testing tips. Document your findings to include in a service report or warranty claim, ensuring your diagnostics are accurate and justified.
Document and Communicate Your Findings
Keep detailed notes of each test: readings, error codes, visual damages. Photos can be invaluable—think of them as proof for warranty claims or professional repairs later. When ready, consult expert resources or contact a technician via our contact page. Accurate diagnostics prevent unnecessary repairs and safeguard your warranty benefits, as outlined in our comprehensive guide. Remember, meticulous testing and record-keeping are your best tools to return your dishwasher to optimal performance, saving money and extending its lifespan.Many homeowners believe that diagnosing appliance issues is straightforward: run a quick test, replace a faulty part, and get back to everyday life. However, this simplistic view often obscures crucial nuances that can make or break warranty claims and long-term appliance health. One common misconception is that error codes alone are sufficient to identify problems. In reality, error codes are merely the starting point—they require expert interpretation and contextual understanding to avoid misdiagnosis. Relying solely on these codes can lead to unnecessary repairs or overlooked issues, ultimately voiding warranties if not carefully documented.
Another myth circulating among DIY enthusiasts is that all warranties cover any repair without exceptions. But warranties typically have fine print exclusions—like damage caused by improper use or neglect—that homeowners often overlook, resulting in invalid claims. Consulting a dedicated resource, such as our guide on diagnostics and warranties, can clarify the nuances and ensure your efforts align with warranty requirements.
A critical trap to avoid involves misinterpreting appliance behavior during diagnostics. For example, some believe that a machine emitting random beeps or displaying intermittent error codes signals a minor glitch. But these symptoms may indicate underlying issues like faulty sensors or compromised wiring, which, if unaddressed, can escalate to costly repairs or damage your warranty eligibility. Regularly consulting professional diagnostic resources or engaging with experts can help you distinguish between normal glitches and diagnosable faults.
This leads us to a vital question for the advanced technician: How does one differentiate between transient faults and systemic failures that are warrantably covered? According to industry experts, thorough testing—beyond error codes—is essential. It involves detailed component-level diagnostics, such as testing thermal fuses, inspecting wiring harnesses for corrosion, and verifying control board integrity. These advanced steps, detailed in expert diagnostics guides, ensure precise problem identification and strong documentation—both crucial when submitting warranty claims.
In conclusion, understanding the nuanced landscape of appliance diagnostics extends beyond basic troubleshooting. Recognizing that error codes are only pieces of a larger puzzle, being aware of warranty fine print, and conducting comprehensive inspections can save you money and safeguard your appliance’s longevity. Have you ever fallen into this trap? Let me know in the comments, and remember—expertise in diagnostics is your best tool against unnecessary expenses.
Tools I Recommend for Appliance Diagnostics
To keep your dishwasher running smoothly over the years, investing in quality diagnostic tools is essential. I personally rely on a digital multimeter for testing electrical continuity and resistance, which is invaluable when diagnosing faulty sensors or heating elements. A non-contact voltage tester complements this by quickly verifying power at outlets and circuit connections without the need to disconnect wiring. For more advanced diagnostics, a borescope camera allows me to inspect hard-to-reach components like the sump or spray arms without dismantling the entire unit. These tools have consistently saved me time and money by enabling accurate, early detection of issues before they escalate.
Maintaining Performance with Software and Firmware Updates
Many modern dishwashers have firmware that can be updated via their apps or control panel. Keeping this software current ensures compatibility with your network and fixes known bugs that may affect diagnostics or cycle efficiency. Regularly checking manufacturer websites for updates is a proactive step you can take to prolong the lifespan of your appliance. This trend toward integrated diagnostics may soon include predictive maintenance alerts, warning homeowners of potential failures before they happen. Staying ahead of these trends by updating your software and understanding how to interpret the data can dramatically improve long-term performance.
How do I Maintain My Dishwasher Over Time?
Consistent maintenance is the cornerstone of appliance longevity. Regularly inspecting and cleaning the spray arms, filters, and seals ensures optimal operation. For example, removing and cleaning the filter under the spray arm with a simple vinegar solution can prevent clogs and maintain water pressure. Likewise, checking the door gasket for cracks and replacing it promptly prevents leaks and water damage—preserving warranty coverage and preventing costly repairs. Scheduling a semi-annual diagnostic check using knowledge gained from trusted resources like professional diagnostics tips can catch issues early. Remember, proactive care is always cheaper and more effective than reactive repairs.
Tools and Tips for Scaling Repairs
When your troubleshooting reveals that a component needs replacing—such as a circulation pump or control panel—having the right tools makes all the difference. A set of screwdrivers suited for appliance work, along with a thermal fuse tester, can allow you to perform reliable replacements without resorting to costly service calls. Document your process with photos, which can be especially helpful if you plan to request warranty repair or assistance. As technology advances, I predict that diagnostic apps linked to your smartphone will offer real-time troubleshooting support, enabling even novice homeowners to extend their appliance’s lifespan. For now, mastering basic testing methods like testing the thermal fuse for continuity—detailed in this guide—is your best bet for effective maintenance.
Take the next step and try testing your dishwasher’s heating element with a multimeter today. This straightforward check can prevent cycle failures and improve efficiency, extending your appliance’s life. Keep in mind, mastering these diagnostic techniques not only saves money but also empowers you to handle future repairs confidently.
What No One Tells You About Real Diagnostic Success
- I realized that relying solely on error codes is like trusting a weather forecast only when it matches your plans; you might miss the bigger picture if you’re not digging deeper. Doing your own thorough inspections, like checking wiring harnesses or testing the thermal fuse, can reveal hidden issues that error messages hide.
- Investing in proper tools, such as a quality multimeter or a borescope camera, is a game-changer. These tools turned my guesswork into precision, saving me money and frustration, and taught me that the right equipment amplifies your diagnostic confidence.
- Understanding warranty fine print isn’t just legal mumbo jumbo—it’s empowering. Knowing what your warranty covers and how to document your findings has helped me make stronger claims and avoid unnecessary expenses on repairs that are already under warranty.
- Patience and meticulous record-keeping are underrated allies. Taking photos during inspections or noting error code patterns creates a clear story when consulting professionals or making warranty claims, ensuring your diagnostics lead to effective solutions.
- Finally, I learned that proactive maintenance, like cleaning filters and inspecting spray arms regularly, prevents issues from escalating. It’s like regular health check-ups—preventive care keeps your dishwasher humming smoothly and extends its lifespan.
Tools and Resources that Changed My Approach
- A reliable digital multimeter has been my cornerstone for electrical tests, especially when checking heating elements or sensor continuity. I trust it because it gives clear, consistent readings, which are critical for accurate diagnostics.
- The thermal fuse testing guide offers straightforward methods that I now use as my go-to for thermal cut-off issues. It’s easy to follow and has saved me from unnecessary replacements.
- Consulting detailed troubleshooting articles from trusted expert guides has expanded my knowledge and confidence. They demystify complex problems into manageable steps and prevent me from feeling overwhelmed during repairs.
- Keeping a repair diary, with notes and photos, has been invaluable when working through long-term projects or warranty claims. This habit has turned DIY efforts into a professional-level record-keeping system.
- Staying updated with software and firmware updates from manufacturers is an often-overlooked yet essential aspect of maintaining my dishwasher’s smart features. It’s remarkable how small updates can provide significant performance improvements and diagnostic capabilities.
Empowering Yourself for a Smarter Repair Future
Remember, each technical skill you develop in appliance diagnostics adds to your confidence and independence. Don’t shy away from troubleshooting; instead, see it as an opportunity to learn more about your appliance and how it works. Your proactive approach not only saves money but also extends the enjoyment and efficiency of your dishwasher. If you’ve ever hesitated to dive into diagnostics, take that first step today—test a thermal fuse, inspect your wiring, or simply read a troubleshooting article. The journey to mastering your dishwasher’s health is within your reach, and I promise, the satisfaction of solving a problem yourself is truly worth it. Have you ever struggled with pinpointing an issue that turned out to be simpler than expected? Share your story below and let’s learn together.