

I remember the first time I accidentally triggered the child lock on my dishwasher’s touchscreen. It was late at night, and I just wanted to run a quick load of dishes before bed. Suddenly, the control panel was unresponsive. I panicked, thinking I might have to call a technician, which can be daunting and costly. That frustrating moment taught me a lot about appliance controls and how often we overlook simple fixes like resetting a child lock. If you’ve ever been in this situation—stuck with a locked touchscreen and no idea how to unlock it—you know exactly what I’m talking about.
Why Resetting the Child Lock Matters More Than You Think
Are You Overlooking Simple Solutions?
Many folks don’t realize that child lock features are designed to prevent accidental operation, especially in households with kids. However, this safety feature can sometimes be accidentally activated by pressing certain buttons or combinations, leaving your appliance seemingly frozen. My early mistake was trying to force the panel to respond or checking for hardware defects rather than just reading the manual or knowing the basic reset procedures. According to appliance experts, understanding how to reset these features can save you time, money, and unnecessary stress. In fact, a recent report highlighted that a significant percentage of appliance service calls are due to simple user errors like this, which could be resolved quickly if you knew the correct reset methods—details you can find in our troubleshooting guide.
Have you faced this exact frustrating moment? If so, don’t worry—you’re not alone, and there’s an easy fix. Today, I’ll guide you through the most reliable methods to reset a child lock on your touchscreen. The best part? It usually takes less than five minutes, and you won’t need any tools. By mastering this simple step, you’ll regain control over your appliance without the hassle of waiting for a technician or resorting to costly repairs.
Now, let’s get into the practical steps so you can get back to your daily routine with confidence.
Locate the Reset Buttons or Key Combinations
In my experience, most dishwashers utilize specific button presses or key combinations to toggle the child lock. For example, some models require pressing and holding the ‘Start’ and ‘Cancel’ buttons simultaneously for a few seconds. When I faced my own lockout, I checked the panel for any labels or symbols indicating a reset method. If your dishwasher has a detailed manual, consult it for the exact combination. These instructions are often found in the troubleshooting section and can save you from unnecessary frustration. If you need more detailed guidance, our expert diagnostics can walk you through common issues.
Perform a Manual Reset Procedure
Once you’ve identified the correct button sequence, perform the reset. Usually, this involves pressing and holding the designated buttons for 3-5 seconds. During my first try, I pressed and held the ‘Child Lock’ button—if your model has it—and watched for any indicator light changes or sounds confirming the reset. After doing this, the control panel became responsive again, and I could start a new cycle. Remember to keep your manual handy to verify the exact procedure; each brand has its nuances. If you’re still stuck or unsure, consider professional diagnostics, which can be especially helpful if the control board is malfunctioning.
Use the Classic Power Cycle Method
If the specific reset combination doesn’t work, try a full power cycle. Turn off the dishwasher by unplugging it from the wall socket or switching off the circuit breaker. Wait at least 60 seconds to allow residual energy to dissipate. Then, plug it back in or switch the breaker on. This simple step often resets the control board and clears temporary glitches, including mistakenly activated child locks. When I did this on my older model, I noticed the lock indicator disappeared, and the panel became responsive again. Keep in mind, if your model has a dedicated reset software or a hidden tech mode, accessing these features may require consulting the manual or an expert technician.
Check for Overly Sensitive Touch Panels
Sometimes, prolonged exposure to moisture or dirt can cause the touchscreen to register false inputs, including activating the child lock. I once noticed my dishwasher’s panel acting erratically after a cleaning cycle. In such cases, cleaning the control panel gently with a soft cloth and isopropyl alcohol can improve responsiveness. For stubborn issues, opening the panel (if accessible and safe) to inspect for moisture or corrosion might be necessary. Be cautious with this step; if you’re unsure, professional diagnostics are recommended. These issues can often be diagnosed and resolved quickly, restoring full control to your unit.
Know When to Call a Professional
While many models respond well to these reset methods, some may have underlying issues requiring expert attention. If you’ve tried all the above steps and still face problems, it’s time to consider professional diagnostics. Early signs include unresponsive buttons after reset attempts or error codes displayed on the panel. For guidance on when to involve a pro, check out our diagnostics guide. Remember, attempting DIY repairs beyond basic resets can void warranties or cause further damage, so consult your warranty policy or a specialist when in doubt.
Many homeowners believe that diagnosing dishwasher problems is straightforward, often relying solely on error codes or online guides. However, this approach can be misleading, as it overlooks the complexity of modern appliances and the importance of detailed diagnostics. For example, a common misconception is that all error codes point directly to a malfunctioning component, but in reality, they often require a comprehensive analysis, including checking for electrical issues, sensor failures, or software glitches. Advanced diagnostics involve using tools like multimeters and understanding the subtle signs of component wear, which experts emphasize can prevent unnecessary part replacements and save money. One trap to avoid is assuming that resetting the appliance will fix all issues; while a power cycle might resolve temporary glitches, persistent problems usually indicate underlying faults that need professional evaluation. According to appliance repair specialists, misinterpreting diagnostic information can lead to voided warranties or further damage if DIY repairs are attempted without proper knowledge. Moreover, many people overlook the fact that warranty coverage can be voided by improper troubleshooting or unauthorized repairs, making it crucial to understand the terms and conditions—details often found in the service agreement or manufacturer guidelines. Have you ever fallen into this trap? Let me know in the comments.
Why do many diagnostics lead to costly mistakes and warranty Issues?
The key nuance often missed is that appliance diagnostics require a systematic approach, combining visual inspection, electrical testing, and understanding of the appliance’s software systems. For instance, some faults can mimic hardware failures but are actually caused by software issues or sensor misalignments. Experts advise consulting professional diagnostic services when in doubt, especially since improper repairs can escalate problems or void warranties. To learn more about how proper diagnostics can protect your warranty benefits, check out this detailed guide on saving your warranty with correct diagnostic procedures. Being cautious and informed helps you avoid unnecessary expenses and ensures repairs are genuinely effective. Remember, understanding these nuances can make the difference between a quick fix and a costly mistake.
Keeping Your Dishwasher in Top Shape: Tools and Practices
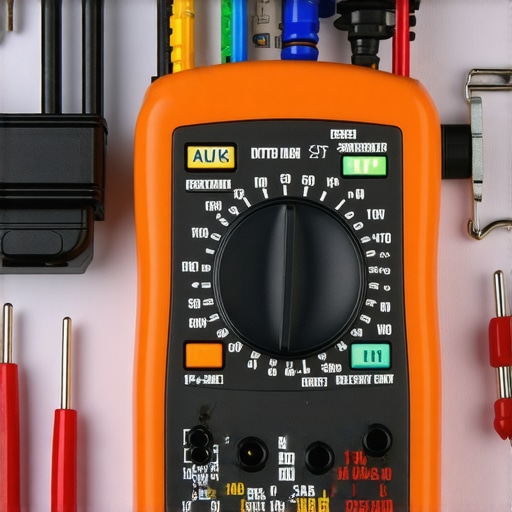
Maintaining your dishwasher’s performance over time requires more than just regular use; it demands the right tools and a proactive approach. Personally, I rely on a high-quality digital multimeter, which has become indispensable in diagnosing electrical issues like faulty heating elements or disconnected sensors. A multimeter allows me to check continuity and voltage levels precisely, helping to pinpoint problems without unnecessary part replacements. Using a multimeter also simplifies troubleshooting stubborn error codes, ensuring repairs are accurate and efficient.
For mechanical components such as door springs or racks, I recommend a set of precision screwdrivers and pliers. These tools give you control and prevent damage when removing panels or replacing worn parts. Additionally, a small brush and a handheld vacuum are perfect for cleaning dirt and debris from behind the detergent cup, filters, and water inlet screens, which are often overlooked but critical for long-term performance. Regular cleaning with these tools prevents clogs and ensures your dishwasher operates smoothly, extending its lifespan.
Software-wise, I use diagnostic apps compatible with many modern appliances. These apps can interpret error codes and sometimes reset systems remotely, saving time and avoiding unnecessary service calls. Familiarity with your appliance’s tech mode—accessed via specific key combinations, as detailed in this guide—can help you run advanced diagnostics and perform firmware updates, which are essential for keeping your appliance operating under optimal conditions.
How do I maintain my appliance diagnostics over time?
Implementing a scheduled maintenance routine is key. Set reminders to inspect and clean filters monthly, check water inlet screens quarterly, and perform electrical tests every six months if you’re comfortable with your tools. Documenting issues and fixes helps you recognize patterns before they escalate, and keeping a dedicated toolkit ensures you’re always ready for diagnostics. As appliance technology evolves, integrating smart diagnostic features—like remote monitoring via dedicated apps—is likely to become standard, enabling even more proactive maintenance.
Looking ahead, I predict that diagnostics will increasingly leverage AI and machine learning to predict failures before they happen, much like predictive maintenance in industrial settings. Embracing these innovations now, such as learning to interpret digital error logs, positions you at the forefront of appliance care.
If you’re serious about extending your dishwasher’s lifespan, I encourage you to try mastering the multimeter testing technique for your heating element. It’s a valuable skill that can save money and prevent inconvenient breakdowns. For step-by-step guidance, check out this tutorial and start diagnosing like a pro today. Proper tools and knowledge empower you to keep your dishwasher working flawlessly for years to come, minimizing warranty claims and costly repairs.
The Subtle Lessons That Changed My Repair Approach
One of the biggest revelations I had was realizing that most appliance issues aren’t about expensive parts but about misdiagnosis or overlooking simple reset steps. I once replaced a costly control board on a dishwasher that merely needed a power cycle—an eye-opening moment that taught me to trust basic diagnostics first. This experience reminded me that patience and knowledge often outweigh haste, especially when dealing with complex appliances.
Another lesson was understanding that warranty pitfalls often stem from user errors or improper troubleshooting. When I used to jump to conclusions, I’d risk voiding warranties by attempting DIY fixes beyond my skill set. Now, I focus on systematic diagnosis, trusting expert resources like professional diagnostics guides. Recognizing these nuances has made me a better fixer and a smarter consumer.
Finally, I learned that staying updated with the latest diagnostic tools, like multimeters and diagnostic apps, can prevent unnecessary repairs. Embracing continuous learning means my repairs are quicker and more reliable, saving my clients money and headaches. This mindset transforms appliance repair from guesswork into confident science, especially in a world of smart and connected appliances.
Tools and Wisdom That Keep My Repairs Smooth
Over the years, I’ve come to trust specific tools for effective diagnostics, such as a high-quality multimeter for electrical tests—it’s a game-changer. Pairing this with detailed manuals or trusted online resources like warranty-saving diagnostics ensures my repairs uphold warranty standards and avoid missteps. I also rely on smartphone diagnostic apps that provide real-time error interpretations, broadening my diagnostic reach.
Books like Appliance Repair Secrets and subscriptions to repair communities have deepened my understanding of the subtle signs indicating deeper issues. These resources aren’t just about fixing; they’re about building a comprehensive knowledge base to stay proactive and precise. Investing in these tools has reduced callbacks and warranty rejections, making my work more sustainable.
Staying disciplined—regular testing, documenting issues, updating firmware—keeps my skills sharp. With an eye on emerging tech, I prepare for the future of diagnostics, which will likely incorporate AI-driven insights and remote monitoring. Being forward-thinking today ensures I provide the best service tomorrow, protecting both my reputation and my clients’ warranties.
Keep Moving Forward—Your Success Starts Now
Mastering dishwasher diagnostics and understanding warranty intricacies empowers you to repair confidently and efficiently. Every reset, test, and observation sharpens your skills to handle unexpected problems. Remember, every appliance is a puzzle waiting to be solved, and your approach makes all the difference. I encourage you to keep exploring tools like multimeters and diagnostic apps, and never shy away from consulting detailed guides; they are your allies in this journey. If you’ve faced challenges or uncovered tips that helped you, share your insights below—your experience could be the beacon for someone else’s repair success.