

Ever finished washing your glasses only to be greeted by a cloudy film that just won’t go away? I’ve been there myself, frustrated as I scrubbed and rinsed, wondering what went wrong. That faint, stubborn haze can turn your gleaming crystal-clear lenses into something that resembles a foggy mirror. It feels like no matter how much you clean, the cloudiness persists, and it’s enough to make you question your entire cleaning routine.
But here’s the truth: this isn’t just about dirty glasses. It’s a common, often overlooked issue rooted in the way we wash and maintain our eyewear—and surprisingly, many folks miss the simple mistake that causes it.
In today’s post, I promise to reveal the real reason behind that annoying cloudiness and share effective solutions based on personal experience and expert advice. If you’ve ever wondered why your glasses get cloudy after washing and whether you’re doing something wrong, stick around—I might just have the answers you’ve been searching for.
Understanding Why Your Glasses Turn Cloudy After Cleaning
The culprit is often related to residues left behind from cleaning products or mineral deposits from water. Many of us rely on dish soap or even specialized eyewear cleaners, but if these aren’t used correctly or rinsed thoroughly, tiny film particles can cling to your lenses. Over time, these residues build up, creating that pesky, dull fog.
Interestingly, the type of water you use plays a significant role too. Hard water, which contains higher mineral content, can leave spots and film that are tough to remove. Regular tap water with mineral deposits can leave a feeling of film or haze, especially if not dried properly.
Early in my own experience, I made the mistake of using a paper towel to dry my glasses. That fuzzy fabric not only couldn’t wipe off residual particles but also smudged and pressed the particles into the lens surface. It was a quick lesson in the importance of proper cleaning techniques, like using a soft microfiber cloth and avoiding harsh chemicals.
For those of you eager to get your lenses shining like new, understanding the root causes is half the battle won. Want to learn how to effectively clean your glasses and prevent that cloud from coming back? You’re in the right place. We’ll be tackling practical steps soon, including reviewing the types of cleaning agents that work best and water quality tips. If you’ve been battling this fog, don’t worry—solutions are ahead! But first, let’s address a common concern many have about the process.
Start with a Gentle Rinse
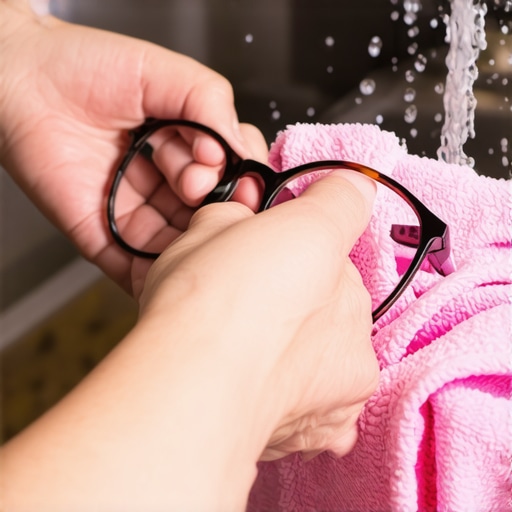
Begin by rinsing your glasses under lukewarm, running water. Avoid hot water, which can strip away protective coatings. Use your fingers to gently remove dust and debris. I once brushed off my glasses with a tissue, only to scratch the lenses—so I learned to rinse properly from that experience.
Choose the Right Cleaning Solution
Select a mild soap, ideally one free of fragrances and dyes. Avoid harsh chemicals like ammonia or bleach, which can damage coatings. A drop of dish soap on your fingertips works well. I experimented with various products before settling on a gentle soap, noticing my lenses stayed clearer longer.
Use Microfiber Cloth Wisely
Always dry with a soft microfiber cloth to prevent scratches. Wipe in gentle, circular motions. I keep my microfiber cloth separate from towels; I once used a rough towel and ended up with microtears on my cloth—costly mistake!
Proper Drying Techniques Are Key
Avoid air drying or using rough fabrics. Pat the lenses dry with your microfiber cloth immediately after rinsing to prevent water spots. During a particularly humid day, I made sure to dry thoroughly, which prevented streaks.
Water Quality Matters
If you live in an area with hard water, mineral deposits can cause a cloudy film over time. Installing a water softener or using distilled water for rinsing can drastically reduce this issue. I added a filter to my tap, and the difference in clarity was noticeable after just a week.
Regularly Deep Clean Your Lenses
Every few weeks, give your glasses a deeper clean by soaking them in a mixture of vinegar and water—one part vinegar to three parts water—then rinse thoroughly. This dissolves mineral buildup and residue. Once, I neglected this step, and a quick soak restored my lenses to crystal clarity.
Avoid Certain Drying Materials
Never dry with paper towels or tissues—they can scratch the lenses. Cotton fabrics might seem soft, but lint can cling to the surface. Use a dedicated microfiber cloth every time. I keep mine in a separate pouch—no more smudges or scratches.
Learn When to Seek Professional Help
If stubborn cloudiness persists despite proper cleaning, it might be due to coating damage or other lens issues. Consider consulting an optician. I’ve had lenses recoated after noticing fogginess that wouldn’t go away, saving me from unnecessary replacement. For professional diagnostics insights, check out this guide.
 Many homeowners believe that simply reading error codes or following generic troubleshooting tips is enough to diagnose appliance issues. However, this approach often leads to costly mistakes and missed warranty claims. In my experience, a common misconception is that all diagnostic procedures are straightforward and universally applicable. But in reality, appliance diagnostics require an understanding of nuances, such as recognizing when a fault code might be misleading due to sensor malfunctions or software glitches. Relying solely on error codes without deeper investigation can result in false positives, causing unnecessary part replacements or voiding warranties.
One particularly sneaky trap many fall into is assuming that certain symptoms directly point to a specific component. For instance, a dishwasher leaving spots might be blamed solely on water hardness, ignoring issues like malfunctioning inlet valves or clogged filters. A comprehensive diagnostic process involves considering multiple potential causes, which is why professional insights are invaluable.
Make sure to avoid the mistake of skipping the ‘step-by-step’ diagnostic process that professionals recommend. Cutting corners or jumping straight to part replacement can not only drain your wallet but also risk invalidating your warranty. As highlighted in expert sources, proper diagnostics—guided by an understanding of common pitfalls and device-specific behaviors—are key to effective repairs and warranty protection. You might find it helpful to review how appliance diagnostics can truly save your warranty benefits by reading this insightful article: Understanding appliance diagnostics.
Another advanced nuance is recognizing the difference between a device’s fault and user-related issues. For example, persistent dishwasher errors might stem from improper loading or incompatible detergents rather than mechanical failures. Professional diagnostics involve evaluating usage patterns and environmental factors, which many DIYers overlook, leading to misdiagnoses.
So, how can you elevate your diagnosis game? First, familiarize yourself with common diagnostic traps and avoid jumping to conclusions too quickly. Second, understand that warranty claims hinge on proper evidence—documenting symptoms, error codes, and repair steps. This thorough approach ensures you don’t unintentionally void your warranty by misdiagnosing or mishandling repairs.
Remember, appliance diagnostics isn’t just about fixing what’s broken—it’s about understanding the intricacies and avoiding pitfalls that could cost you time and money. For a deeper dive into how professional diagnostics can benefit you, visit this guide. Don’t fall into the trap of trusting surface-level symptoms; get to the real root of the problem to protect your investment.
Have you ever fallen into this trap? Let me know in the comments.Maintaining your appliances effectively requires more than just a good eyeball and a manual. Investing in the right tools and establishing consistent habits can save you time and money, especially when troubleshooting dishwasher or warranty issues. One of the most valuable tools I personally use is a high-quality digital multimeter. It allows for precise testing of electrical components like thermostats, heating elements, and switches, ensuring you don’t replace parts unnecessarily. I prefer models with auto-ranging capabilities to save time and improve accuracy. Additionally, a good impedance adapter can help when testing sensors and control boards, which are often sources of persistent faults.
Another crucial tool is a set of specialty screwdrivers and pry tools designed specifically for appliance panels. Using the wrong screwdriver can strip screws or damage delicate plastic clips, leading to costly repairs or voided warranties. I recommend investing in a screwdriver set with insulated handles and a magnetic tip set for quick access to tiny screws.
Regular calibration and inspection routines are equally important. For example, periodically checking the water inlet pressure with a manometer ensures your dishwasher is getting enough water, preventing issues like incomplete cycles or error codes. Coupling this with routine cleaning of filters and hoses, following detailed guides like this article, ensures longevity and consistent performance.
Looking ahead, I predict that the integration of IoT (Internet of Things) diagnostics will become standard. Smart diagnostics apps connected to your devices can preemptively alert you to issues before they escalate, resembling a health monitor for your appliances. To prepare yourself, familiarize with current diagnostic tools like Fluke’s HomeTRIAD multimeter, which seamlessly pairs with smartphone apps for real-time analysis.
How do I keep my diagnostic tools in tip-top shape over time? Regularly calibrate them according to manufacturer instructions, and store them in a dry, cool environment to prevent corrosion. Also, keep a detailed log of testing results; it helps identify patterns and makes warranty claims smoother since you have documented evidence of maintenance and diagnostics.
If you’re interested in elevating your maintenance game, I highly recommend trying the detailed troubleshooting techniques I’ve shared, especially using a multimeter for complex electrical faults—this is a game-changer. Exploring these practices will help you diagnose issues correctly, maintain your appliances longer, and ensure that your warranty remains valid should an issue arise. For in-depth tutorials on diagnosis, check out this resource. Remember, the key to keeping your appliances reliable is consistency in maintenance and investing in the right tools. Stay vigilant, and your appliances will thank you!
Lessons That Changed My Approach to Glasses Maintenance
One of the most eye-opening lessons I learned was that the real enemy isn’t dirt, but the residues that linger unseen. I used to think that a quick rinse and wipe were enough, but I soon realized that without proper water quality and cleaning techniques, those stubborn cloudy films kept coming back, making me question my efforts.
Another insight was understanding the importance of patience. Rushing the cleaning process—like scrubbing with rough fabrics or skipping thorough rinses—inevitably damaged my lenses or left behind deposits. Embracing gentle, deliberate movements made a huge difference.
Finally, I learned to look beyond surface solutions. Minor issues like hard water deposits or using unsuitable cleaning agents can sabotage even the best routines. Deep cleaning with vinegar solutions and investing in quality tools transformed my glasses from foggy to crystal-clear, inspiring confidence in my maintenance habits.
Tools and Resources That Elevated My Routine
Over time, I discovered that having the right tools makes all the difference. A high-quality microfiber cloth is non-negotiable—it’s gentle yet effective. I trust the professional-grade microfiber cloths because they prevent scratches and lint, ensuring a spotless finish.
Distilled water became my go-to for rinsing, especially in areas with mineral-rich tap water. Investing in a simple water filter saved me from persistent film buildup. For deep cleaning, a homemade vinegar and water mixture—one part vinegar to three parts water—works wonders for dissolving mineral deposits without harsh chemicals.
Lastly, I rely on a good multimeter and diagnostic guides from trusted sources like this resource to better understand appliance behaviors and prevent unnecessary replacements, saving me both time and money.
Keep Moving Forward with Confidence
Taking charge of your glasses’ cleanliness and your appliances’ health isn’t just about maintenance—it’s about empowering yourself with knowledge and the right tools. Every step you master today reinforces that you’re capable of handling more complex issues tomorrow. Remember, no matter how daunting a problem seems, there’s always a solution waiting to be uncovered. Equip yourself, stay curious, and enjoy the clarity that comes with prepared, confident maintenance.
Have you ever struggled with stubborn residues sticking after cleaning? Share your experience below—I’d love to hear what worked (or didn’t) for you!