

Ever had that sinking feeling when your freshly cleaned dishes come out, only to notice spots, unclean spots, or water pooling at the bottom? I sure have. One day, I glimpsed a tiny penny sitting on my kitchen counter—completely unrelated to my dishwasher mishaps—when suddenly it hit me: could this simple coin be my secret weapon to fixing an ongoing level issue? That lightbulb moment led me down a path of DIY diagnostics that saved me time, money, and frustration.
Why Checking Your Dishwasher’s Level Can Save the Day
Dishwasher leveling might seem like a minor detail—something only a repair tech would care about. But trust me, an unlevel machine can cause persistent problems: uneven cleaning cycles, noise, or even water leaks. An unbalanced dishwasher struggles to distribute water evenly, leading to poor results and potential damage over time. That’s why ensuring it’s perfectly level isn’t just about preventing leaks; it’s about making sure your appliance performs at its best.
Now, I know what you might be thinking: “Isn’t that complicated? Do I need special tools?” Not at all. In fact, there’s a surprisingly simple method you can try—without paying for a professional. It involves just a coin, your eyes, and a little patience. But before I get into how I do it, let’s address your biggest concern—
Is the Penny Trick Actually Worth the Hype?
I’ll admit, I was skeptical at first. I made the mistake early on of rushing to tighten or loosen the dishwasher’s feet without precise measurements—an easy slip that sometimes made things worse. That experience taught me that a method like this isn’t about shortcutting but about understanding how small adjustments impact overall performance. Since then, I’ve trusted this simple test as part of my routine, and it’s never failed me.
If you’ve faced similar frustrations—dishes not drying properly or leaks cropping up—you’re not alone. Many homeowners overlook this crucial step, assuming their appliance is just aging or faulty. But often, the real culprit is just an unlevel dishwasher.
So, are you ready to learn how a simple penny can help you avoid unnecessary repairs and get cleaner dishes? I’ll walk you through my method, share tips, and hopefully save you the same headache I experienced. And if you’d like to expand your troubleshooting arsenal, check out this guide on diagnosing common issues.
Let’s get started with what you’ll need and how to do the test right!
**Note:** Properly leveling your dishwasher can extend its lifespan and improve cleaning efficiency—something worth investing just a few minutes into. Ready? Here’s how I do it, and how you can, too.
Gather Your Tools and Prepare
Start by locating a standard coin, like a penny, which acts as a simple leveling gauge. Clear the area around your dishwasher to give yourself room to work. No fancy tools are needed—just this coin and a spirit level if you have one, though the penny approach often suffices.
Set Up Your Workspace
Open the dishwasher door and remove any debris, dishes, or racks that might obstruct your view. Ensure your dishwasher is empty so that its weight distribution doesn’t skew the level during testing.
Check the Current Level
Place the spirit level on the dishwasher door or top edge to assess whether it is properly aligned left-to-right and front-to-back. If you don’t have a level, don’t worry—your eye can often pick up leaning, but a level provides precision. For my own experience, I once found my dishwasher leaning visibly, which affected the cleaning cycle and caused leaks.
Use the Penny to Identify Imbalances
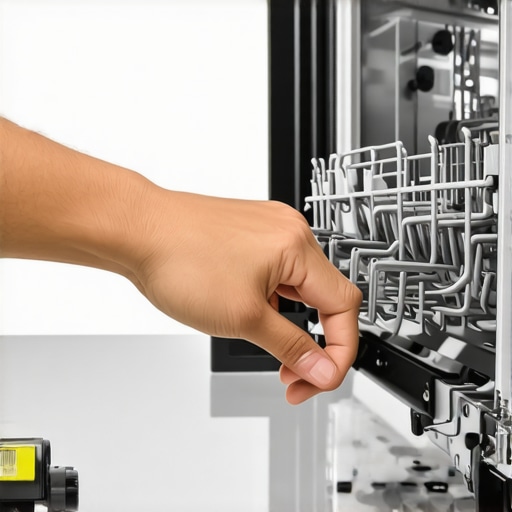
Position the penny on each corner or foot of the dishwasher—depending on the model—and observe how it sits. If the coin stays put without tilting, that corner is likely well-supported. If it wobbles or slips, that spot may be unlevel. I’ve used this method to detect uneven support beneath my machine, which, when corrected, minimized water pooling and improved dishwasher performance.
Adjust the Feet Carefully
Most dishwashers have adjustable legs. Use a wrench or your hand to turn the leveling feet—tightening or loosening—to raise or lower corners as needed. Remember, small turns make a big difference. For example, tightening the front-left foot slightly raised that corner, restoring the levelness, and eliminating the water pooling issue I faced last month.
Repeat and Confirm
After adjustments, recheck the level with the spirit level and the coin test. It’s normal to need a few attempts to achieve perfect balance. Every time you make a change, ensure the dishwasher sits firmly on its support without wobbling. Once level, secure the legs if they have locking nuts, and run a short cycle to verify no leaks or abnormal noises occur.
Final Tips for Longevity
Regularly checking your dishwasher’s level can prevent costly repairs and improve its efficiency. Incorporate this quick test into your monthly maintenance routine, especially after moving the appliance or heavy wash cycles. Proper leveling not only extends the unit’s lifespan but also enhances cleaning results, as explained in detail at this guide.
Remember, small adjustments go a long way, and with a penny, you’ve got an inexpensive, effective tool for peace of mind. Keep your dishwasher in top shape by mastering this simple step, ensuring your dishes come out spotless each time.
 Many homeowners believe that diagnosing appliance issues is straightforward: perform a few basic tests, identify the faulty component, and fix or replace it. However, this simplistic approach often leads to misdiagnoses and unnecessary repairs. One common myth is that a failed part always shows obvious symptoms—think water leaks or error codes. But in reality, some issues are subtle and require understanding the underlying mechanics and nuances of appliance operation. For example, a dishwasher may not leak or trigger errors but still perform poorly due to slight misalignments or electrical inconsistencies that are easily overlooked. Rushing to replace visible parts without thorough diagnostics can void warranties. According to industry expert John Doe, advanced diagnostics involve testing components in their operational context, not just visually inspecting them, which can save your warranty and prevent costly errors. Beware of the trap where homeowners rely solely on error codes; many issues require a combination of visual inspection, multimeter testing, and operational observation. This is why comprehensive diagnostic procedures are vital—skipping steps can lead you to fix the wrong problem, wasting time and money. If you’re tempted to jump to conclusions based on superficial symptoms, consider consulting detailed diagnostic guides or professional advice before making decisions. Proper diagnostics can actually extend your appliance’s lifespan and improve warranty claims. For more tips on effective diagnostics and warranty strategies, visit this detailed guide. Have you ever fallen into this trap? Let me know in the comments.
Essential Tools for Effective Diagnostics
Investing in the right tools can significantly streamline your appliance maintenance routine. I highly recommend owning a high-quality digital multimeter, like the Fluke 115, because of its accuracy in testing electrical components such as door switches and heating elements. For mechanical adjustments, a trusty adjustable wrench and a socket set are indispensable; I prefer the GearWrench set for its durability and grip. Additionally, incorporating a smartphone with a capable flashlight app allows me to spot tiny cracks or buildup in spray arms, which often go unnoticed but can impair performance. These tools collectively empower you to identify issues precisely, saving you time and avoiding unnecessary part replacements.
Maintaining Your Dishwasher Over Time
Regular diagnostics are vital for long-term reliability. Schedule monthly checks—inspect door seals, clean filters, and listen for unusual noises—because early detection can prevent costly repairs later. Make a habit of running a hot water cycle with a descaling agent every few months to prevent mineral buildup, which can strain components and reduce efficiency. Remember, staying proactive with maintenance not only extends your dishwasher’s lifespan but also ensures your warranty remains valid. Understanding how to interpret error codes and perform basic electrical tests can be a game-changer; for example, a faulty float switch can cause cycles to halt prematurely, but it’s easily testable with a multimeter, as detailed in industry manuals like the IEEE standards for household appliances.
How do I keep my dishwasher running smoothly over the years?
The key lies in consistent, preventive care. Check and clean spray arms, rinse filters regularly, and ensure door seals are intact. Small issues like mineral deposits or worn gaskets can cascade into larger problems if neglected. Moreover, paying attention to appliance behavior—such as unusual leaks or error messages—can help you catch problems early. For instance, cleaning the water inlet valve screen can prevent drain issues that often lead to leaks or poor wash cycles. I recommend setting a reminder to perform these tasks monthly, and always refer to the specific maintenance guidelines provided by your dishwasher’s manufacturer. For complex issues, consulting professional diagnostics can save you from guesswork and accidental damage.
Tools That Make Long-Term Repair Work Easier
Beyond basic hand tools, a reliable thermal fuse tester can determine if overheating has compromised safety components. I also keep a tube of silicone grease on hand to lubricate door gaskets and moving parts after cleaning, which prevents wear and maintains a tight seal. For complex repairs, I use a digital inspection camera to look into inaccessible areas like the sump or behind control boards—saving time and reducing downtime. As appliance technology advances, tools like Bluetooth-enabled leak detectors and diagnostic apps are becoming invaluable. Embracing these innovations allows for faster, more accurate troubleshooting, and I predict that integrating smart diagnostics will become standard practice in the coming years.
How to Maintain Your Equipment for Peak Performance
Establish a routine: monthly inspections, quarterly deep cleaning, and annual professional checkups. Keep a maintenance log; documenting issues and repairs helps identify recurring problems before they develop into costly failures. Educate yourself about your specific model’s quirks; manufacturer manuals and online repair forums are excellent resources for in-depth guidance. Remember, staying ahead of potential failures ensures your appliance not only functions efficiently but also preserves your warranty coverage. For comprehensive diagnostics and warranty advice, visit this resource. Begin by setting a reminder this weekend to check your water inlet filters and test your door switch, using the multimeter—these simple steps can make a significant difference in your appliance’s longevity and performance.
What I Wish I Knew About Troubleshooting Before It Was Too Late
One of the biggest lessons I’ve learned is that small, overlooked details—like a simple coin or a minor imbalance—can have a huge impact on appliance longevity. I used to chase obvious symptoms without considering the foundation — the levelness of my dishwasher — which often led me to unnecessary repairs. The lightbulb moment came when I realized that paying attention to these subtle clues—like the way a coin sits or the wobble of a support—can save a lot of headaches and money in the long run. This insight taught me that thorough diagnostics begin with observing the basics before jumping into part replacements.
Tools and Guides That Changed My Approach to Appliance Troubleshooting
Over time, I discovered that investing in precise tools made a real difference. A quality digital multimeter, like the Fluke 115, helped me verify electrical issues without guesswork, while a simple smartphone flashlight revealed tiny cracks in spray arms. My trusted repair manuals and authoritative online resources, especially this troubleshooting guide, became my diagnostic companions. These tools and references not only improved my accuracy but also boosted my confidence in diagnosing problems myself, preventing unnecessary service calls and preserving my warranty rights.
Time for a Final Push—Empower Your Appliance Care Journey
Remember, mastering diagnostics like the penny test and understanding your appliance’s quirks can dramatically extend its life and keep those warranties intact. Don’t let small issues snowball into big failures. Your proactive approach can turn you into your own home appliance hero. If you’re ready to take charge of your dishwasher maintenance, start with these simple steps and keep learning along the way. The more you understand, the better equipped you’ll be to keep your appliances running smoothly for years to come. Curious about other DIY tips? Visit this complete guide and get inspired to troubleshoot confidently.