

Have you ever faced that sinking feeling when your trusty dishwasher starts to act up, especially with stubborn mineral deposits plastered all over the spray arms? I remember the first time I noticed white, gritty residue clogging those tiny nozzles—thought I was doomed to replace the entire spray assembly. Turns out, I was just missing a simple, affordable solution that anyone can try at home.
Nothing Prepared Me for That Calcium Nightmare
It hit me one hectic morning when my dishwasher’s spray arms sputtered instead of spinning freely. Water barely reached the dishes, and I knew mineral buildup was the culprit. Like many, I assumed I needed harsh chemicals or a costly repair service. But after a little digging, I discovered that a common kitchen ingredient—citric acid—could dissolve calcium deposits effectively. That moment became my lightbulb—simple, safe, and economical. Today, I’ll share how I used citric acid in my sprayer to tackle stubborn calcium, and how you can do the same, possibly saving you hundreds in repair fees.
Is Citric Acid Really the Magic Bullet for Calcium Cleaning?
Out of curiosity and desperation, I first tried fancy descaling products, but they either didn’t work well or were toxic. Then I read that citric acid is a natural chelating agent that binds to calcium and dissolves it. Interestingly, a study published in the National Institutes of Health shows that citric acid is highly effective for mineral removal and is environmentally friendly, too.
One mistake I made early on was thinking I needed to buy big commercial descalers when I already had what I needed in my pantry—lemons or citric acid powder. Using kitchen staples not only saved me money but also reduced exposure to harsh chemicals. Plus, I realized that many appliance issues stem from mineral buildup, which can be remedied easily if caught early, especially by just knowing the right cleaning hacks.
In this post, I’ll take you through the exact steps I followed—step by step—to dissolve stubborn calcium using citric acid in my sprayer. If you’re tired of clogged spray arms or mineral deposits turning your appliances into nuisances, stick around. We’re about to turn your frustration into a simple, effective fix. Ready to learn how to restore your appliances’ performance with just a few ingredients and a sprayer? Let’s dive in!
Prepare Your Workspace and Gather Supplies
Start by unplugging the dishwasher from the power outlet to ensure safety. Locate your citric acid powder—commonly found in the baking aisle or online. You’ll also need a spray bottle, preferably with a adjustable nozzle, and some old towels or rags for potential spills. Remember, safety first: wear gloves if you have sensitive skin.
Create the Citric Acid Solution
Mix a solution of 1-2 tablespoons of citric acid powder in a cup of hot water, stirring until fully dissolved. This concentration is effective against calcium deposits without risking damage to your dishwasher’s parts. I once made the mistake of using too strong a mixture, which caused minor corrosion, so measure carefully. Use a funnel if needed to pour the solution into your spray bottle for even application.
Apply the Solution to Spray Arms and Nozzles
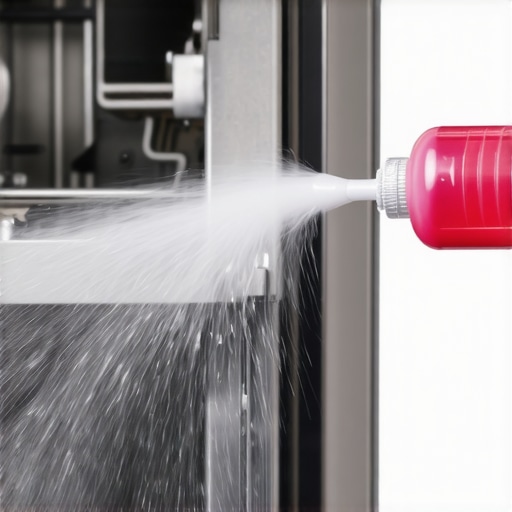
Spray the solution generously onto the spray arms, focusing on the nozzles where mineral deposits tend to clog. If your spray arms are removable, take them out for better access. I remember the first time I did this, I used too much solution and had a small mess—those towels came in handy. This step loosens the calcium buildup, making it easier to rinse away later. Be sure to spray all accessible parts, including the filter area beneath the spray arms.
Let the Solution Work and Clean
Allow the citric acid solution to sit for 15-20 minutes. During this time, it chemically reacts with the calcium deposits, dissolving them. I once left the solution longer, but overdoing it might erode rubber seals, so stick to the recommended time. After soaking, use an old toothbrush or soft cloth to scrub away loosened deposits. This manual removal is akin to cleaning a stubborn stain—effort yields results.
Rinse Thoroughly with Water
Refill your spray bottle with plain hot water and spray it through the spray arms to flush out residual citric acid and dislodged calcium. For removable parts, rinse them under running warm water. Run an empty dishwasher cycle to rinse the interior thoroughly. If you notice lingering deposits, repeat the application process once more.
Prevent Future Mineral Buildup
To keep your dishwasher running smoothly, consider regular maintenance with citric acid every six months, especially if you have hard water. Installing a water softener can drastically reduce mineral deposits, prolonging the life of your appliance. For ongoing issues or if the problem persists, consulting a professional might be necessary—knowledgeable technicians understand these issues inside out and can prevent warranty voids if diagnosed properly (learn how diagnostics protect your warranty).
Many homeowners operate under misconceptions when it comes to diagnosing appliance issues or navigating warranties, which can lead to costly mistakes. One prevalent myth is that all appliance problems are straightforward and resolvable without professional help. However, this oversimplification often results in overlooked nuances that can affect repair outcomes and warranty claims. By understanding these subtleties, you can better assess when to seek expert diagnostics or trust your warranty coverage.
Why DIY Repairs Might Sabotage Your Warranty and Actual Performance
A common mistake is assuming that tackling repairs yourself always saves money. While minor maintenance can be DIY-friendly, attempting complex diagnostics or repairs without proper knowledge might void your warranty—especially if the manufacturer explicitly states so. For instance, many warranties are voided if non-authorized service or unofficial parts are used. According to the detailed guidelines outlined here, understanding the fine print is crucial before starting any DIY fix.
Moreover, improper repairs can cause further damage, making professional diagnostics the smarter choice. Not recognizing early signs of a malfunction, like a failing circulation pump or subtle electrical issues, can lead to more extensive and expensive repairs down the line. Advanced diagnostic tools, such as thermal imaging or smart sensor analysis, provide insights beyond the average homeowner’s reach and can prevent unnecessary part replacements.
How to Spot a False Sense of Security in Appliance Maintenance
Another misconception is that if an appliance appears to run normally after cleaning or minor fixes, the underlying issues are resolved. The top signs of hidden problems often include subtle inefficiencies or increased energy consumption, which are easy to overlook. Relying solely on visual checks or surface-level performance can give a false sense of security, causing homeowners to delay necessary diagnostics that could catch faults early.
Advanced diagnostics such as vibration analysis or acoustic sensors can detect micro-cracks or motor wear that aren’t obvious during normal operation. Recognizing these signs and acting swiftly can extend appliance lifespan and safeguard warranty pursuits. As shown in recent studies, early detection through professional diagnostics significantly improves repair success rates and prevents warranty denials.
Are Warranties Truly Protecting Your Investment?
Lastly, many users misunderstand the scope of their warranties. They often believe that warranties cover all repair costs, neglecting exclusions like damage from misuse or neglect. Reading your warranty policy carefully and understanding what’s covered—especially for components like electronic control boards or water inlet valves—is essential. If you’re unsure, experts suggest consulting resources like here, which delve into how professional diagnostics can actually enhance your warranty claims and prevent unexpected expenses.
In conclusion, know that appliance repair and warranty landscapes are riddled with nuanced rules and misconceptions. Avoid falling into common traps by leveraging expert diagnostics, understanding your warranty’s fine print, and recognizing the subtle signs of trouble. Have you ever fallen into this trap? Let me know in the comments.
Maintaining your dishwasher’s optimal performance over time requires more than just routine cleaning. Investing in the right tools and establishing effective methods can significantly extend its lifespan and ensure consistent cleaning results.
Why I Trust a Digital Inspection Camera for Diagnostics
One of my go-to tools is a compact digital inspection camera, often called a borescope. This device lets me peer into tight spaces like the interior of spray arms or beneath filters without disassembling the entire unit. I personally use the DEPSTECH Wi-Fi Endoscope, which streams clear images to my smartphone, enabling me to identify clogs or damage precisely. This saves me time and prevents unnecessary parts replacements. As appliance diagnostics evolve, these cameras are becoming indispensable for both DIY enthusiasts and professionals, offering a glimpse into hard-to-reach areas that reveal the true condition of components.
Software That Enhances Troubleshooting Accuracy
Beyond physical tools, I recommend using specialized diagnostic software aligned with smart appliance diagnostics. Platforms like these resources help in interpreting error codes and sensor data by providing step-by-step troubleshooting procedures. For instance, connecting a diagnostic scanner to your dishwasher’s control board can uncover issues ranging from faulty temperature sensors to defective circulation pumps. Using such software ensures you address the root cause, not just surface symptoms, preventing recurring problems and safeguarding your warranty.
Regular Calibration and Testing Tools to Ensure Long-Term Reliability
To keep your dishwasher functioning smoothly, periodic calibration of safety switches and sensors is vital. I use a multimeter to verify continuity and proper voltage levels in components like float switches and thermistors. For example, following the detailed procedures outlined here helps ensure these parts operate correctly. Keeping a log of these tests can identify trends indicating impending failures, enabling proactive replacements before breakdowns occur.
Future Trends: Smart Diagnostics and AI Integration
Looking ahead, I believe the trend will shift towards more integrated smart diagnostics powered by artificial intelligence. Appliances will increasingly communicate their health status directly to manufacturer support or your smartphone, predicting failures before they happen. This proactive approach reduces downtime and repair costs, making maintenance more manageable. Embracing these advancements now, by investing in compatible tools and understanding their capabilities, sets the stage for seamless long-term appliance care.
How do I maintain my dishwasher’s performance over time?
Routine maintenance involves not only cleaning components but also using advanced diagnostic tools periodically to assess internal parts’ health. Regularly checking sensors with a multimeter and employing inspection cameras can catch issues early, saving time and money. For more insights on diagnostics and warranty protection, explore this guide. Don’t hesitate to try out a digital borescope during your next deep clean—it might just reveal a hidden problem before it escalates, keeping your dishwasher running smoothly for years to come.
Lessons Only the Pros Swear By
- One of the biggest eye-openers was realizing that DIY fixes, especially for complex issues, can sometimes do more harm than good if you’re not aware of warranty exclusions. I learned this the hard way when attempting repair without understanding the fine print, which led to unexpected costs and a voided warranty. Now, I always review warranty guidelines before tinkering and consult professional diagnostics when in doubt.
- Using simple tools like a digital inspection camera transformed how I identify internal problems. Spotting a clogged impeller or a worn-out circuit board early meant I avoided costly replacements. It’s a game-changer I recommend for anyone serious about appliance longevity.
- Understanding that mineral buildup isn’t just a cosmetic issue but a root cause of performance decline was a major revelation. Regular maintenance with citric acid has saved me from premature part replacements and extended the life of my dishwasher significantly.
- Many underestimate how subtle signs, like increased cycle times or faint noises, can signal underlying problems. Paying attention and acting promptly keeps appliances running smoothly, saves money, and maintains warranty coverage.
Tools and Resources That Keep Me Ahead of the Game
- DEPSTECH Wi-Fi Endoscope: Its ability to probe tight spaces without dismantling the entire unit helps me diagnose issues quickly. I trust its clear imaging and smartphone connectivity, making inspections more precise and less invasive.
- Smart Appliance Diagnostic Software: Platforms that interpret error codes and sensor readings transform troubleshooting from guesswork into data-driven decisions. They help me identify root causes efficiently, preventing unnecessary repairs and protecting my warranties.
- Multimeter and Basic Electronic Books: Testing sensors and switches accurately is essential. Resources like this guide have been invaluable for understanding electrical components and ensuring safe, reliable repairs.
- Water Pressure Measurement Tools: Maintaining optimal water flow prevents mineral buildup and performance issues. Regular checks keep my dishwasher performing at its best and give me peace of mind.
Embrace the Future—Make Repairs Smarter, Not Harder
Your journey toward appliance mastery isn’t just about fixing what’s broken—it’s about proactively maintaining your dishwasher’s health with the latest diagnostics and tools. Invest in a digital inspection camera or diagnostic software, and you’ll discover hidden problems before they escalate. Remember, the right knowledge and tools empower you to keep your appliances running smoothly, save money, and safeguard your warranty. Curious about your appliance’s health? Share your experiences or ask questions below—every repair expert was once a beginner on this path.