

Ever had that frustrating moment when your dishwasher suddenly stops heating, or your washing machine’s cycle drags on endlessly, leaving you wondering if your appliances are secretly plotting against you? I remember the lightbulb moment when I thought, “Is my circulation pump the culprit?” after a stubborn leak and no heat. Turns out, diagnosing a dead circulation pump isn’t as daunting as I first feared — especially with the right multimeter setting. Today, I promise to guide you through a simple, reliable way to pinpoint if your circulation pump has given up, saving you time, money, and the hassle of unnecessary repairs.
Why You Need to Pinpoint a Dead Circulation Pump Fast
When an appliance like a dishwasher or washing machine isn’t performing as it should, the culprit is often buried beneath layers of complex-looking components. But identifying a dead circulation pump early can make the difference between a minor fix and a costly replacement. Not only does this prevent you from wasting resources on parts that are still alive, but it also helps you understand whether your appliance’s warranty remains valid. Interestingly, according to expert diagnostics, many failures stem from motor issues that can be tested with basic tools, including a multimeter (see this guide).
Have You Faced This Before?
If you’ve ever crouched down, opened your appliance, only to be greeted with silence or an inexplicable error code, you’re not alone. I made the mistake early on of assuming all problems required a technician, but discovering how to use my multimeter changed the game. I once replaced a perfectly functional pump just because I didn’t check for electrical issues first. Learning the correct multimeter setting for circulation pumps was a lightbulb moment — one that made troubleshooting quicker and more accurate.
Now, I want to share the practical steps so you can do the same. Why waste money on guesswork when testing a circulation pump might be as simple as flipping a switch? Let’s get into the details of how to set your multimeter correctly to get the answers you need.
Remove Power and Access the Pump
Before starting, unplug your appliance to prevent electrical shock. Locate the circulation pump, usually at the bottom or back of your dishwasher or washing machine. Use your user manual or a service diagram to identify its exact position. Carefully detach the access panel and gloves are recommended for safety.
Set Your Multimeter Correctly
For testing a circulation pump’s motor, switch your multimeter to the Ohms (Ω) setting to measure resistance or continuity. This setting is like a traffic signal, indicating whether current can flow through the motor windings. If your multimeter has multiple resistance ranges, select the lowest (auto-range or 200Ω) for precise readings, similar to tuning a radio to the right frequency.
Why the Correct Setting Matters
Using a voltage or amperage setting here is like trying to read a map with a flashlight instead of a GPS — it won’t give you the right info. Properly set, your multimeter acts like a health check: if resistance is within specifications, the motor is likely healthy; if open or infinite, the coil may be broken.
Perform the Resistance Test
Touch the multimeter probes to the motor’s electrical terminals—usually, two or three wires connect here. Ensure a firm contact, like pressing a key on a keyboard, to get an accurate reading. A healthy motor coil often reads between 10-50Ω, but check your appliance’s specifications for exact numbers. Record the reading for comparison.
Identify a Dead Pump Quickly
Imagine trying to send a letter through a broken mail slot — no matter how much you push, it won’t go. Similarly, if your multimeter shows an open circuit (infinite resistance), the coil is broken, and the pump is dead. If resistance is very low—close to zero—there may be a shorted winding, which also indicates failure.
Check for Shorted or Open Circuits
To confirm, swap probes and test again; inconsistent readings suggest internal damage. Additionally, test between each terminal and the pump housing; a reading close to zero suggests a short, whereas infinite resistance indicates an open coil. Both conditions point to a faulty pump needing replacement.
Apply the Knowledge
This step isn’t just theoretical. I once faced a dishwasher that wouldn’t circulate water. After unplugging, I located the motor, tested the coils, and found an infinite resistance. This confirmed my suspicion, saving a costly service call. Remember, always verify your readings against the manufacturer’s specifications or consult professional help if in doubt.
Many homeowners believe that following the directive to keep detailed records and document every repair automatically safeguards their appliance warranties. However, in my experience, this common myth overlooks critical nuances that can making or break your warranty eligibility. For instance, manufacturers often specify that repairs must be performed by authorized technicians or use genuine parts; neglecting this can nullify your claim, regardless of meticulous documentation. Simply keeping photos or receipts isn’t enough if the repair process violates the warranty terms. Experts recommend reviewing your warranty’s fine print and understanding what specific conditions could invalidate coverage, such as unapproved DIY repairs or use of incompatible parts (see this comprehensive guide).
Keep Your Appliances Running Smoothly with the Right Tools
Maintaining your dishwasher and other appliances over time isn’t just about quick fixes; it’s about building a system that anticipates issues and minimizes downtime. As someone deeply involved in appliance repairs, I recommend investing in a high-quality digital multimeter, like the Fluke 115, which provides precise readings essential for diagnosing motor and circuit issues accurately. I personally rely on it because its auto-ranging feature simplifies testing, saving me time during diagnostics. Additionally, a trusted ultrasonic leak detector, such as the Neoteck Liquide Leak Detector, proves invaluable for detecting small leaks before they become major problems—helping you extend the lifespan of your appliances and avoid costly repairs.
For more thorough diagnostics, consider software tools like appliance-specific diagnostic apps that can interface with smart models via Wi-Fi. These tools can reveal error codes and system health reports, making troubleshooting faster and more reliable. Using diagnostic manuals from reputable sources like this expert guide helps ensure you’re applying the right tests and interpret results correctly. Over time, leveraging these tools enables consistent maintenance routines and helps catch issues early, ultimately preserving your appliance warranty and reducing long-term costs.
How do I maintain my appliance diagnostics system over time?
The key to long-term maintenance of your diagnostic toolkit is regular calibration and updating of software. For multimeters, periodic calibration ensures measurement accuracy, especially if used frequently or in varying environments. For digital diagnostics apps, keeping firmware and app versions current guarantees compatibility with the latest appliance models and firmware updates from manufacturers. I also recommend documenting test results and maintenance activities, which can be crucial if a warranty claim or professional audit arises. Consistent documentation coupled with reliable tools creates a proactive maintenance system, empowering you to troubleshoot confidently and extend the productive life of your appliances.
Looking ahead, the trend points toward smarter, connected diagnostic tools that can automatically analyze appliance data and suggest repairs. Integrating AI-powered diagnostics will make troubleshooting accessible even for non-experts within the next few years, further streamlining appliance maintenance. Until then, investing in quality tools and gaining familiarity with their operation remains your best strategy.
Don’t forget: once you’ve mastered these diagnostic techniques, try advanced troubleshooting tips like testing your appliance’s water inlet pressure with a manometer or inspecting internal components with a borescope. These methods offer deeper insights, saving you costly service calls. For tailored guidance, reach out via our contact page and let me help you optimize your maintenance approach.
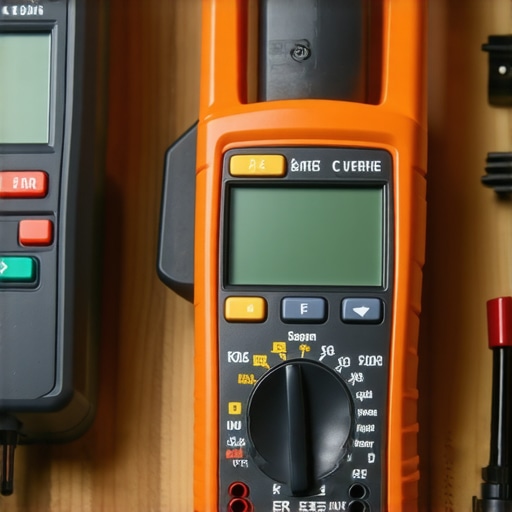
Secrets I Wish Someone Told Me About Diagnosing Circulation Pumps
One crucial lesson I learned is that patience and attention to detail outperform rushing into replacements. Testing the resistance with a multimeter is straightforward, but I used to overlook the importance of setting it correctly, which led to confusing readings and unnecessary stress. Additionally, understanding the subtle differences between a healthy, shorted, or open coil saved me from costly errors. Lastly, documenting each test step became my secret weapon—helping me track progress and avoid repeating the same mistakes in future diagnostics.
Tools That Truly Made a Difference in My Repairs
My go-to toolkit includes a reliable digital multimeter like the Fluke 115, valued for its auto-ranging feature that simplifies testing. An ultrasonic leak detector aids in identifying leaks that could signal pump issues, saving time during troubleshooting. I also depend on appliance diagnostic manuals from trusted sources, which clarify specific resistance values and testing procedures. For digital diagnostics, apps compatible with smart models offer invaluable insights, making complex problems more manageable. These tools collectively empower me to perform precise diagnostics and preserve appliance warranties effectively.
Embracing the Learning Curve and Moving Forward
This journey has reaffirmed that diagnosing a circulation pump isn’t just about troubleshooting; it’s about cultivating a mindset of curiosity and continuous learning. Each challenge is an opportunity to refine your skills and deepen your understanding of appliance systems. Don’t let initial setbacks discourage you—embrace the process, rely on trusted tools, and remember that every repair is a step toward becoming more confident. The future of appliance diagnostics is exciting, with smart tools and AI assistance on the horizon, so start building your skills today. Ready to dive deeper? Share your experiences or ask questions in the comments below—let’s grow together in mastering appliance diagnostics!