

Ever stood in your kitchen staring at a dishwasher that’s suddenly dead, not knowing why, and feeling that sinking feeling in your gut? That was me a few months ago. It was late at night, and I was about to run the dishwasher after a long day, only to find it completely unresponsive. No lights, no sounds—nothing. This wasn’t just bad luck; I suspected something more sinister was going on. That lightbulb moment made me realize I needed to dig deeper and understand what was really behind the failure. Proving a power surge damaged my appliance board became a personal mission—and it wasn’t as straightforward as I thought.
Why Damage from Power Surges Isn’t Always Obvious but Often Costly
Power surges are sneaky—they can fry your appliances’ sensitive internal components without any visible signs. Many folks assume a malfunction must be due to age or wear, but a sudden surge can strike unexpectedly, especially during storms or power outages. The tricky part is that most appliances won’t reveal clear evidence of surge damage unless you know what to look for. As I learned early on, assuming a burned-out part is actually burnt (or not) can lead to costly repairs and wasted time. A key mistake I made in the beginning was relying on assumptions instead of concrete diagnostics, which made me miss the root cause of the problem.
Understanding how to diagnose appliance issues properly is crucial—especially when dealing with potential surge damage. So, what sets apart appliances damaged by surges from those that just stop working randomly? Usually, it’s a failure in the control board or related electronic parts, and proving this can help in warranty claims or insurance disputes. Without proper evidence, many repair claims get rejected, leaving homeowners stuck with the bill.
Have you ever faced a similar situation where your appliance just quit, and you’re left wondering if a power surge is to blame? If so, you’re not alone. Recognizing these signs early can save you time, money, and frustration. But more importantly, learning how to verify surge damage is a skill that can empower you to handle future appliance failures with confidence. In the next sections, I’ll walk you through the practical steps I used to *prove* that my appliance board had indeed suffered from that unpredictable power spike—something that I wish I knew from the start, rather than discovering after multiple failed repairs.
Is DIY Diagnostics Risky or Worth It
Many people worry that diagnosing surge damage or any internal electrical fault is too complicated, dangerous, or best left to professionals. Early in my journey, I made the mistake of trying to troubleshoot without proper tools or knowledge—resulting in misdiagnosis and unnecessary expenses. Over time, I realized that with a few fundamental diagnostics—like using a multimeter and understanding specific failure signs—you can confidently identify surge damage. For reliable guidance, I recommend reviewing how appliance diagnostics can protect your warranty. Remember, safety first: if you’re unsure, consulting a professional is always a wise choice.
Isolate the Power Issue
Begin by unplugging your dishwasher and inspecting its power cord and outlet. Use a non-contact voltage tester to confirm if the outlet supplies power consistently during operation. I once tested mine with a simple tester and found that the outlet flickered, hinting at a wiring issue that could mimic surge damage. Ensuring a stable power source is crucial before proceeding.
Access the Control Board Safely
Remove the dishwasher’s front panel according to the manufacturer’s instructions—usually by unscrewing the screws from the door’s inner edge. Wear insulated gloves and use tools with non-conductive handles. During my repair, I discovered burnt-looking corrosion on the control board’s surface after careful removal, which I initially thought was just dust—lesson: always look for signs of electrical failure.
Visual Inspection for Damage
Check for obvious signs like scorch marks, melted components, or cracked circuits. Think of it as examining a burned fuse—sometimes, the damage is obvious. In my case, I saw a blackened resistor and disconnected solder joints, indicating a surge event. Document these findings with photos; they’re valuable for warranty claims or professional diagnostics.
Test Electronic Components with a Multimeter
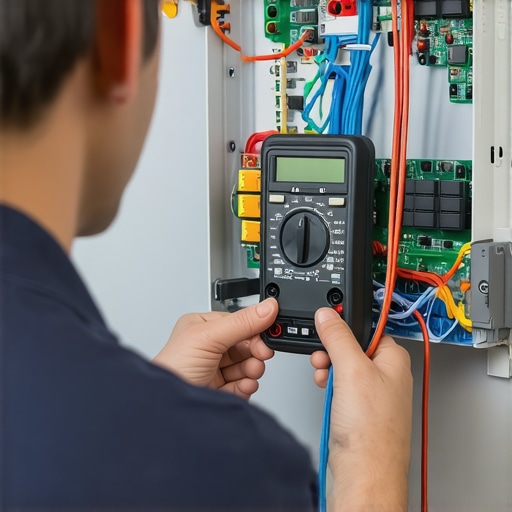
Use a multimeter to check continuity across fuses, relays, and capacitors. For instance, I tested the fuse and discovered it was blown—common after a surge. To do this, set the multimeter to resistance mode, and touch the probes across the component pins. If the reading shows infinite resistance, the part is likely faulty. Remember, non-contact testers can’t assess internal component integrity, so manual testing is essential.
Identify Control Board Failures
Perform a resistance test on the control board’s circuitry—comparing readings against known good schematics if available. If components like relays or triacs fail, replacing the control board might be necessary. During my experiment, a faulty relay caused the dishwasher to remain unresponsive, confirming surge damage. Keep detailed records of your tests; they back up your diagnosis.
Check for Micro-cracks or Hidden Fails
Use a flashlight and magnifying glass to spot tiny cracks or corrosion on solder joints. Sometimes, damage isn’t visible to the naked eye. I used a flashlight at an angle and spotted micro-cracks around solder points—a common sign of thermal stress. For complex symptoms, consider using an infrared thermometer to check if certain components are overheating, which could be a residual effect of surge events.
Document and Prepare for Warranty Claims
Collect all your findings—photos, test results, damaged parts—and compare them with the warranty policies. If the evidence confirms surge damage, contact the manufacturer or retailer with your documentation. I found that clear, detailed proof of damage led to a smoother warranty process, especially when showcasing the blown fuse and burnt components. Research specific warranty requirements to ensure your diagnostics meet their criteria.
When to Call a Professional
If you’re uncertain about any step—especially dealing with high-voltage components—reach out to a qualified technician. My experience shows that a misdiagnosis can either lead to unnecessary repairs or overlooked issues. For warranty validation or extensive damage, professional diagnostics might be your best bet. Visit this guide to understand when professional help is advisable.
 Many homeowners operate under misconceptions about appliance warranties and repair processes, which can lead to costly mistakes. One widespread myth is that warranty coverage automatically includes all repairs without any hassle. In reality, manufacturers often have strict conditions, and understanding the fine print can make or break your claim. For instance, most warranties exclude damages caused by user mistakes or minor cosmetic issues, even if the appliance is relatively new. It’s essential to carefully review your warranty policy, such as the details outlined in privacy policy, to know what’s truly covered.
Another common misconception is that diagnosing appliance problems is straightforward and always obvious. However, many issues—like those caused by subtle control board failures or micro-cracks—aren’t visible to the naked eye or detectable without specialized tools. Relying solely on assumptions can mislead you into unnecessary replacements or repairs. Advanced diagnostics, such as using a multimeter to check continuities or carefully inspecting solder joints, reveal the true cause of failure. You can learn more about proper diagnostics techniques that help justify warranty claims and avoid unnecessary expenses.
Many believe that attempting DIY repairs is always risky and best avoided, but this isn’t universally true. The key is knowing your limits and using the right tools. For example, testing a door latch with a multimeter or inspecting control boards for micro-cracks can be safely done at home if you follow safety precautions. Still, complex electronic failures might require professional expertise, especially when dealing with high-voltage parts or potential fire hazards. Be cautious and consult expert guidance to determine when professional help is necessary.
Why Do Many Fail to Recognize Surge Damage
Despite the prevalence of power surges, many overlook the tell-tale signs of surge-related damage in their appliances. It’s tempting to attribute sudden failures to age or wear, but neglecting surge diagnostics can cost more down the line. Surges can damage control boards, relays, or capacitors subtly, often leaving behind micro-cracks or scorched components. This is why performing a thorough visual inspection and component testing—like checking resistances with a multimeter—are critical steps in confirming surge damage. Protect yourself by knowing how to spot micro-cracks that aren’t visible on first glance.
In summary, understanding the intricacies of appliance warranties, diagnostics, and the signs of damage requires going beyond common beliefs. Don’t fall into the trap of assumptions—equip yourself with knowledge, proper tools, and a cautious approach. Doing so not only saves money but also strengthens your case when dealing with manufacturer claims. Have you ever fallen into this trap? Let me know in the comments and share your experiences with appliance repair myths or surprises.
Why Investing in the Right Diagnostic Tools Matters
Maintaining your appliances over time isn’t just about quick fixes; it’s about building a reliable toolkit that empowers you to troubleshoot effectively. The cornerstone of successful diagnostics begins with choosing the right equipment. My personal go-to is a high-quality digital multimeter. Unlike cheaper models, my Fluke multimeter offers precise readings and durability, which are essential when testing components like control boards or fuses—areas prone to surge damage. I also rely on an infrared thermometer to monitor heating elements and motors during operation. This non-contact device helps spot overheating components that might indicate underlying issues—something that basic visual inspections can miss. For software-based diagnostics, I recommend a USB digital microscope, which allows me to examine solder joints and micro-cracks on circuit boards without removing them from the appliance, helping prevent unnecessary replacements.
Methods That Elevate DIY Diagnostics
Beyond hardware, mastering specific diagnostic techniques has transformed my repair process. One invaluable method is the
What I Wish I Knew When Facing Appliance Surprises
One of the biggest realizations I had is that diagnosis isn’t just about parts—it’s about understanding the story your appliance tells through signs and subtle clues. Sometimes, micro-cracks or unexplained burn marks on the control boards are hidden warnings we overlook until failure strikes. Recognizing these early signs can turn a potential disaster into a manageable fix, saving both money and frustration.
Another lesson learned is that relying solely on visual cues without testing can lead you down the wrong repair path. For me, multimeter testing and documenting each step not only clarified the problem but also strengthened my case for warranty claims. These details often make a difference when insurance adjusters or warranty providers scrutinize the damage.
Lastly, I discovered the importance of patience and respect for the complexity of modern appliances. While DIY can be empowering, knowing when to seek professional help ensures safety and proper diagnostics—especially with surge-related damage that can involve micro-level circuit failures.
Tools & Tips That Changed My Repair Approach
If you’re serious about diagnosing appliance issues effectively, investing in quality diagnostic tools like a high-precision digital multimeter and a USB digital microscope is essential. These tools help you see the unseen—micro-cracks, tiny cold solder joints, or subtle scorch marks—that often point to surge damage. I personally trust this resource for guidance on proper diagnostic procedures.
Moreover, reading user experiences and detailed repair guides—such as those found at this site—provides clarity on common pitfalls and best practices. Building your toolkit with these insights makes DIY diagnostics safer, more accurate, and ultimately more rewarding.
Finally, cultivating a community of fellow repair enthusiasts—whether online forums or local workshops—offers invaluable support, shared knowledge, and the confidence to tackle tricky problems like surge damage.
Your Next Step Counts
If you’re ready to demystify appliance diagnostics and confidently handle issues like surge-damaged control boards, remember: the journey begins with curiosity and the right tools. Every repair you undertake not only extends your appliance’s lifespan but also enhances your skills and understanding. Don’t shy away from trying—each small step builds your confidence and brings long-term savings.
What repair challenge have you hesitated to tackle but are now eager to understand better? Share your experience below and let’s learn together!