

Ever found yourself standing in front of your dishwasher, utterly frustrated, wondering why it isn’t starting or maybe why water isn’t draining properly? I’ve been there, especially during a hectic week when I just couldn’t afford to have my kitchen appliance let me down. One moment it’s running smoothly, and the next, it’s silent or leaking — yet I can’t figure out what’s wrong. That lightbulb moment hit me when I realized that a tiny, often overlooked culprit— a stuck plastic lid—could be the root of many dishwasher problems.
The Hidden Problem That Can Halt Your Dishwasher in Its Tracks
If your dishwasher refuses to operate, or if water pools at the bottom after a cycle, you might be dealing with a stuck plastic lid. These small components are part of the door assembly, and when they don’t move freely or get stuck, they can trigger safety switches or disrupt excellent water flow. The good news? With a bit of patience and the right tips, you can troubleshoot this yourself rather than calling for expensive repairs.
Is Your Plastic Lid Actually the Issue or Just a Myth?
Early on, I made the mistake of assuming every strange noise or leak was due to something major like a broken pump or seal. Turns out, simple issues like a plastic lid sticking can cause these problems — and I didn’t even think to check. According to appliance repair experts, small mechanical obstructions are a common reason for dishwasher failures, yet many homeowners overlook them because they seem insignificant at first glance.
So, have you ever faced a situation where your dishwasher just wouldn’t open or close properly, or it was leaking unexpectedly? If so, you’re not alone. Let’s walk through how to identify if a stuck plastic lid is causing your troubles—and how to fix it, safely and effectively.
Remove the Door Panel Carefully
Start by unplugging your dishwasher from the power source to ensure safety. Using a screwdriver, carefully remove the screws securing the door panel. Gently lift the panel away, revealing the door assembly and latch components. Remember, patience is key to avoid damaging delicate parts.
Inspect the Plastic Lid and Its Movement
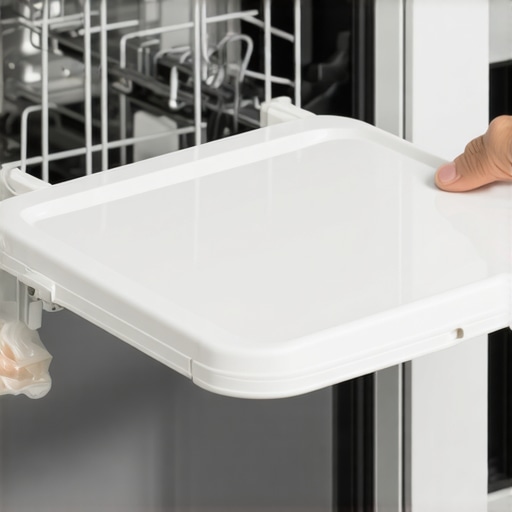
Locate the plastic lid within the door assembly. Check if it’s stuck, cracked, or misaligned. Gently move the lid back and forth to see if it frees up easily. If it’s stuck due to debris or residue, use a soft brush or cloth to clean around the hinge and latch area. Think of it as cleaning a stubborn hinge on a gate—sometimes, a nudge and cleaning do the trick.
Clear Obstructions and Apply Lubricant
If you notice debris or grime hindering the lid’s movement, remove or scrape away the buildup carefully. Apply a food-grade silicone lubricant to the hinge and latch to ensure smooth operation. This small upkeep can prevent future sticking and prolong the lifespan of the door components.
Test the Door Assembly Before Reassembly
After cleaning and lubricating, manually move the plastic lid to check if it operates freely. Reconnect the electrical connections and temporarily reattach the door panel to see if the lid moves smoothly when opening and closing. This step is akin to testing a hinge before mounting a gate permanently—make sure everything works properly first.
Reassemble and Verify Functionality
Once satisfied with the movement, reattach the door panel securely with screws. Plug the dishwasher back in, turn it on, and run a quick cycle to observe if the issue is resolved. If problems persist, consider consulting a professional or exploring appliance diagnostics at this resource for deeper insights.
 Many homeowners assume that troubleshooting a dishwasher problem is straightforward—usually, they think replacing a part or calling a professional is the only option. However, this mindset often leads to misconceptions, especially when it comes to understanding warranty coverage and diagnosing issues accurately. One common myth is that all failures are due to visible damage or obvious defects. In reality, many issues stem from nuanced causes that require deep knowledge of appliance mechanics and diagnostic procedures.
A crucial point often missed is that improper diagnostics can void warranties, especially if DIY repairs violate warranty terms or bypass manufacturer guidelines. For instance, using unapproved parts or attempting repairs without proper testing can jeopardize your claim. As highlighted by experts in appliance diagnostics, understanding the exact cause of a problem before attempting fixes is essential—misdiagnosing can lead to unnecessary expenses or warranty denial. Dive into detailed diagnostics with knowledge, rather than assumptions, to protect your warranty and ensure effective repairs.
One trap many fall into is rushing into repairs based on symptoms alone—like water pooling after a cycle—without investigating underlying causes. This approach can mask deeper issues such as control board faults or internal sensor malfunctions. An advanced consideration is recognizing how software updates or firmware glitches might influence appliance behavior—something homeowners often overlook. According to appliance repair specialists, leveraging professional diagnostics tools increases success rates and preserves warranty benefits, as opposed to guesswork-based repairs. To learn more about proper diagnostic techniques that can save your warranty and avoid unnecessary expenses, visit here.
Additionally, understanding the specific nuances of your appliance’s model and its common failure points can make a significant difference. For example, certain dishwasher models have known issues with control panel moisture ingress, which can cause intermittent operation—a detail that basic troubleshooting might miss. Recognizing these subtleties helps in making informed decisions and prevents costly or damaging repairs.
Have you ever fallen into this trap? Let me know in the comments. Remember, expert diagnostics go beyond just fixing the problem—they safeguard your warranty and ensure long-term appliance health.
Invest in the Right Diagnostic Equipment for Longevity
Having the proper tools is essential for effective appliance maintenance. I personally rely on a high-quality digital multimeter to test electrical components precisely, especially when diagnosing control boards or sensors. For instance, a reliable multimeter helps me quickly identify bad resistors or open circuits without throwing parts blindly at the problem. Additionally, a smartphone decibel meter can reveal subtle motor wear noises, guiding me when to consider replacing parts like the circulation pump. These tools not only save time but also protect your warranty by ensuring you diagnose correctly before attempting repairs.
How do I maintain my tools over time?
Proper care involves regularly calibrating your multimeter to keep readings accurate and storing tools in a dry, safe environment to prevent damage. Periodic cleaning of your device contacts ensures longevity, much like how I clean my thermometer lens after each use. Investing in quality tools is a future-proof step that pays off when your appliance needs quick troubleshooting. As appliance technology advances, integrating diagnostic software or apps may become standard; staying updated on these trends can give you an edge in long-term appliance care. For further insights, visit this resource.
Implement Routine Maintenance to Maximize Performance
Consistent upkeep prevents small issues from escalating into costly repairs. Regularly inspecting door seals with a paper test, for example, helps catch leaks early and avoids damage to the control board (more on that here). Clean spray arms with a toothpick to prevent clogs, ensuring water reaches all dishes evenly, and check filters periodically to reduce strain on the pump. Using proper cleaning agents, like vinegar-based solutions, can also prevent calcium buildup that hampers instrument function. Implementing a scheduled maintenance plan tailored to your dishwasher model keeps everything running at peak efficiency and extends the lifespan of key components.
Scaling Up with Professional Diagnostics
While DIY fixes are satisfying, some issues require advanced diagnostics to stay within warranty bounds. Modern appliances come equipped with self-diagnostic modes that, when used correctly, can point you directly to the problem code, saving hours of guesswork. If your dishwasher exhibits persistent problems, consulting a professional with specialized equipment can verify the health of internal parts like the control module or motor. Expert diagnostics can uncover hidden faults that aren’t outwardly visible, preventing premature replacements and protecting your warranty. Check out this article for a detailed overview of diagnostic techniques and how they safeguard your investment.
Future Trends in Appliance Maintenance
The future of appliance care is heading towards interconnected systems and smarter diagnostics. IoT-enabled appliances will self-report issues and even order parts automatically, simplifying maintenance routines. As these innovations become mainstream, mastering current diagnostic tools now positions you ahead of the curve. Regularly updating your knowledge and tools will ensure you can handle emerging technologies efficiently.
Want to try a new advanced tip? Use a laser thermometer to quickly identify uneven wash temperatures, revealing hidden hot spots or cooling issues that might stress components over time—an insightful move that can save you from costly repairs later. Visit here to learn how to do this effectively and enhance your troubleshooting skills.
What I Wish I Knew When I First Touched My Dishwasher
One of the most valuable lessons I learned was to look beyond the obvious. Tiny components like a plastic lid might seem insignificant, but they can cause major disruptions. Don’t dismiss small parts when diagnosing problems.
Another insight was the importance of patience. Rushing to replace parts or call repairs without proper inspection can lead to unnecessary expenses and void warranties. Take time to investigate thoroughly.
And finally, I realized that DIY fixes, when done correctly, can save you money and extend the life of your appliance—provided you have the right knowledge and tools. Small troubleshooting steps often prevent larger, costlier failures.
Tools and Resources That Turn Troubleshooting into Mastery
My essential toolkit includes a high-quality digital multimeter, which helps me accurately diagnose electrical issues—trust me, this saves a ton of guesswork. Additionally, I rely on resources like expert diagnostic guides to stay grounded in best practices.
Books like “Appliance Repair Essentials” have transformed how I approach repairs, showing me step-by-step techniques that protect warranties while fixing problems effectively. Lastly, online communities provide real-world tips and shared experiences that boost confidence and knowledge.
Your Next Steps: Applying What You’ve Learned
Armed with this insight, you can confidently troubleshoot minor dishwasher issues like a stuck plastic lid. Remember, careful inspection, the right tools, and patience are your best allies. Don’t hesitate to explore more at this comprehensive guide to deepen your diagnostic skills.
Take action today—your dishwasher will thank you for it. Whether you fix it yourself or consult a professional, understanding the mechanics keeps your appliances running smoothly and preserves your warranty.
What’s Your Experience with Dishwasher Troubleshooting?
Have you ever underestimated a simple component like the plastic lid and paid the price? Share your story below and let’s learn from each other’s experiences!