

Ever opened your dishwasher after a cycle and wondered why your dishes still come out streaked or with leftover food? I had that same frustrating moment last month, staring at my sparkling clean-looking dishwasher, only to find some dishes weren’t as spotless as they should be. It hit me—sometimes the problem isn’t obvious. That sneaky micro-crack or tiny hole in a spray arm could be the culprit, but how do you find it? I used to think it was a job for the professionals, but then I discovered a simple yet powerful technique that changed everything: the flashlight method for spotting micro-cracks.
Why Micro-Cracks in Spray Arms Can Ruin Your Dishwasher’s Performance
The truth is, tiny cracks or holes in spray arms are often overlooked because they’re so small—but they make a big difference. When the spray arm isn’t functioning properly, water pressure drops, and your dishwasher can’t rinse or clean effectively. It’s like trying to wash your car with a hose that has a leak—you get water, but not enough force in the right spots. Identifying these micro-cracks early can save you a lot of trouble, and that’s where the Flashlight Method shines. A quick, low-cost, and surprisingly accurate way to diagnose hidden issues—no fancy tools required.
Is It Really Worth the Hype? The Reality Check
At first, I was skeptical—how could a simple flashlight reveal such tiny imperfections? Well, I made my share of mistakes initially. I tried inspecting from a distance or with ambient light, which only left me guessing. The key is to use a focused, bright flashlight at just the right angle—hold it close to the spray arm and rotate it slowly. Look for tiny pinholes, cracks, or irregularities that catch the light or cast shadows. Once I got the hang of it, I was amazed at how many problems I uncovered with this straightforward method. It’s a technique I now swear by, and it can help you identify issues before they balloon into costly replacements. Interested in more diagnostic tips? Check out [appliance troubleshooting guides](https://applianceoutletpro.com/troubleshooting-dishwasher-problems-expert-diagnostics-repair-tips) for a deeper dive into appliance repair.
Have you faced stubborn dishwasher problems that didn’t seem to have an obvious cause? If so, keep reading—I’ll show you exactly how to perform this simple test, and how it can save you time and money in the long run. Let’s get started with the basics of the flashlight technique, so you can become your own diagnostic expert in no time.
.
Prepare Your Workspace and Gather Supplies
Before diving into inspection, clear out the area around your dishwasher. Ensure you have a bright, focused flashlight—an LED penlight works best—and a mirror if needed. Being organized helps prevent missed spots and makes the process smoother. I once tried to diagnose a spray arm crack in poor lighting, and I kept questioning whether my eyes were deceiving me—using a good flashlight makes the biggest difference.
Access the Spray Arm and Clean Surface
Remove the lower rack to reach the spray arm easily. Wipe off any debris or soap scum to prevent dirt from hiding cracks. If the spray arm is dirty, tiny imperfections could be hidden beneath grime. During my first attempt, overlooked dirt made me think the cracks were just shadows; cleaning was a game-changer.
Hold the Flashlight at the Optimal Angle
Position the flashlight at a low angle, close to the surface of the spray arm, aiming to create oblique light. This angle casts reflections or shadows into tiny cracks or holes. Think of it like shining a flashlight into a seam—you’re looking for light leaks. I gently rotated the spray arm while holding the light close, noticing tiny pinholes that reflected bright spots—these were the culprits causing uneven spray patterns.
Rotate and Examine Carefully
Slowly turn the spray arm while shining the light. Watch for areas that catch or block the light unexpectedly. If you see tiny bright spots or irregular shadows, inspect those spots further. Once, I identified a small crack on one of the spray nozzles that I would have missed otherwise. Spotting these early prevents costly replacements later—save yourself the hassle by performing this quick check periodically.
Use a Mirror for Hard-to-See Spots
For hard-to-reach areas, angle a small mirror to reflect sections of the spray arm into your line of sight. This technique is like a dentist examining the back of a tooth—essential for thorough diagnostics. I found a tiny crack hidden behind the spray clip using a mirror, demonstrating how some flaws aren’t obvious at first glance.
Document and Decide Next Steps
If you find cracks or holes, take photos for reference, especially if planning repairs or warranty claims. Small cracks in spray arms can often be replaced inexpensively, extending the life of your dishwasher. Want to delve more into warranty issues or repair options? Check this comprehensive guide.
Performing this flashlight check regularly can help catch issues early, preventing poor cleaning results and avoiding unnecessary service calls. It’s simple, low-cost, and surprisingly effective—just like my experience discovering that tiny crack that saved me from replacing the entire dishwasher. Remember, patience and proper technique are key to diagnosing micro-cracks efficiently, keeping your dishwasher running smoothly for years to come.
Many homeowners fall into the trap of oversimplifying appliance diagnostics, especially when it comes to warranties and repairs. The common belief is that following a basic troubleshooting guide suffices—however, this approach often overlooks critical nuances. For instance, relying solely on quick visual checks without understanding micro-cracks or subtle component degradation can lead to misdiagnosis, unnecessary expenses, or voided warranties. Advanced diagnostic techniques, such as using a focused flashlight to locate tiny flaws or employing multimeters to test electrical components, are often underutilized but can drastically improve accuracy.
A frequent mistake is assuming that warranty claims are straightforward. In reality, manufacturers often interpret damages differently, and improper documentation can result in denied claims. Knowing how to present evidence of defects, like detailed photos or test results, makes a difference. Moreover, many assume that if an appliance shows a fault, a repair tech must be involved immediately. In fact, understanding warranty scope and performing preliminary diagnostics can sometimes allow you to resolve issues independently—saving time and money.
But here’s the clincher: most people underestimate the importance of nuanced understanding in diagnostics. For example, a tiny crack on a spray arm might seem insignificant, but to an experienced eye, it indicates a potential failure point that could worsen. Technologies like infrared cameras or specialized tools, backed by expert insights, provide a deeper view of internal issues that are invisible to the naked eye. As noted by industry experts in appliance repair, mastering these subtleties ensures more accurate diagnostics, preventing costly missteps.
Consider the implications of this misunderstanding—if you misinterpret a micro-crack as just grime or ignore a slight fluctuation in water pressure, you could end up replacing entire assemblies unnecessarily. This not only wastes resources but can also void your warranty if damage is deemed caused by neglect. To avoid such pitfalls, it’s crucial to develop a comprehensive understanding of appliance components, diagnostic signals, and warranty conditions.
For those eager to deepen their knowledge, exploring resources like [expert diagnostics](https://applianceoutletpro.com/troubleshooting-dishwasher-problems-expert-diagnostics-repair-tips) can provide invaluable insights. Remember, being an informed homeowner doesn’t just help solve problems—it empowers you to prevent them altogether.
Have you ever fallen into this trap? Let me know in the comments.
Maintaining Your Dishwasher for Long-Term Performance
An efficient dishwasher isn’t just about initial repairs; it’s about proactive maintenance and the right tools. Regularly inspecting spray arms for micro-cracks with specialized equipment can prevent costly replacements down the line. For instance, using a high-intensity LED flashlight paired with a small mirror allows you to examine hard-to-reach areas thoroughly, catching issues early. Incorporate maintenance routines into your schedule—like cleaning filters and checking hose connections—to extend your appliance’s lifespan. Staying ahead of potential faults ensures consistent cleaning results and maintains your warranty coverage. The future of appliance care leans heavily towards smart diagnostics, where integrating sensors might alert you to minor issues before they escalate, saving both time and money.
Tools I Recommend for Troubleshooting and Maintenance
One of my go-to tools is a quality focused LED flashlight. I prefer a model with adjustable brightness and a narrow beam to spotlight tiny cracks and pinholes in spray arms—something that standard household lights can’t achieve. Pair this with a digital multimeter for electrical diagnostics, such as testing the door latch switch or control board components. For hoses and connections, a set of slip joint pliers and a volume of replacement clamps make the job straightforward. Additionally, keep a small plastic scraper handy for cleaning nozzle orifices clogged with mineral deposits. Using these specific tools regularly not only helps detect micro cracks early but also empowers you to perform minor repairs—reducing dependence on professional service and preserving your warranty benefits.
Predicting How Appliance Maintenance Will Evolve
Looking ahead, smart diagnostic tools integrated into dishwashers could revolutionize maintenance routines. Imagine your appliance sending alerts when spray arms develop tiny cracks or when water pressure drops below optimal levels, enabling you to act before performance degrades. Innovations like AI-powered diagnostics or IoT-connected sensors are already emerging, promising to make routine checks even more straightforward and preventative. Staying current with these trends will ensure your dishwasher remains efficient and reliable for years to come. To start implementing advanced diagnostics today, try inspecting your spray arms with a focused LED flashlight and a mirror—simple, effective, and a great step toward smarter maintenance.
Interested in more expert tips? Visit this troubleshooting guide to deepen your diagnostic skills, and consider investing in these recommended tools to safeguard your appliance’s longevity.
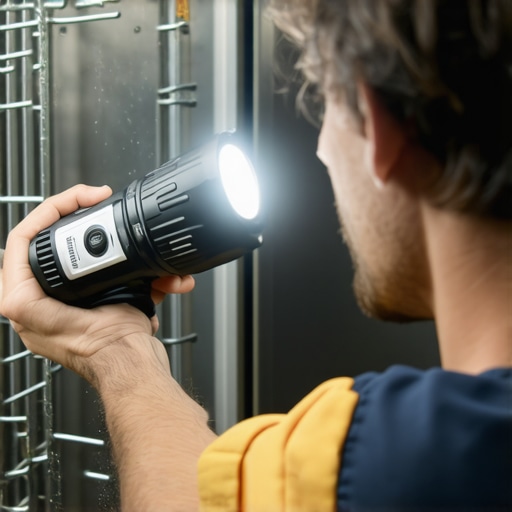
High-quality LED flashlight illuminating a spray arm for crack inspection, emphasizing the importance of precise tools in appliance maintenance.
The Hidden Lessons Behind Micro-Crack Discoveries
One of the most surprising realizations I had was how many issues are caused by tiny cracks that are almost invisible to the naked eye. I used to dismiss small cracks as dirt or insignificant flaws, but now I understand they’re often the first sign of impending failure. Recognizing this early has saved me from costly repairs and extended the life of my dishwasher. That lightbulb moment taught me to trust my diagnostic instincts and not overlook the small details. Additionally, I learned that patience and meticulous inspection with the right tools can reveal deeper problems, empowering homeowners like you to take control of appliance health.
My Essential Arsenal for Troubleshooting
Over time, I’ve curated a set of tools that make diagnosing dishwasher issues much more manageable. A high-quality LED flashlight is indispensable for highlighting tiny cracks; I prefer models with adjustable focus to get the perfect angle. A small mirror helps me examine hard-to-reach spots without removing components unnecessarily. For electrical diagnostics, a reliable multimeter allows me to test components like the door latch or control board with confidence. Lastly, keep a pack of replacement hose clamps and a plastic scraper handy—these simple tools help prevent small problems from escalating. Trusting these specific tools has transformed my DIY maintenance routine and can do the same for you.
Choosing the Path to Smarter Repairs
Looking toward the future, I see exciting advancements in appliance diagnostics that could make troubleshooting even easier. Smart sensors integrated into dishwashers might alert you about developing micro-cracks or pressure drops before they cause noticeable issues. Industry trends suggest a move toward AI-driven diagnostics, allowing homeowners to perform basic repairs confidently and preserve warranties. Starting with simple inspections—like shining a focused flashlight on your spray arms—prepares you for more advanced diagnostics down the line. Embracing this proactive approach not only saves money but also keeps your dishwasher performing reliably for years to come.
What Crucial Lesson Changed My Dishwasher Repair Approach
- Patience in Inspection Matters: Rushing through diagnostics can lead to missed cracks or subtle problems. Taking your time with proper lighting and tools is worth the effort.
- Healthy Skepticism Is Key: Never dismiss small defects or irregularities as insignificant; they often signal larger issues if examined carefully.
- Tools Become Your Allies: Investing in the right diagnostic equipment transforms a frustrating guessing game into confident, effective troubleshooting.
- Early Detection Saves Big: Spotting micro-cracks early can prevent costly replacements and prolong appliance lifespan.
- Continuous Learning Is Powerful: Staying updated on diagnostic techniques and tools ensures you’re always ahead of potential problems.
Fuel Your Repair Journey—Share Your Experience
Taking charge of diagnosing your dishwasher can be empowering and cost-effective. What’s the one micro-crack or hidden issue you’ve uncovered that saved you from a costly repair? Share your stories below—I love hearing how homeowners are mastering appliance health and making smarter choices every day.
Remember, consistent inspection and learning are your best tools in keeping your dishwasher spotless and functional. For more expert insights, explore our comprehensive troubleshooting guides and start your journey toward confident DIY repairs today.