

Ever been in the middle of your morning rush, craving that hot cup of coffee, only to hear an unsettling grinding noise coming from your dishwasher? It’s a moment that instantly sours your day. I’ve been there myself—thinking I had to call in a pro or shell out a hefty repair bill. Turns out, that dreaded sound was a sign I could fix things myself with a bit of knowledge and some patience.
Today, I’m going to share with you how to diagnose a grinding noise in your drain pump. This isn’t just about fixing a squeaky wheel; it’s about understanding your appliance better, saving money, and avoiding the frustration of unnecessary repairs. When your dishwasher makes that grinding, squealing, or rattling noise, it’s usually a sign something’s not right—be it debris, a worn-out bearing, or something more obscure.
If you’ve ever wondered whether that noise is a sign of a looming disaster, you’re not alone. Many homeowners dismiss these sounds as minor or inevitable. But ignoring them can lead to bigger issues like pump failure or water damage. The good news is, with a little know-how, you can pinpoint the cause before it turns into a full-blown breakdown.
Before we jump into the diagnostics, I want to share a quick mistake I made early on—assuming the problem was always a clogged filter or jammed spray arm. While those are common culprits, I once overlooked a tiny piece of broken plastic lodged in the pump, which caused the grinding noise. That simple oversight cost me a lot of time and a hefty repair bill. To avoid that, I learned it’s essential to do a thorough check.
Meanwhile, understanding how to effectively troubleshoot your appliance can make all the difference. For more detailed DIY tips, you might want to check out this guide on [appliance troubleshooting](https://applianceoutletpro.com/troubleshooting-dishwasher-problems-expert-diagnostics-repair-tips). Now, let’s move beyond the guesswork and get down to diagnosing that grinding noise, so you can get your dishwasher back to silent operation.
Disconnect Power and Access the Pump
Before anything else, unplug your dishwasher or turn off the circuit breaker to prevent electric shock. Open the dishwasher door and remove the lower rack to access the bottom. Unscrew the access panel, usually located at the front or bottom of the unit. Carefully set aside the panel and insulation if present, revealing the drain pump assembly.
Identify and Remove the Drain Pump
Locate the drain pump, typically a small motor with attached hoses. Disconnect the electrical connector and loosen the clamps securing the hoses with pliers. Gently pull out the pump assembly, keeping track of all parts and screws. My personal experience here involved a slippery spare part, which made me realize how important it is to lay out all components for reassembly.
Inspect for Debris and Damage
Examine the pump impeller and housing for debris, broken plastic pieces, or obstructions. Use a flashlight to look inside the impeller — if you see bits of broken plastic or gunk, it could cause the grinding noise. Imagine the impeller as a boat propeller; any trash caught in its blades can cause imbalance, similar to your dishwasher’s grinding sound. Clean out any debris with a soft brush or cloth. If the impeller is chipped or cracked, replacement is necessary.
Test the Pump with a Multimeter
If no visible debris is found, test the motor’s windings with a multimeter. Disconnect the wires from the pump terminals and set the multimeter to resistance mode. A reading close to zero indicates a good winding; an infinite or very high reading suggests a burned-out motor. This step is crucial — I once replaced a pump only to find out that the motor was still functioning, saving me from unnecessary expense. For detailed testing methods, visit this guide.
Reassemble and Test
Once the pump is clean and functioning, reattach it by reversing removal steps. Secure hoses tightly with clamps, reconnect the electrical plug, and replace the access panel. Restore power and run a short cycle, listening for any grinding sounds. If the noise persists, the issue may be elsewhere or the pump may need replacement. Similarly, if you’re considering replacing parts yourself, check this tutorial on replacing a door spring.
Consider Professional Help for Persistent Issues
Sometimes, diagnosing the problem requires advanced tools or knowledge beyond basic inspection. If after cleaning and testing the pump, the grinding continues, it’s wise to seek professional diagnostics. They can confirm whether the motor is failing or if another component, like the impeller or seal, needs attention. To understand when to trust warranty service, review this article. Addressing these issues early can prevent costly repairs and ensure your dishwasher runs smoothly again.
Many homeowners assume that appliance warranties will cover all repair costs — but this isn’t always true. A common misconception is that warranty claims are straightforward and automatically approved, yet in reality, manufacturers often have strict exclusions and require proper diagnostics before any coverage. Rushing into repairs without understanding these nuances can lead to denied claims and wasted resources, emphasizing the importance of knowing how to present your case effectively. For example, a misdiagnosis might suggest a faulty part when, in fact, user misuse or neglect caused the issue. This highlights the critical need for accurate diagnostics, as detailed in expert guides like this troubleshooting guide. Additionally, many people underestimate the significance of proper documentation when filing warranty claims. Photos, detailed descriptions, and records of maintenance can make the difference between a quick fix and long, frustrating delays. Another misconception is assuming that DIY repairs automatically VOID warranties. While some manufacturers are strict, many allow limited self-service if done correctly and documented, provided it doesn’t interfere with structural components. However, mistakes like replacing parts with incompatible models can actually void coverage, an error discussed in this resource. Advanced diagnostics, including testing with multimeters or infrared cameras, are often overlooked but can be invaluable in pinpointing the exact issue, avoiding unnecessary claim rejections. A common trap is assuming that a simple visual check is sufficient — but complex problems like failing circulation pumps or microcontroller issues require professional assessments. As revealed in recent studies by appliance repair experts, investing in proper diagnostics can preserve warranty benefits and prevent ill-informed repairs. Are you aware of the critical diagnostic steps that can save your warranty coverage? Make sure you’re not falling into these common traps — for detailed guidance, visit here. Understanding these nuances helps you make smarter repair decisions, saves money, and ensures your appliances stay in top shape longer. Have you ever fallen into this trap? Let me know in the comments.Maintaining your dishwasher’s performance over time requires more than just regular use; it demands the right tools and a proactive approach. I personally swear by a high-quality multimeter, like the Fluke 117, for diagnosing electrical issues. Its precision allows me to test components like heating elements and motors with confidence, avoiding unnecessary replacements. Additionally, a set of small, precision screwdrivers has been invaluable for accessing tricky panels and delicate parts without damaging them, which is crucial when handling sensitive electronics or seals.
A laser thermometer has become my go-to for quickly assessing operation cycles—I use it to confirm whether the heating element reaches proper temperatures, ensuring efficient drying and cleaning. Regular inspection of door gaskets with a dedicated leak tester pen helps prevent water damage and maintain sealing integrity, extending the appliance’s lifespan.
But tools alone won’t keep things running smoothly; scheduled maintenance plays a vital role. I recommend setting a monthly reminder to clean spray arms with toothpicks to clear blocked holes, which I detail in this guide. Also, regularly inspecting and cleaning filters prevents debris buildup that can cause poor wash performance or grinding noises. These small, consistent efforts prevent larger issues down the line, saving money and hassle.
Looking ahead, I predict the trend towards smart diagnostics tools will grow, making it even easier for homeowners to monitor appliance health remotely. Future devices might integrate AI-driven alerts, advising when specific components need attention—imagine getting a push notification that your circulation pump is showing signs of wear.
How do I maintain my dishwasher’s performance over time?
Adopting a routine that combines advanced testing with scheduled inspection can dramatically extend your appliance’s lifespan. Use your multimeter monthly to verify electrical components, and keep spray arms and filters clean to prevent clogs. Consider investing in diagnostic tools that sync with your smartphone for real-time alerts and maintenance tips. For comprehensive tips on troubleshooting and diagnostics, explore this expert guide and stay ahead of costly repairs.
Speaking from experience, putting these practices into action has helped me avoid a major leak that could have caused serious water damage. I encourage you to test your heating element with a digital thermometer or multimeter today. Start small—checking the heater contact points—and watch how this proactive step can save you money in the long run.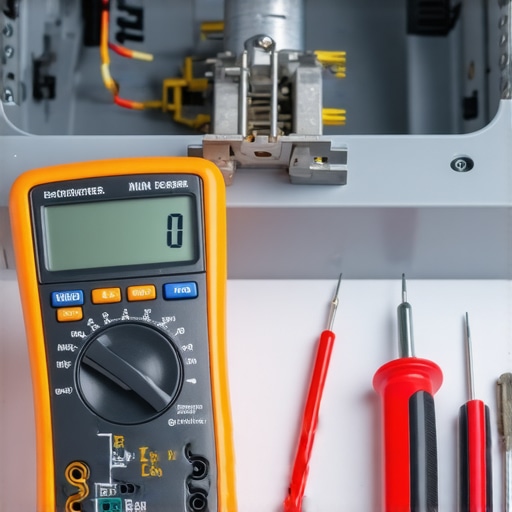
*Image prompt: A close-up of a digital multimeter testing a dishwasher heating element, with tools like small screwdrivers and laser thermometer nearby.*
Stepping Beyond the Manual: What I Wish I Knew About Dishwasher Repairs
One of the most profound lessons I discovered was that initial assumptions about appliance issues often lead us down the wrong path. I once replaced an entire pump system only to realize the real problem was a tiny piece of debris lodged in the impeller. That experience taught me to dig deeper before jumping to conclusions and underscored the importance of thorough inspection and proper diagnostics, which can be as simple as using a multimeter or a flashlight. Now, I approach every repair with curiosity and patience, knowing that each component holds a story that guides me toward a solution.
Tools That Changed My Approach to Appliance Repair
Over time, I found that having the right tools transforms a daunting task into an achievable project. A quality multimeter, like the Fluke 117, gives me confidence when testing electrical components. A small, precision screwdriver set allows me to navigate tight spaces without damage. I also rely on a laser thermometer for quick temperature checks and a leak tester pen for door gasket inspections. These tools are worth every penny because they save me from unnecessary replacements and help maintain my appliances efficiently. For additional insights, check out this comprehensive troubleshooting guide.
Stay Ahead by Listening to Your Appliances
The future of appliance care is leaning toward smarter diagnostics and proactive maintenance. I believe investing in these technologies will empower homeowners to prevent breakdowns before they happen. Imagine receiving a smartphone alert when a pump’s bearings start to wear out, allowing you to schedule repairs at your convenience. Regularly testing critical components like heating elements and circulation pumps, using tools I mentioned earlier, helps catch issues early. This proactive approach not only extends the lifespan of your dishwasher but also preserves warranties and gives peace of mind. So don’t wait for that grinding noise to turn into a costly disaster—start listening and testing today.