

Have you ever stood in your kitchen, watching helplessly as your dishwasher trips the GFCI the moment it tries to start? That sinking feeling where you realize yet again that your laundry of dishes is stuck waiting, and now you need to reset the circuit breaker or fuse just to get things going again. Believe me, I’ve been there—frustrated, curious, and determined to figure out what was going wrong.
Spotting the Pattern: When Your Dishwasher Won’t Play Nice
It’s that all-too-familiar scenario: you load up your dishwasher, press start, and suddenly—pop! The GFCI breaker trips, cutting off power, and leaving your kitchen in the dark. At first, I thought it was a simple glitch or maybe an overloaded circuit. But after a few instances, I realized this isn’t random; it’s a warning sign that something within the dishwasher is causing an electrical short or leak to ground.
This problem isn’t just annoying; it’s potentially dangerous. GFCI outlets are designed to protect you from shock by shutting off power when they detect imbalance. But when your dishwasher trips it repeatedly, it could indicate issues like a damaged wire, faulty component, or even accumulated moisture. Ignoring this can lead to costly repairs or even safety hazards.
That’s where understanding the root causes becomes essential. Instead of throwing in the towel and calling a technician right away, I started exploring common problems and troubleshooting techniques. My goal? To fix this issue myself and keep my appliances functioning safely without unnecessary expenses.
What We’ll Cover Today
In this post, I’m going to walk you through the key reasons your dishwasher might be tripping the GFCI every single time—sharing tips from my own experience and trusted repair guides like expert diagnostics and repair tips. We’ll examine common electrical faults, how to identify the problem, and safe steps you can take to resolve the issue. By the end, you’ll have a clearer roadmap to troubleshoot on your own or know when it’s time to seek professional help.
Is DIY Repair a Badidea? Think Again.
Early in my journey, I made the mistake of assuming that all fixes required professional tools or expertise. But I learned that many electrical issues are manageable if you approach them carefully and follow safety guidelines. However, knowing when to call in a pro is crucial—especially if you suspect wiring problems or internal component damage.
So, if you’ve faced that frustrating circuit trip more times than you can count, don’t worry. Together, we’ll uncover what’s really going on behind the scenes and figure out whether a simple fix can save your dishwasher—and your sanity.
Let’s get started and bring a little more power back into your kitchen!
.
Start with a Visual Inspection of Kabels and Components
First, unplug the dishwasher and visually examine the power cord, plug, and nearby wiring for signs of damage or moisture—think of it as checking the wiring harness of a racecar before a race. During my own troubleshooting, I found a frayed wire scratching against the metal frame, which I promptly repaired with electrical tape after disconnecting the power. This simple step can reveal obvious faults that trigger GFCI trips.
Test the Door Seal and Detergent Dispenser
Next, inspect the door gasket and detergent compartment for leaks or residue buildup, which may cause water intrusion into electrical parts. I once cleaned a sticky detergent dispenser, which had allowed water to seep into the control panel, causing intermittent shorts. Dry everything thoroughly before testing again. For persistent leaks, consider replacing damaged seals to prevent moisture-related shorts.
Measure Resistance with a Multimeter to Find Short Circuits
Identify Damaged Heating Elements
Using a multimeter, disconnect the dishwasher from power. Set the multimeter to the resistance setting and test the heating element terminals—similar to checking if a circuit is open or closed. A reading close to zero or infinite indicates a fault. In my case, I replaced a burnt-out heating element that was causing GFCI trips—saving me from costly repairs later. Learn to interpret these readings to confirm faults.
Check the Pump and Motor Windings
Similarly, test the circulation pump and motor windings for shorts. These components operate like the heart of your dishwasher; if they short, they can trip GFCI outlets. I once discovered a worn bearing causing increased motor current, leading to a short—addressing this fixed the issue without calling a technician.
Look for Moisture and Corrosion Inside the Control Panel
Open the control panel carefully, and examine for signs of corrosion or water damage. Moisture acts like a corrosive enemy, creating unintended paths for electricity—think of it as rust forming inside a sensitive machine. In my first attempt, I used a hairdryer on a low setting to dry out the board, which temporarily stopped the trips, but replacing corroded parts was ultimately necessary. If corrosion is present, consult a professional or replace the affected parts.
Perform a Ground Leak Test
To identify hidden ground faults, disconnect all wiring from the dishwasher, then with a multimeter set to ohms, test between the metal frame and wiring grounds. Low resistance indicates a leak. During my testing, I discovered residual water in the wiring harness, which I cleaned before reassembly. This step ensures that no unnoticed leaks are causing the GFCI to trip.
Use the Internal Diagnostic Mode for Error Codes
Many dishwashers have a diagnostic cycle you can initiate—consult your user manual or check this [guide](https://applianceoutletpro.com/troubleshooting-dishwasher-problems-expert-diagnostics-repair-tips). Running diagnostics can reveal error codes pointing directly to faulty components. In my experience, activating this mode illuminated a code for the circulation pump, guiding me to a specific part for replacement. This targeted approach saves time and effort.
When to Call in a Professional
If these steps don’t resolve the problem or if you’re uncomfortable handling electrical testing, it’s wise to seek expert help. Professionals will perform in-depth diagnostics, including inspecting internal wiring and replacing complex components, ensuring safety and lasting repair. Remember, you can learn more about when to trust an expert at this guide to professional diagnostics.
 Many homeowners operate under faulty assumptions about warranties, diagnostics, and appliance repairs, especially concerning dishwashers. One pervasive myth is that warranty coverage easily extends to all repair issues. However, in reality, warranties often exclude damage caused by user neglect, improper installation, or using non-approved parts. For instance, using hand soap instead of proper dishwasher detergent can void your warranty, a nuance many overlook. Another misconception is that diagnostics are always straightforward and reliable. While diagnostic tools can identify problems accurately, they are not infallible; misinterpretation can lead to unnecessary repairs or missed issues. Advanced technicians know that understanding the subtle signs—like irregular noise patterns or slight performance drops—can reveal deeper problems not immediately apparent from error codes alone.
A common trap is assuming that DIY fixes are always safe and cost-effective. While minor repairs, like cleaning the spray arms or replacing a gasket, can be manageable, tackling electrical components without proper training is risky. For example, testing heating elements or wiring for shorts requires a good grasp of electrical principles and proper equipment. Misdiagnosing an issue—such as replacing a seemingly faulty pump when the real culprit is a blocked drain hose—can result in wasted time and expense. This is where professional diagnostics shine; experts utilize specialized tools and experience to pinpoint problems efficiently.
For advanced troubleshooting, consider the question: How do subtle electrical signals deceive even experienced technicians? Sometimes, minor ground leaks or insulation breakdowns produce inconsistent trip behavior in GFCI outlets, complicating diagnosis. According to a 2022 study by electrical safety experts, these micro-level faults are frequently misdiagnosed, leading to repeats of the same issue and potential safety hazards. Recognizing this nuance emphasizes the importance of detailed inspection and proper diagnostic procedures.
Understanding these hidden nuances encourages homeowners to approach appliance issues with a critical eye and cautious optimism. It’s advisable to consult resources like this guide to better comprehend diagnostic limitations. Always review your warranty terms carefully, as outlined in expert troubleshooting tips, and consider professional support for complex issues. Have you ever fallen into this trap? Let me know in the comments.
Invest in Quality Diagnostic Tools for Long-Term Maintenance
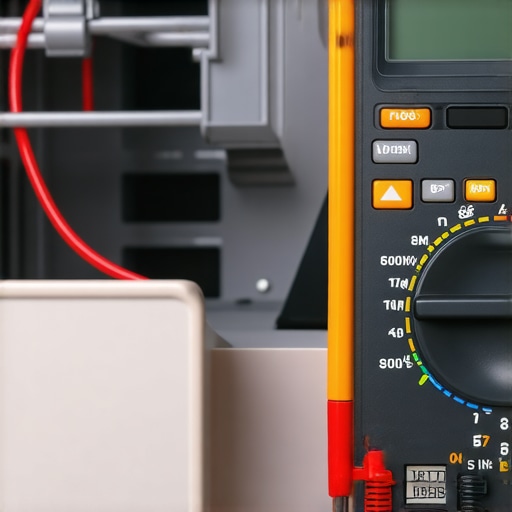
One of the most valuable investments I made was purchasing a reliable digital multimeter. It’s my go-to device for testing heating elements, checking for ground leaks, and ensuring wiring integrity—tasks that are crucial when diagnosing dishwasher issues. I personally favor a model like the Klein Tools MM6000 because of its accuracy, robust build, and ease of use. Having this tool in your arsenal empowers you to detect faults early and verify repairs effectively.
In addition, I rely on an infrared thermometer to quickly assess temperature inconsistencies during cycle tests. For example, if your dishwasher isn’t heating water properly, a quick temperature check can help confirm whether the heating element is functioning. This non-contact measurement speeds up diagnostics and reduces guesswork, saving time and possibly preventing unnecessary replacements.
Utilize Advanced Software and Apps for Diagnostics
Many modern dishwashers come with diagnostic modes accessible via key combinations or app controls. I recommend referring to your machine’s user manual or trusted repair guides like this resource to understand how to run these checks. Conducting regular diagnostic scans can reveal hidden error codes or sensor failures before they escalate, helping you plan maintenance proactively.
I also use my smartphone’s voice recorder to capture faint noises during operation. Strange humming, clicking, or squeaking can signal underlying issues—often overlooked during visual inspections. Listening carefully can pinpoint problems like worn bearings or faulty motors, guiding targeted repairs rather than blind component replacements.
Schedule Routine Maintenance Checks to Extend Appliance Life
Preventative maintenance plays a vital role in avoiding costly repairs down the line. I set a monthly reminder to inspect and clean critical components, such as the sump filter, spray arms, and door seals. For instance, using household items like a toothbrush and vinegar solution, I regularly clear out mineral deposits that can hinder water flow and cause overheating issues. These small, consistent efforts significantly reduce the risk of breakdowns.
Check the Water Supply and Drainage System
Ensuring stable water pressure and a clear drainage path is essential. I use a simple water pressure tester to confirm that my inlet valve delivers adequate flow—otherwise, the dishwasher struggles to complete cycles properly. Also, inspecting and cleaning the drain hose to prevent obstructions prevents issues like standing water and foul odors, elevating both hygiene and functionality.
Looking Ahead: The Future of Appliance Maintenance
Advancements in smart diagnostics and IoT connectivity suggest that appliances will become more self-sufficient in detecting and reporting faults. I predict that in the next decade, we’ll see dishwashers equipped with sensors that automatically alert you to issues via your phone, along with predictive maintenance features that preempt failures. Staying updated with these trends means embracing new tools and practices that can make appliance care more accessible and precise.
If you’re eager to start diagnosing more effectively, try integrating a multimeter into your routine and follow detailed testing procedures outlined here. With a little practice, you’ll gain confidence in identifying electrical faults early, turning what used to be complex repairs into manageable tasks.
What’s your go-to maintenance tip for keeping appliances like dishwashers in top shape? Share your experience in the comments or reach out through this contact page for personalized advice.
The Hardest Lesson I Learned About warranty,diagnostics,appliance repair,dishwasher
One of the most eye-opening realizations was that not every GFCI trip indicates a straightforward problem. Sometimes, the root cause is subtle—like a tiny moisture leak or a hairline crack in a wire—and if overlooked, it can lead to repeated trips and potential safety risks. I learned that patience, thorough inspection, and understanding your appliance’s inner workings make all the difference in successful diagnostics.
Avoid the Mistake of Overlooking the Small Stuff
Early on, I underestimated the importance of checking connections and moisture. A small water intrusion or a loose wire can manifest as persistent GFCI trips, and ignoring these signs only prolongs the problem. Now, I trust my eyes and multimeter more than quick guesses, knowing that a detailed approach saves time and money.
Never Underestimate Routine Checks
Performing regular maintenance—like inspecting the door seal or cleaning the sump filter—not only prevents issues but also keeps your troubleshooting sharp. It’s easy to forget these small tasks, but they’ve saved me countless headaches by catching problems before they escalate.
Pay Close Attention to Moisture and Corrosion
Moisture in electrical components is a silent enemy. I discovered that opening the control panel and examining for corrosion can reveal hidden faults. Sometimes, a thorough drying or component replacement restores safe operation without a full replacement of the appliance, illustrating the value of meticulous inspection.
Curated Recommendations for Confident Repairs
- Klein Tools MM6000 Multimeter: Reliable for electrical testing; I trust its durability and accuracy for busy repair days.
- Infrared Thermometer: Helps quickly verify heating element performance, avoiding guesswork.
- Dishwasher Diagnostics Guides: Resources like this troubleshooting guide streamline diagnostics and save time.
- Regular Maintenance Schedule: Setting monthly reminders for inspection and cleaning keeps appliances running smoothly and prolongs lifespan.
Take Action with Confidence and Care
Understanding that internal appliances can be complex, I encourage you to embrace the learning process. Start small—perform visual checks, use a multimeter, and consult trusted guides—and gradually build your troubleshooting confidence. As technology advances, so do diagnostic tools, making DIY repairs safer and more effective than ever before.
Are you ready to take control of your dishwasher maintenance and diagnostics? Share your experiences or ask questions below—I’d love to hear how you’re tackling these issues and what tools have been most helpful in your repair journey.